

This chapter is taken from book "Programming Windows Phone 7" by Charles Petzold published by Microsoft press. http://www.charlespetzold.com/phone/index.html
WriteableBitmap and UIElement
WriteableBitmap does not including any facility to save bitmaps. However, the WriteableBitmap class does give you access to all the pixels that define the bitmap. Only one pixel format is supported, where each pixel is a 32-bit value. You can obtain the pixel bits from an existing bitmap, or set new pixel bits on a WriteableBitmap to define the image. Access to these pixel bits allows you a great deal of flexibility in how you save or load bitmaps. You can provide your own bitmap "encoder" to save pixel bits in a particular bitmap format, or your own "decoder" to access a file of a particular format and convert to the uncompressed pixel bits.
WriteableBitmap has two ways to get the visuals of a UIElement onto a bitmap. The first uses one of the constructors:
WriteableBitmap writeableBitmap = new WriteableBitmap(element, transform);
The element argument is of type UIElement and the transform argument is of type Transform. This constructor creates a bitmap based on the size of the UIElement argument as possibly modified by the Transform argument (which you can set to null).
Here's a simple sample program. The content grid is given a background based on the current accent color. It contains a TextBlock and an Image element:
<Grid
x:Name="ContentPanel"
Grid.Row="1"
Margin="12,0,12,0"
Background="{StaticResource
PhoneAccentBrush}">
<TextBlock
Text="Tap anywhere to
capture page"
HorizontalAlignment="Center"
VerticalAlignment="Center"
/>
<Image
Name="img"
Stretch="Fill" />
</Grid>
The Image element has no bitmap to display but when it does, it will ignore the bitmap's aspect ratio to fill the content grid and obscure the TextBlock.
When the screen is tapped, the code-behind file simply sets the Image element source to a new WriteableBitmap based on the page itself:
namespace
RecursivePageCaptures
{
public partial
class MainPage
: PhoneApplicationPage
{
public MainPage()
{
InitializeComponent();
}
protected
override void OnManipulationStarted(ManipulationStartedEventArgs
args)
{
img.Source = new
WriteableBitmap(this,
null);
args.Complete();
args.Handled = true;
base.OnManipulationStarted(args);
}
}
}
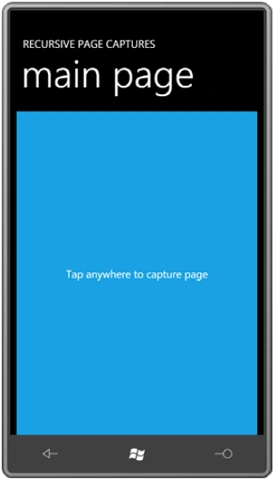
When you first run the program, the screen looks like this:
Tap once, and the whole page becomes the bitmap displayed by the Image element:
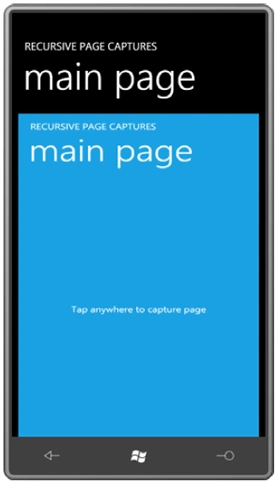
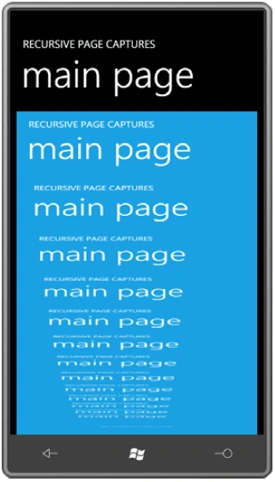
Keep in mind that the PhoneApplicationPage object being captured has its Background property set to the default value of null, so that's why you see the original background of the content panel behind the captured titles. You can continue tapping the screen to recapture the page content, now including the previous Image element:
The Pixel Bits
The Pixels property of WritableBitmap is an array of int, which means that each pixel is 32 bits wide. The Pixels property itself is get-only so you can't replace the actual array, but you can set and get elements of that array.
When you first create a WriteableBitmap, all the pixels are zero, which you can think of as "transparent black" or "transparent white" or "transparent chartreuse."
By directly writing into the Pixels array of a WriteableBitmap you can create any type of image you can conceive. Comparatively simple algorithms let you create styles of brushes that are not supported by the standard Brush derivatives. The content area of the CircularGradient project consists solely of an Image element waiting for a bitmap:
<Grid
x:Name="ContentPanel"
Grid.Row="1"
Margin="12,0,12,0">
<Image
Name="img"
HorizontalAlignment="Center"
VerticalAlignment="Center"
/>
</Grid>
The code-behind file for MainPage defines a rather arbitrary radius value and makes a square WriteableBitmap twice that value. The two for loops for x and y touch every pixel in that bitmap:
namespace
CircularGradient
{
public partial
class MainPage
: PhoneApplicationPage
{
const int
RADIUS = 200;
public MainPage()
{
InitializeComponent();
WriteableBitmap writeableBitmap =
new WriteableBitmap(2
* RADIUS, 2 * RADIUS);
for (int
y = 0; y < writeableBitmap.PixelWidth; y++)
{
if (Math.Sqrt(Math.Pow(x
- RADIUS, 2) + Math.Pow(y - RADIUS, 2)) <
RADIUS)
{
double angle = Math.Atan2(y -
RADIUS, x - RADIUS);
byte R = (byte)(255 *
Math.Abs(angle) /
Math.PI);
byte B = (byte)(255 - R);
int color = 255 << 24 | R << 16 | B;
writeableBitmap.Pixels[y * writeableBitmap.PixelWidth +
x] = color;
}
}
writeableBitmap.Invalidate();
img.Source = writeableBitmap;
}
}
}
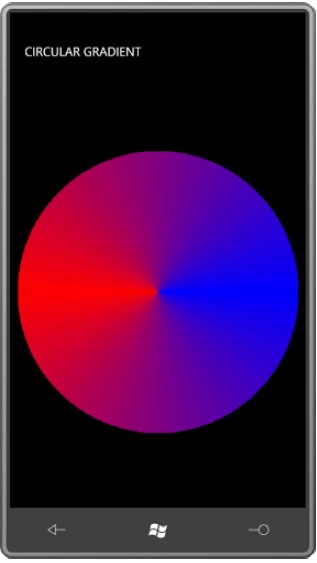
The center of the WriteableBitmap is the point (200, 200). The code within the nested for loops begins by skipping every pixel that is more than 200 pixels in length from that center. Within the square bitmap, only a circle will have non-transparent pixels.
Vector Graphics on a Bitmap
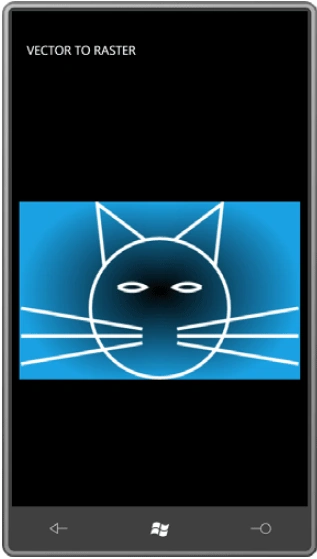
You can combine the two approaches of drawing on a WriteableBitmap. The next sample displays a Path on a WriteableBitmap against a gradient that uses transparency so that you can see how the premultiplied alphas work.
The Path Markup Syntax for the cat is defined in a
Path element in
the Resources
section of the MainPage.xaml file:
<phone:PhoneApplicationPage.Resources>
<Path
x:Key="catPath"
Data="M 160 140 L 150 50
220 103
M 320 140 L 330 50 260
103
M 215 230 L 40 200
M 215 240 L 40 240
M 215 250 L 40 280
M 265 230 L 440 200
M 265 240 L 440 240
M 265 250 L 440 280
M 240 100 A 100 100 0 0 1
240 300
A 100 100 0 0 1 240 100
M 180 170 A 40 40 0 0 1
220 170
A 40 40 0 0 1 180 170
M 300 170 A 40 40 0 0 1
260 170
A 40 40 0 0 1 300 170" />
</phone:PhoneApplicationPage.Resources>
I'm using this Path element solely to force the XAML parser to acknowledge this string as Path Markup Syntax; the Path element won't be used for any other purpose in the program.
The content area consists of just an Image element awaiting a bitmap:
<Grid
x:Name="ContentPanel"
Grid.Row="1"
Margin="12,0,12,0">
<Image
Name="img"
HorizontalAlignment="Center"
VerticalAlignment="Center"
/>
</Grid>
Everything else happens in the constructor of the
MainPage class. It's a
little lengthy but well commented and I'll also walk you through the logic:
namespace
VectorToRaster
{
public partial
class MainPage
: PhoneApplicationPage
{
public MainPage()
{
InitializeComponent();
// Get PathGeometry from resource
Path catPath =
this.Resources["catPath"]
as Path;
PathGeometry pathGeometry =
catPath.Data as
PathGeometry;
catPath.Data = null;
// Get geometry bounds
Rect bounds =
pathGeometry.Bounds;
// Create new path for rendering on bitmap
Path newPath =
new Path
{
Stroke = this.Resources["PhoneForegroundBrush"]
as Brush,
StrokeThickness = 5,
Data = pathGeometry,
};
// Create the WriteableBitmap
WriteableBitmap
writeableBitmap =
new
WriteableBitmap((int)(bounds.Width +
newPath.StrokeThickness),
(int)(bounds.Height
+ newPath.StrokeThickness));
// Color the background of the bitmap
Color baseColor = (Color)this.Resources["PhoneAccentColor"];
// Treat the bitmap as an ellipse:
// radiusX and radiusY are also
the centers!
double radiusX =
writeableBitmap.PixelWidth / 2.0;
double radiusY =
writeableBitmap.PixelHeight / 2.0;
for (int
y = 0; y < writeableBitmap.PixelHeight; y++)
for (int
x = 0; x < writeableBitmap.PixelWidth; x++)
{
double angle =
Math.Atan2(y - radiusY, x - radiusX);
double ellipseX = radiusX *
(1 + Math.Cos(angle));
double ellipseY = radiusY *
(1 + Math.Sin(angle));
double ellipseToCenter =
Math.Sqrt(Math.Pow(ellipseX -
radiusX, 2) +
Math.Pow(ellipseY
- radiusY, 2));
double pointToCenter =
Math.Sqrt(Math.Pow(x -
radiusX, 2) + Math.Pow(y - radiusY, 2));
double opacity =
Math.Min(1, pointToCenter / ellipseToCenter);
byte A = (byte)(opacity
* 255);
byte R = (byte)(opacity
* baseColor.R);
byte G = (byte)(opacity
* baseColor.G);
byte B = (byte)(opacity
* baseColor.B);
int color = A << 24 | R <<
16 | G << 8 | B;
writeableBitmap.Pixels[y * writeableBitmap.PixelWidth + x] =
color;
}
writeableBitmap.Invalidate();
// Find transform to move Path to edges
TranslateTransform
translate = new
TranslateTransform
{
X = -bounds.X + newPath.StrokeThickness / 2,
Y = -bounds.Y + newPath.StrokeThickness / 2
};
writeableBitmap.Render(newPath, translate);
writeableBitmap.Invalidate();
// Set bitmap to Image element
img.Source = writeableBitmap;
}
}
}
Here's the result:
Images and Tombstoning
In the 1890s, American puzzle-make Sam Loyd popularized a puzzle that was invented a couple decades earlier and has since come to be known as the 15 Puzzle, or the 14-15 Puzzle, or (in France) Jeu de Taquin, the "teasing game." In its classic form, the puzzle consists of 15 tiles labeled 1 through 15 arranged randomly in a 4×4 grid, leaving one blank tile. The goal is to shift the tiles around so the numbers are sequential.
The version I'm going to show you does not use numbered tiles. Instead it lets you access a photo from the phone's picture library and chops that up into tiles. (The game becomes rather more difficult as a result.) As a bonus, the program shows you how to save images when an application is tombstoned.
The program's content area consists of a
Grid
named playGrid (used for holding the tiles) and two buttons:
<Grid
x:Name="ContentPanel"
Grid.Row="1"
Margin="12,0,12,0">
<Grid.RowDefinitions>
<RowDefinition
Height="*" />
<RowDefinition
Height="Auto" />
</Grid.RowDefinitions>
<Grid.ColumnDefinitions>
<ColumnDefinition
Width="*" />
<ColumnDefinition
Width="*" />
</Grid.ColumnDefinitions>
<Grid
Name="playGrid"
Grid.Row="0"
Grid.Column="0"
Grid.ColumnSpan="2"
HorizontalAlignment="Center"
VerticalAlignment="Center"
/>
<Button
Content="load"
Grid.Row="1"
Grid.Column="0"
Click="OnLoadClick" />
<Button
Name="scrambleButton"
Content="scramble"
Grid.Row="2"
Grid.Column="1"
IsEnabled="False"
Click="OnScrambleClick" />
</Grid>
</Grid>
Seemingly redundantly, the XAML file also includes two buttons in the
ApplicationBar also labeled "load" and "scramble":
<phone:PhoneApplicationPage.ApplicationBar>
<shell:ApplicationBar
IsVisible="False">
<shell:ApplicationBarIconButton
x:Name="appbarLoadButton"
IconUri="/Images/appbar.folder.rest.png"
Text="load"
Click="OnLoadClick" />
<shell:ApplicationBarIconButton
x:Name="appbarScrambleButton"
IconUri="/Images/appbar.refresh.rest.png"
Text="scramble"
IsEnabled="False"
Click="OnScrambleClick" />
</shell:ApplicationBar>
</phone:PhoneApplicationPage.ApplicationBar>
The MainPage class in the code-behind file begins with some constants. The program is set up for 4 tiles horizontally and vertically but you can change those. (Obviously in Portrait mode, the program works best if VERT_TILES is greater than HORZ_TILES.) Other fields involve storing state information in the PhoneApplicationService object for tombstoning, and using the PhotoChooserTask for picking a photo.
Here's the entire manipulation logic:
protected
override
void
OnManipulationStarted(ManipulationStartedEventArgs
args)
{
if
(args.OriginalSource is
Image)
{
Image img = args.OriginalSource
as
Image;
MoveTile(img);
args.Complete();
args.Handled =
true;
}
base.OnManipulationStarted(args);
}
void
MoveTile(Image
img)
{
int
touchedRow = -1, touchedCol = -1;
for
(int
y = 0; y < VERT_TILES; y++)
for
(int
x = 0; x < HORZ_TILES; x++)
if
(tileImages[y, x] == img)
{
touchedRow = y;
touchedCol = x;
}
if
(touchedRow == emptyRow)
{
int sign =
Math.Sign(touchedCol
- emptyCol);
for (int
x = emptyCol; x != touchedCol; x += sign)
{
tileImages[touchedRow, x] = tileImages[touchedRow, x + sign];
Grid.SetColumn(tileImages[touchedRow, x],
x);
}
tileImages[touchedRow, touchedCol] =
null;
emptyCol = touchedCol;
}
else
if
(touchedCol == emptyCol)
{
int sign =
Math.Sign(touchedRow
- emptyRow);
for (int
y = emptyRow; y != touchedRow; y += sign)
{
tileImages[y,
touchedCol] = tileImages[y + sign, touchedCol];
Grid.SetRow(tileImages[y, touchedCol], y);
}
tileImages[touchedRow, touchedCol] =
null;
emptyRow = touchedRow;
}
}
The randomizing logic piggy-backs on this manipulation
logic. When the "scramble" button is clicked, the program attaches a handler for
the CompositionTarget.Rendering
event:
void OnScrambleClick(object
sender, EventArgs
args)
{
scrambleCountdown = 10 * VERT_TILES * HORZ_TILES;
scrambleButton.IsEnabled =
false;
appbarScrambleButton.IsEnabled =
false;
CompositionTarget.Rendering +=
OnCompositionTargetRendering;
}
void
OnCompositionTargetRendering(object
sender, EventArgs
args)
{
MoveTile(tileImages[emptyRow, rand.Next(HORZ_TILES)]);
MoveTile(tileImages[rand.Next(VERT_TILES), emptyCol]);
if
(--scrambleCountdown == 0)
{
CompositionTarget.Rendering -=
OnCompositionTargetRendering;
scrambleButton.IsEnabled =
true;
appbarScrambleButton.IsEnabled =
true;
}
}
The event handler calls MoveTile twice, once to move a tile from the same row as the empty square, and secondly to move a tile from the same column as the empty square.
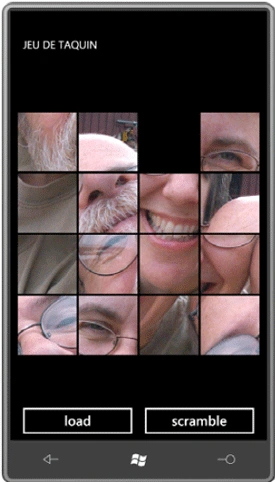
This program also handles tombstoning, which means that it saves the entire game state when the user navigates away from the page, and restores that game state when the game is re-activated.
When the program returns from its tombstoned state, the process goes in reverse:
protected
override
void
OnNavigatedTo(NavigationEventArgs
args)
{
object
objHaveValidTileImages;
if
(appService.State.TryGetValue("haveValidTileImages",
out
objHaveValidTileImages) &&
(bool)objHaveValidTileImages)
{
emptyRow = (int)appService.State["emptyRow"];
emptyCol = (int)appService.State["emptyCol"];
for (int
row = 0; row < VERT_TILES; row++)
for (int
col = 0; col < HORZ_TILES; col++)
if (col != emptyCol || row != emptyRow)
{
byte[] buffer = (byte[])appService.State[TileKey(row,
col)];
MemoryStream stream =
new
MemoryStream(buffer);
BitmapImage bitmapImage =
new
BitmapImage();
bitmapImage.SetSource(stream);
WriteableBitmap tile =
new
WriteableBitmap(bitmapImage);
GenerateImageTile(tile, row, col);
}
haveValidTileImages =
true;
appbarScrambleButton.IsEnabled =
true;
}
base.OnNavigatedTo(args);
}
The method reads the byte buffer and converts into a MemoryStream, from which a BitmapImage and then a WriteableBitmap is created. The method then uses the earlier GenerateTileImage method to create each Image element and add it to the Grid.
Join the conversation! Your thoughts help the community grow.