
Introduction
File upload is one of the functionality which we use in most of the application, whether it is a business app or it is a commercial app, we require file upload feature. In old application we have file upload feature with an input type file control. We browse using file browser and select the file/s but now a days customers required more user friendly way like drag and drop, copy paste, etc. Even the internet browser also evolved to support may types of event which helps to implement these type of functionality.
Agenda
We will discuss implementation of file upload using drag and drop. There are browsers present in the market which don’t support drag and drop so for that we have to provide the browse feature as well. We will write a clean SOC code and separate the file upload feature as a separate reusable component and will help to bind UI and view model in a cleaner way.
Let’s frame out our scenario first.
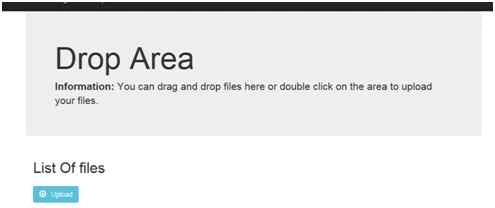
- We will create a file upload drop area when we drop files in there they should be ready for upload.
- When we double click on the drop zone it should open the file browser.
- All files should store in an observable array.
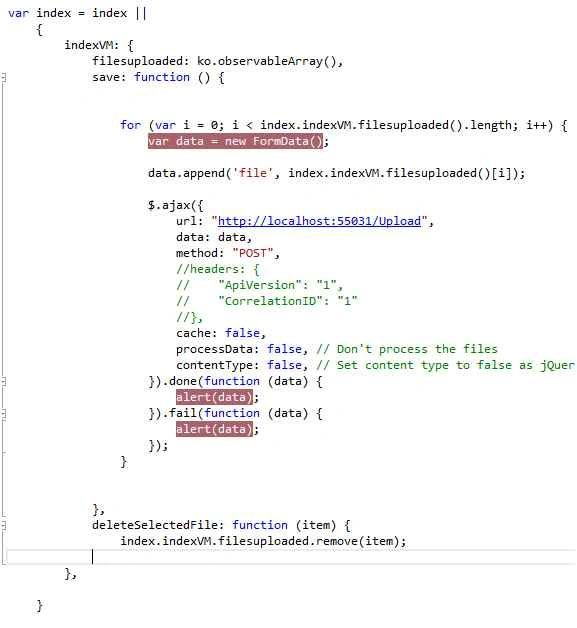
- When we click on the upload button file should reach the Web API.
- In the API we will just read the files or convert them in byte arrays. File upload in repository is not in the scope of this article.
Note: There are many ways to store the file in a file repository like Azure blob storage, Database, SharePoint, etc.
Application will look like the following,
Steps to implement the drag and drop functionality
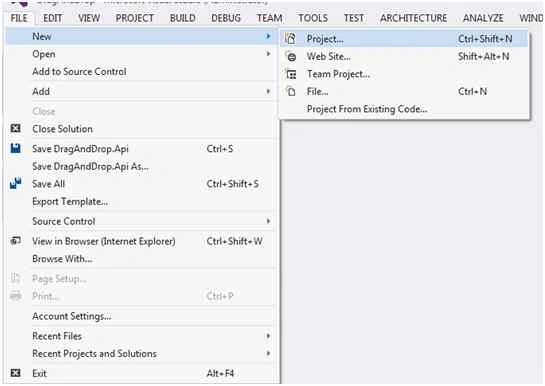
Step 1: Open Visual Studio, File, New, then Project.
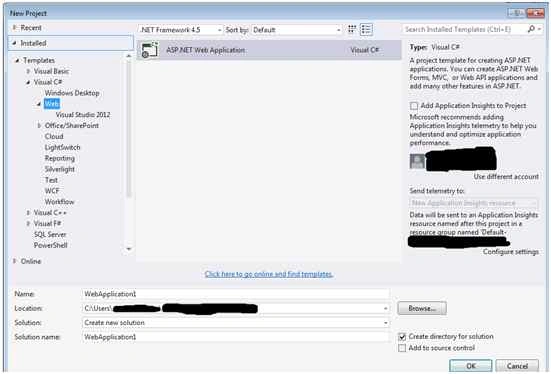
Step 2: Select Web project then enter your solution name, project name and the file location and click OK.
Step 3: Select the project type. Here we require two projects one for web UI project and other the API project (service to upload files)
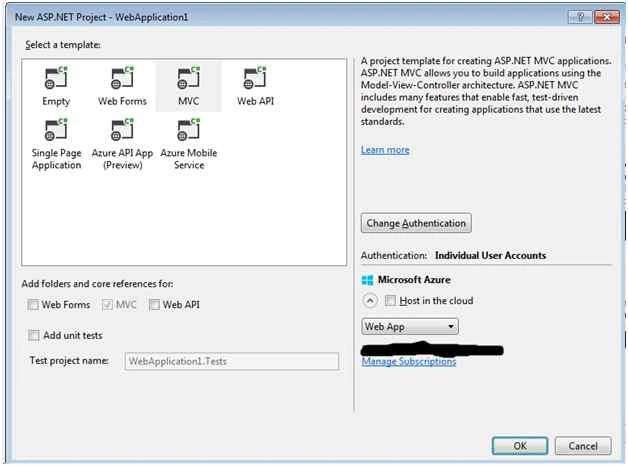
[Create two projects one UI MVC project and other WEB API project. We can create both type of projects in the same project but for the sake of separation and the recommended approach we divided into two projects. Once you add your project it should (recommended approach) look like below.]

Step 4: In the API project add one controller name Attachment and add an Action method name Upload.
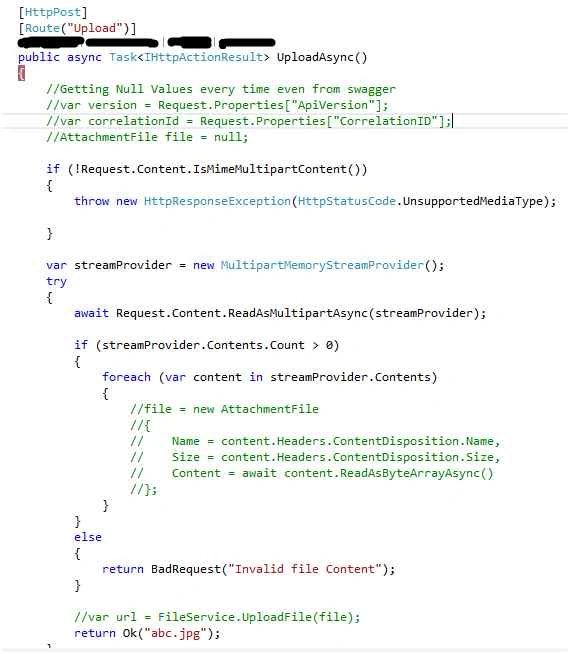
[I commented few lines because we don’t need those logic for this article I just kept them because it helps us to understand the entire API logic]
Step 5: For web project we have to add few more JavaScript libraries from Nuget.
- JQuery [Install-Package jQuery]
- Knockout JS [Install-Package knockoutjs]
- Bootstrap [Install-Package bootstrap -Version 3.3.5]
[Most of the ASP.NET project contains JQuery and Bootstrap unless you select an empty template]
Step 6: We will not create a separate controller we will modify the default template Controller which is Home.
Step 7: Edit the UI of the view as per a div as the drop zone.
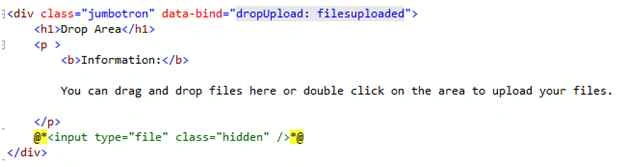
Step 8: Create a view model JS for the upload UI
Step 9: Now we will create a custom binding and add the following code,

In this piece of code we are initializing the target control to behave like a drop zone. Here we are hooking up some events and adding one input type file control which will help us in file browsing. Here are the following things,
- Adding event handlers for drop, drag drop event when that happens it will add the dropped files to the observable array.
- We are appending a file upload control so that when we double click on the box it should open a file browser and when we select the files it will add those files to the observable array.
- In the drag enter we are changing the background color of the drop zone div.
- And in drag over we prevent it to bubble up so that drop event happens properly.
Step 10: Final step will be to bind the div (drop zone) and the observable array in UI with the following code,

Note: To reduce the code size, I deleted the package folder. You have to first restore the nugget packages for the entire solution and then run the application. You can also refer the following link to enable Nuget package.
Conclusion
We have seen how we can use knockout custom binding to implement the drag and drop and create a reusable code. We implemented in SOC way and it will not make our UI or View Model dirty.
References
kishore kumar B VPosted Dec 4, 2017, 7:08 AM
Firstly Thank you for great post. I am seeing an issue with browser compatibility. This will not work in IE browsers. I mean the browsers that will not support Drag and drop(HTML5) Did you ever got into this particular issue. If you have any solution please help me.
Jayant KulkarniPosted May 27, 2016, 12:28 AM
nice one..
Bipin PatilPosted Jan 14, 2016, 9:08 AM
Good Artical
Ankur MistryPosted Dec 13, 2015, 3:10 AM
halpful - thank you
Manas MohapatraPosted Dec 13, 2015, 1:34 AM
Nice Stuff..