

Today, in this article let's learn another new and interesting concept related to Windows Phone 7, whereby communicating with WCF Service to perform some operation.
The Telerik Rad Controls for Windows Phone 7 can be downloaded from http://www.telerik.com/products/windows-phone.aspx.
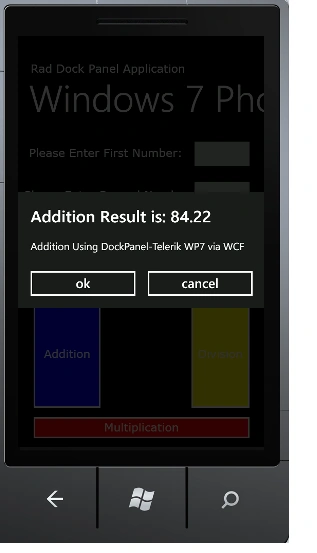
The Rad Message Box is used to display the output in a nice and enhanced UI.
Question: What is a Dock Panel?
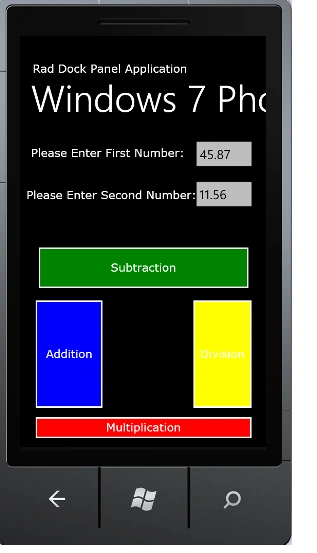
In simple terms "It provides flexibility for the user in accessing application, where elements are well aligned with Rich UI based in Dock. The elements in the dock panel are arranged according to the user requirement level. For instance: Left or Right or Top or Bottom".
Let's get this implemented for a better idea of this!!!
Step 1: The complete code of the IService1.cs looks like this:
using System; using System.Collections.Generic; using System.Linq; using System.Runtime.Serialization; using System.ServiceModel; using System.ServiceModel.Web; using System.Text; namespace WCF_Dock_Application [OperationContract] [OperationContract] [OperationContract] [OperationContract] |
Step 2: The complete code of the Service1.svc.cs looks like this:
using System; using System.Collections.Generic; using System.Linq; using System.Runtime.Serialization; using System.ServiceModel; using System.ServiceModel.Web; using System.Text; namespace WCF_Dock_Application public double add(double a, double b) public double sub(double a, double b) public double mul(double a, double b) |
Step 3: The complete code of the Web.Config looks like this:
<?xml version="1.0"?> <configuration> <system.web> </configuration> |
Step 4: The complete code of the MainPage.xaml looks like this:
<phone:PhoneApplicationPage
x:Class="Rad_Dock_Panel_Application_WP7.MainPage" xmlns="http://schemas.microsoft.com/winfx/2006/xaml/presentation" xmlns:x="http://schemas.microsoft.com/winfx/2006/xaml" xmlns:telerik="clr-namespace:Telerik.Windows.Controls;assembly=Telerik.Windows.Controls.Primitives" xmlns:phone="clr-namespace:Microsoft.Phone.Controls;assembly=Microsoft.Phone" xmlns:shell="clr-namespace:Microsoft.Phone.Shell;assembly=Microsoft.Phone" xmlns:d="http://schemas.microsoft.com/expression/blend/2008" xmlns:mc="http://schemas.openxmlformats.org/markup-compatibility/2006" xmlns:primitives="clr-namespace:Telerik.Windows.Controls;assembly=Telerik.Windows.Controls.Primitives" mc:Ignorable="d" d:DesignWidth="480" d:DesignHeight="768" FontFamily="{StaticResource PhoneFontFamilyNormal}" FontSize="{StaticResource PhoneFontSizeNormal}" Foreground="{StaticResource PhoneForegroundBrush}" SupportedOrientations="Portrait" Orientation="Portrait" shell:SystemTray.IsVisible="True" > About
<!--LayoutRoot is the root grid where all page content is placed--> <!--TitlePanel contains the name of the application and page title--> <!--ContentPanel - place additional content here--> <Grid x:Name="ContentPanel" Grid.Row="1" Margin="12,0,12,0"> </phone:PhoneApplicationPage> |
Step 5: The complete code of the MainPage.xaml.cs looks like this:
using System; using System.Collections.Generic; using System.Linq; using System.Net; using System.Windows; using System.Windows.Controls; using System.Windows.Documents; using System.Windows.Input; using System.Windows.Media; using System.Windows.Media.Animation; using System.Windows.Shapes; using Microsoft.Phone.Controls; using Rad_Dock_Panel_Application_WP7.ServiceReference1; using Telerik.Windows.Controls.Primitives; using Telerik.Windows.Controls; namespace Rad_Dock_Panel_Application_WP7 private void add_Call(object sender, addCompletedEventArgs e) private void btnAdd_Click(object sender, RoutedEventArgs e) } private void sub_Call(object sender, subCompletedEventArgs e) } } private void mul_Call(object sender, mulCompletedEventArgs e) private void btnMul_Click(object sender, RoutedEventArgs e) private void div_Call(object sender, divCompletedEventArgs e) private void btnDiv_Click(object sender, RoutedEventArgs e) #region Instance Variables |
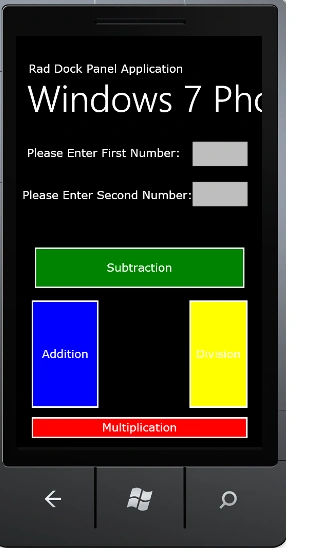
Step 6: The output of the application looks like this:
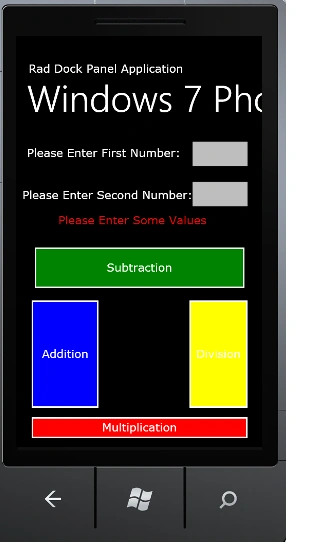
Step 7: The Output of the Nothing Entered Application looks like this:
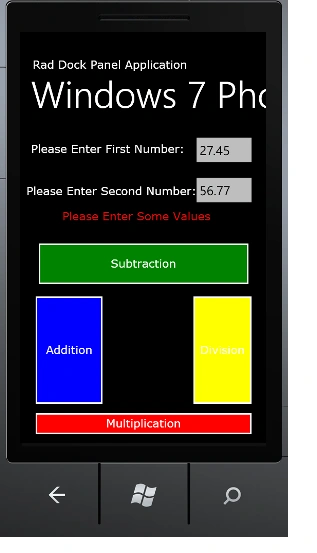
Step 8: The Output of the Addition Operation Application looks like this:
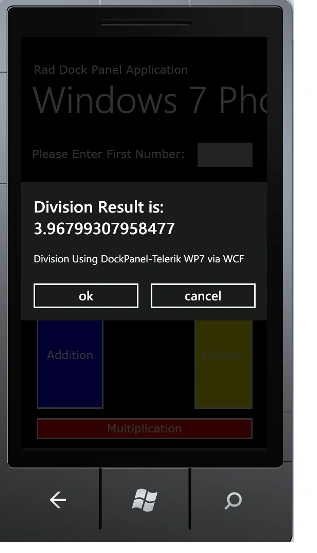
Step 9: The Output of the Division Operation Application looks like this:
I hope this article is useful for you.
Arjun PanwarPosted Mar 13, 2012, 12:17 AM
It is a wonderful article
Amit MaheshwarieditedPosted Mar 12, 2012, 1:04 PMEdited Mar 12, 2012, 1:04 PM
It's a great effort to accomplish such task keep it up and thanks for sharing.....