

Introduction
In this article, I will explain how to create and delete a directory or folder from your drive in ASP.NET using C#. When you are running a community website where the user posts articles, forum messages, etc. When a user registers in a website a folder can be created at run time, then when you upload or ask a query, the data can be automatically placed inside the user's own directory instead of the root or anywhere else. You must import the following namespace:
using System.IO;
Complete Program
Create_and_Remove_Directory.aspx.cs
- using System;
- using System.Collections.Generic;
- using System.Linq;
- using System.Web;
- using System.Web.UI;
- using System.Web.UI.WebControls;
- using System.IO; // Add This Namespace
- public partial class Create_and_Remove_Directory : System.Web.UI.Page
- {
- protected void Page_Load(object sender, EventArgs e)
- {
- }
- protected void RadButton1_Click(object sender, EventArgs e)
- {
- string path = @"D:\" + txtname.Text; // Give the specific path
- if (!(Directory.Exists(path)))
- {
- Directory.CreateDirectory(path);
- Sucesslbl.Text = "Directory Created Successfully";
- }
- else
- {
- Sucesslbl.Text = "Already Directory Exits With Same Name";
- }
- }
- protected void RadButton2_Click(object sender, EventArgs e)
- {
- string path = @"D:\" + deletetxt.Text;
- if (Directory.Exists(path))
- {
- DeleteDirectory(path);
- }
- else
- {
- Deletelbl.Text = "Directory not exits";
- }
- }
- private void DeleteDirectory(string path)
- {
- // Delete all files from the Directory
- foreach (string filename in Directory.GetFiles(path))
- {
- File.Delete(filename);
- }
- // Check all child Directories and delete files
- foreach (string subfolder in Directory.GetDirectories(path))
- {
- DeleteDirectory(subfolder);
- }
- Directory.Delete(path);
- Deletelbl.Text = "Directory deleted successfully";
- }
- }
- <%@ Page Language="C#" AutoEventWireup="true" CodeFile="Create_and_Remove_Directory.aspx.cs" Inherits="Create_and_Remove_Directory" %>
- <%@ Register assembly="Telerik.Web.UI" namespace="Telerik.Web.UI" tagprefix="telerik" %>
- <!DOCTYPE html PUBLIC "-//W3C//DTD XHTML 1.0 Transitional//EN" "http://www.w3.org/TR/xhtml1/DTD/xhtml1-transitional.dtd">
- <html xmlns="http://www.w3.org/1999/xhtml">
- <head runat="server">
- <title></title>
- <style type="text/css">
- .style1
- {
- width: 230px;
- }
- .style2
- {
- width: 169px;
- }
- .style3
- {
- width: 230px;
- height: 26px;
- }
- .style4
- {
- width: 169px;
- height: 26px;
- }
- .style5
- {
- height: 26px;
- }
- .style6
- {
- width: 230px;
- height: 29px;
- }
- .style7
- {
- width: 169px;
- height: 29px;
- }
- .style8
- {
- height: 29px;
- }
- </style>
- </head>
- <body>
- <form id="form1" runat="server">
- <div>
- <asp:ScriptManager ID="ScriptManager1" runat="server">
- </asp:ScriptManager>
- <h3>Create and Remove Directory in ASP.NET</h3>
- <table style="width: 47%;">
- <tr>
- <td class="style1" style="font-weight: bold">
- Enter File Name to Create</td>
- <td class="style2">
- <asp:TextBox ID="txtname" runat="server"></asp:TextBox>
- </td>
- <td>
- </td>
- </tr>
- <tr>
- <td class="style3">
- </td>
- <td class="style4">
- <telerik:RadButton ID="RadButton1" runat="server" Font-Bold="True"
- onclick="RadButton1_Click" Text="Create Directory">
- </telerik:RadButton>
- </td>
- <td class="style5">
- <asp:Label ID="Sucesslbl" runat="server" ForeColor="Red"></asp:Label>
- </td>
- </tr>
- <tr>
- <td class="style6" style="font-weight: bold">
- Enter File Name to Delete</td>
- <td class="style7">
- <asp:TextBox ID="deletetxt" runat="server"></asp:TextBox>
- </td>
- <td class="style8">
- </td>
- </tr>
- <tr>
- <td class="style1">
- </td>
- <td class="style2">
- <telerik:RadButton ID="RadButton2" runat="server" Font-Bold="True"
- onclick="RadButton2_Click" Text="Delete Directory">
- </telerik:RadButton>
- </td>
- <td>
- <asp:Label ID="Deletelbl" runat="server" ForeColor="Red"></asp:Label>
- </td>
- </tr>
- </table>
- </div>
- </form>
- </body>
- </html>
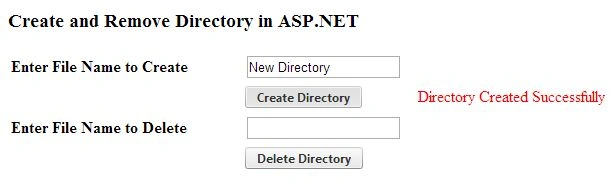
Output 1

Enter the directory name and then click on the "Create Directory" button:
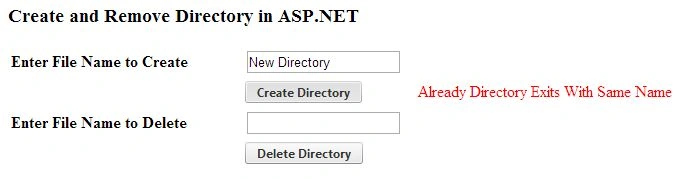
Output 2
If you will again click on Create Directory button then:
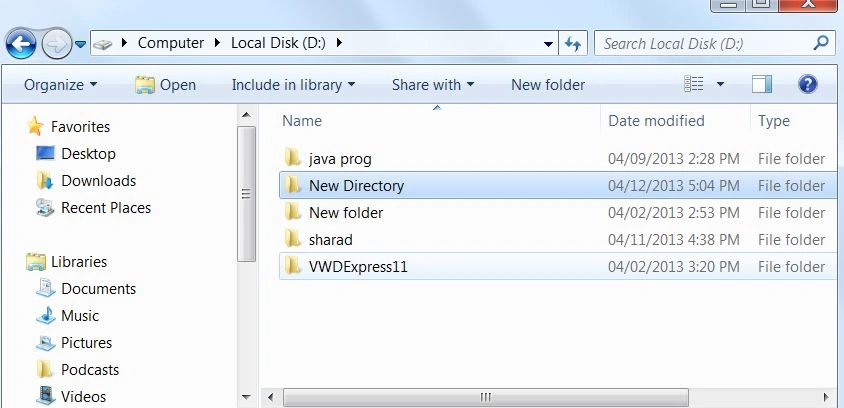
Output 3
Open the drive and you will see a new directory created, as in:
Output 4
Now enter a name in the "remove" TextBox and then click on the "Delete Directory" button:

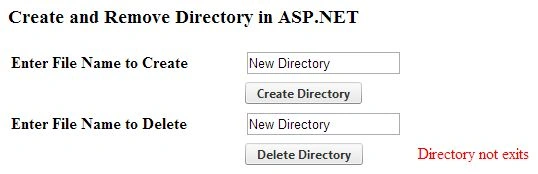
Output 5
If you will again click on Delete Directory button then:
Output 6
Now, open the drive, a new directory is removed from your drive, as in:
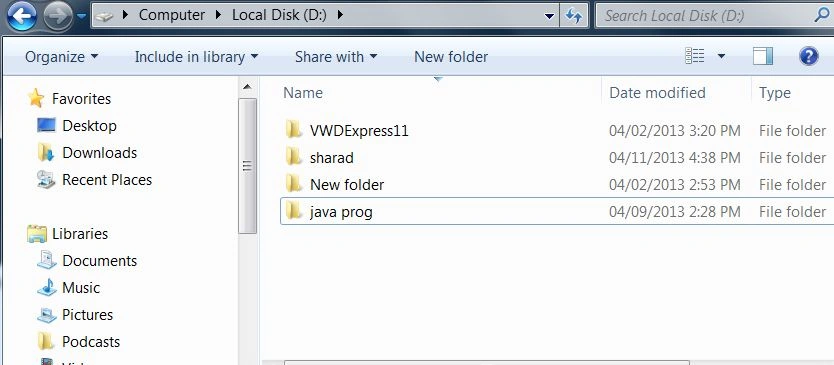
For more information, download the attached sample application.
samyu samyuPosted Aug 28, 2018, 3:41 PM
How to read the existed folder name? Please advice.
Gopal MahalePosted Apr 15, 2015, 7:00 AM
and what about for asp.net mvc...
Nitin BhardwajPosted Oct 15, 2013, 8:58 AM
Session["UserHit"] = HttpContext.Current.Session.SessionID.ToString(); you use userHit as a directory name
reyhan moPosted Oct 13, 2013, 2:42 PM
i have a question .please help me.....we have two pages .the first page is for log in . the second one is for uploading pictures . i should make new directory for every user that does not exist. i mean every user who log in should have a directory with their name to upload picture on it.i have problem to make directory with textbox name. should i use the cookie of the log in page ? how? help me :(