

Introduction
This article explains the use of a collection view in backbone.js. In this application we will create a model, router and view. Models are used for keeping the actual data, they use the data for communicating between client and server using the fetch() and save() methods.
A router is away to populate the data into the model and collection and depending on necessities the data is displayed using the view.
Views are responsible for rendering the stuff on the screen.
Use the following procedure to create the application:
- First we will create a web application as in the following:
- Start Visual Studio 2013.
- From the Start window select "New Project".
- Select "Installed" -> "Visual C#" -> "Web" -> "Visual Studio 2012" and select "ASP.NET Empty Web Application".
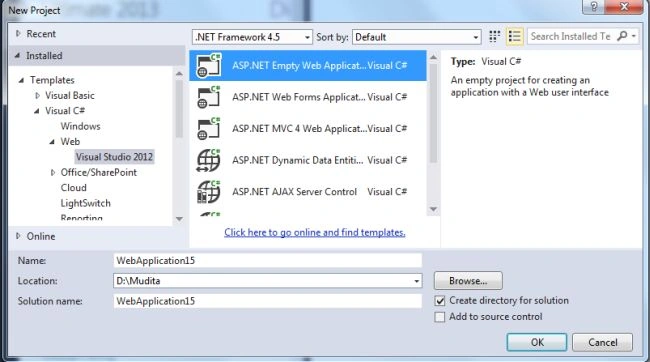
- Click on the "OK" button.
- Now Add an HTML page to the project:
- In the Solution Explorer.
- Right-click on the project and select "Add" -> "HTML page".
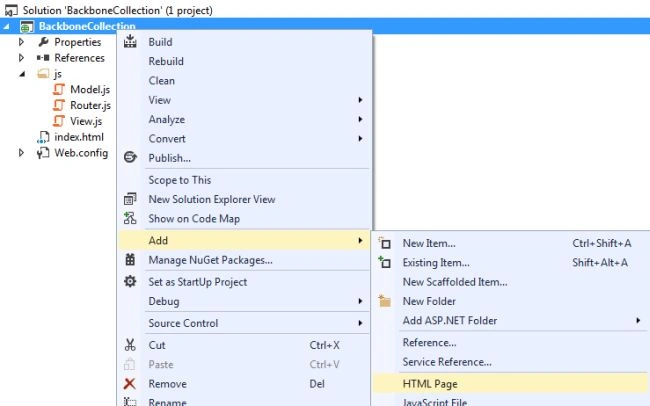
- Change the name of the page.
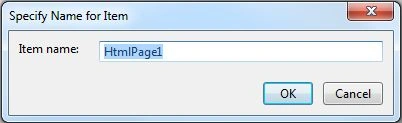
- Click on the "OK" button.
Add the following code:
<!DOCTYPE html>
<html>
<head>
<title>Collection View Sample Code</title>
<script src="http://ajax.googleapis.com/ajax/libs/jquery/1.7.2/jquery.min.js"></script>
<script src="http://underscorejs.org/underscore-min.js"></script>
<script src="http://backbonejs.org/backbone-min.js"></script>
<script src="js/Model.js"></script>
<script src="js/Router.js"></script>
<script src="js/View.js"></script>
</head>
<body>
<h1>Backbone.js Collection View example</h1>
<table>
<thead>
<tr>
<th>Name</th>
<th>Address</th>
</tr>
</thead>
<tbody></tbody>
</table>
</body>
</html>
- Now add a folder named "js" for adding JavaScripts such as "Model.js", "View.js" and "Router.js." In the Solution Explorer, right-click on the "js" folder add then select "New item" and the JavaScript file.
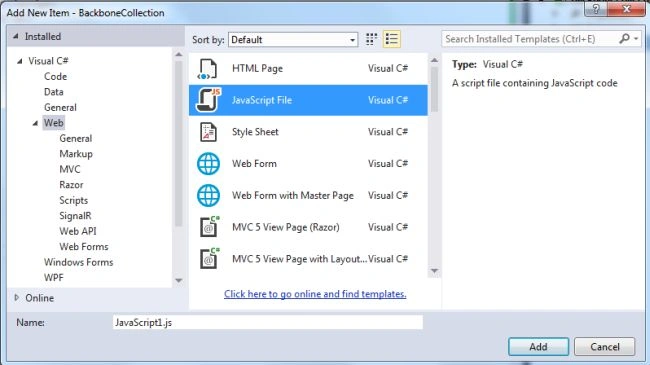
In the Model.js script file add the following code:
var models = {};
models.Person = Backbone.Model.extend({
validate: function (attributes) {
if (typeof attributes.Name !== 'string') {
return 'Name is mandatory';
}
if (typeof attributes.Name !== 'string') {
return 'Address is mandatory';
}
}
});
models.People = Backbone.Collection.extend({
model: models.Person
});
In the "View.js" write this code:
var views = {};
views.PeopleItem = Backbone.View.extend({
tagName: 'tr',
initialize: function (options) {
_.bindAll(this, 'render');
this.model.bind('change', this.render);
},
render: function () {
jQuery(this.el).empty();
jQuery(this.el).append(jQuery('<td>' + this.model.get('Name') + '</td>'));
jQuery(this.el).append(jQuery('<td>' + this.model.get('Address') + '</td>'));
return this;
}
});
views.People = Backbone.View.extend({
collection: null,
el: 'tbody',
initialize: function (options) {
this.collection = options.collection;
_.bindAll(this, 'render');
this.collection.bind('reset', this.render);
this.collection.bind('add', this.render);
this.collection.bind('remove', this.render);
},
render: function () {
var element = jQuery(this.el);
element.empty();
this.collection.forEach(function (item) {
var itemView = new views.PeopleItem({
model: item
});
element.append(itemView.render().el);
});
return this;
}
});
In the code above the use of "tagName:'tr'" specifies that everyone is displayed in the table row.
jQuery(this.el).append(jQuery('<td>' + this.model.get('Name') + '</td>'));
jQuery(this.el).append(jQuery('<td>' + this.model.get('Address') + '</td>'));
This code specifies the columns of the table in which the data will be stored.
In the "Router.js" file write this code:
var Router = Backbone.Router.extend({
routes: {
'': 'index'
},
index: function () {
var people = new models.People([
{
Name: 'John',
Address: 'Mumbai'
},
{
Name: 'Smith',
Address: 'Delhi'
},
{
Name: 'Joy',
Address: 'Banaras'
},
{
Name: 'Jeny',
Address: 'Banglore'
}
]);
var view = new views.People({
collection: people
});
view.render();
people.add([
{
Name: 'Zaphod',
Address: 'Kolkata'
}
]);
}
});
jQuery(document).ready(function () {
var router = new Router();
Backbone.history.start();
});
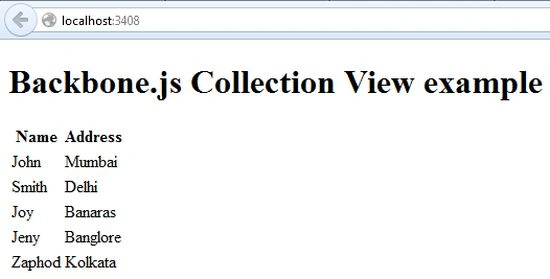
- Execute the application:
Join the conversation! Your thoughts help the community grow.