

Introduction
In this article we will create a Web API application using backbone.js. We will create a single-page API application and Backbone.js.
Let's see how to use backbone.js in the Web API.
Step 1
Create a Web API application using the following:
- Start Visual Studio 2013.
- From Start window Select "New Project".
- Select "Installed" -> "Template" -> "Visual C#" -> "Web" -> "Visual Studio 2012" and select "ASP.NET MVC4 Web Application".
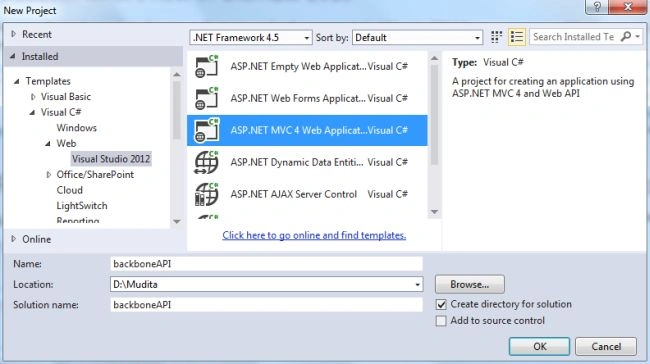
- Click on the "OK" button.
- From the MVC4 project window select "Web API".
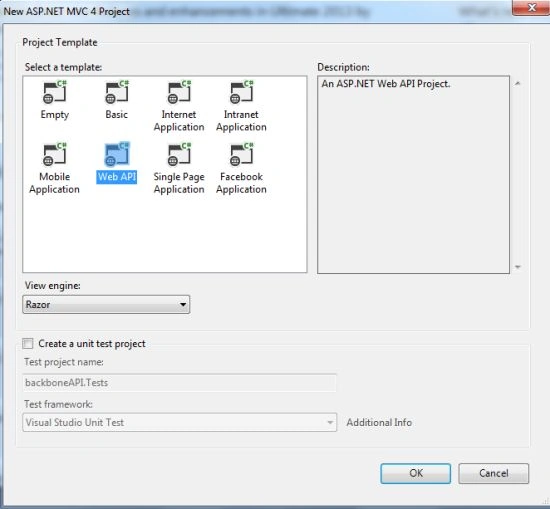
- Click on the "OK" button.
Step 2
Now add the model class to the project:
- In the Solution Explorer.
- Right-click on the Model Folder.
- Select "Add" -> "Class".
- Select "Installed" -> "Visual C#" and select "Class".
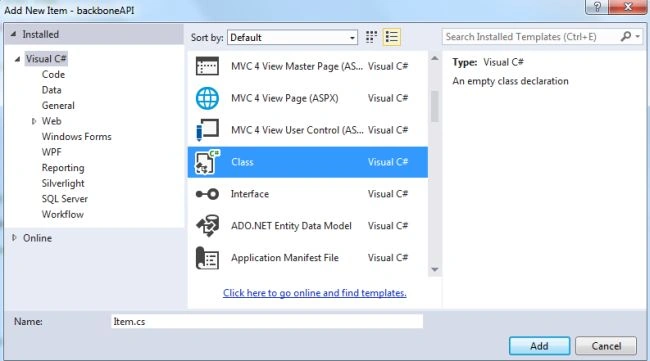
- Click on the "Add" button.
Add the following code:
using System;
using System.Collections.Generic;
using System.Linq;
using System.Web;
namespace backboneAPI.Models
{
public class Item
{
public int ID { get; set; }
public string Name { get; set; }
public int order { get; set; }
public bool complete { get; set; }
}
}
Step 3
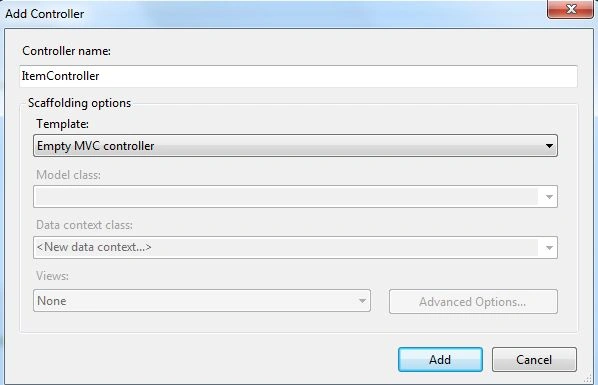
Now add an MVC controller "ItemController" to the project.
- In Solution Explorer right-click on the Controller folder.
- Select "Add" then "Controller", select "Empty MVC controller" from the templates and click on the "Ok" button.
public class ItemController : Controller
{
//
// GET: /Item/
public ActionResult Index()
{
return View();
}
}
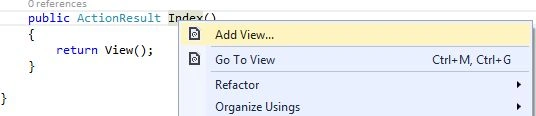
In the ItemController class is an action method Index(). Right-click on the index method and select "AddView" then click on the "OK" button.
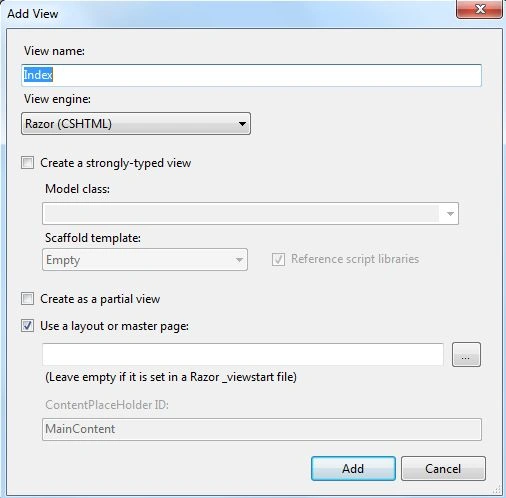
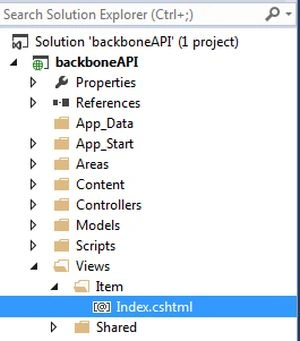
Now we can see in the Solution Explorer that there is a folder named "Item" added and the View is generated in this folder.
Step 4
Now we add a API controller with Entity Framework in the Controller folder. Before adding it we need to build our application.
- In the Solution Explorer.
- Right-click on the Controller folder and Select "API Controller with read/write actions, using Entity Framework" from the template.
- Select the Model Class.
- Now select the Context Data Class.
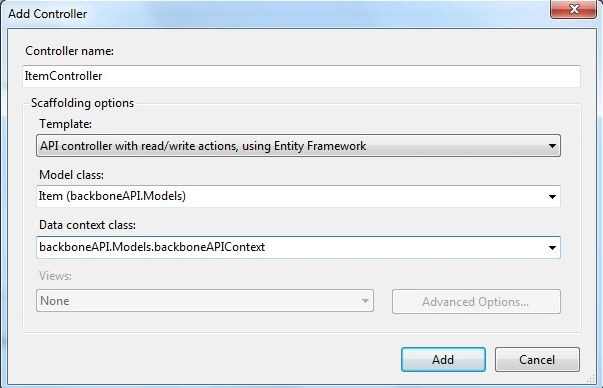
- And click on the "Ok" button.
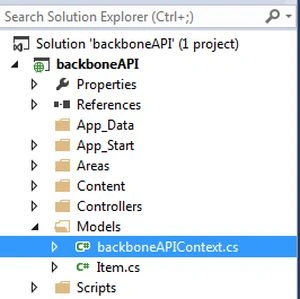
In the ItemsController the code is automatically generated with read write operations. And there is a context class added in the Model folder.
Step 5
Now add the code in the Index.cshtml page. We can find this file from "View" -> "Item" -> "Index.cshtml" and add the following code:
<!DOCTYPE html>
<html lang="en">
<head>
<meta charset="utf-8">
<title>Backbone.js Items</title>
<link href="~/Content/themes/items.css" rel="stylesheet" />
</head>
<body>
<div id="todoapp">
<header>
<h1>Add new items</h1>
<input id="new-todo" type="text" placeholder="add new items you want to add">
</header>
<section id="main">
<input id="toggle-all" type="checkbox">
<label for="toggle-all">Ckeched as all complete</label>
<ul id="todo-list"></ul>
</section>
<footer>
<a id="clear-completed">Clear completed</a>
<div id="todo-count"></div>
</footer>
</div>
<div id="instructions">
double click to add items
</div>
<script src="~/Scripts/json2.js"></script>
<script src="~/Scripts/jquery-1.8.2.js"></script>
<script src="~/Scripts/underscore.js"></script>
<script src="~/Scripts/backbone.js"></script>
<script src="~/Scripts/todos.js"></script>
<!-- Templates -->
<script type="text/template" id="item-template">
<div class="view">
<input class="toggle" type="checkbox" <%= done ? 'checked="checked"' : '' %> />
<label><%- title %></label>
<a class="destroy"></a>
</div>
<input class="edit" type="text" value="<%= title %>" />
</script>
<script type="text/template" id="stats-template">
<% if (done) { %>
<a id="clear-completed">Clear <%= done %> completed <%= done == 1 ? 'item' : 'items' %></a>
<% } %>
<div class="todo-count"><b><%= remaining %></b> <%= remaining == 1 ? 'item' : 'items' %> left</div>
</script>
</body>
</html>
Step 6
We need to change some code in the Todos.js file.
var TodoList = Backbone.Collection.extend({
// Reference to this collection's model.
model: Todo,
url: function () {
return 'api/items';
},
Step 7
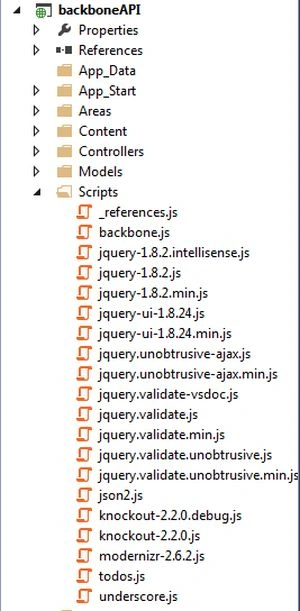
We need to add a JS fie in your project, such as "backbone.js", "underscore.js", "jquery-1.8.2.min.js" and "todos.js".
Step 8
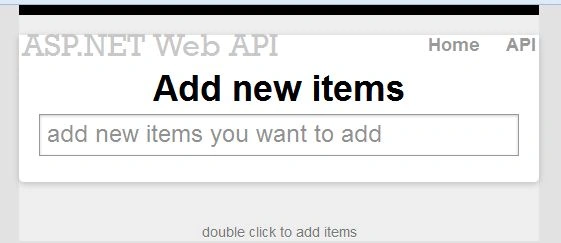
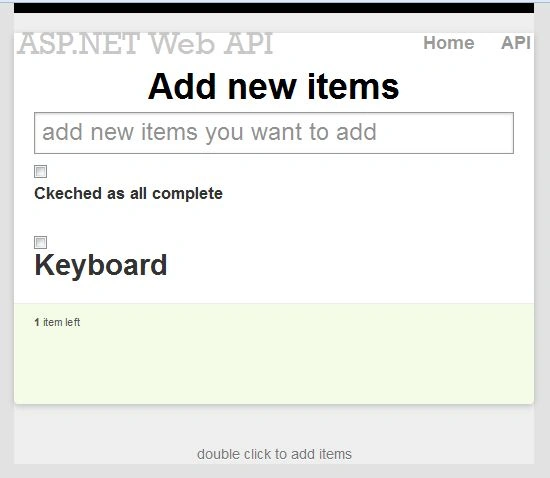
Execute the application:
Add the items to the list:
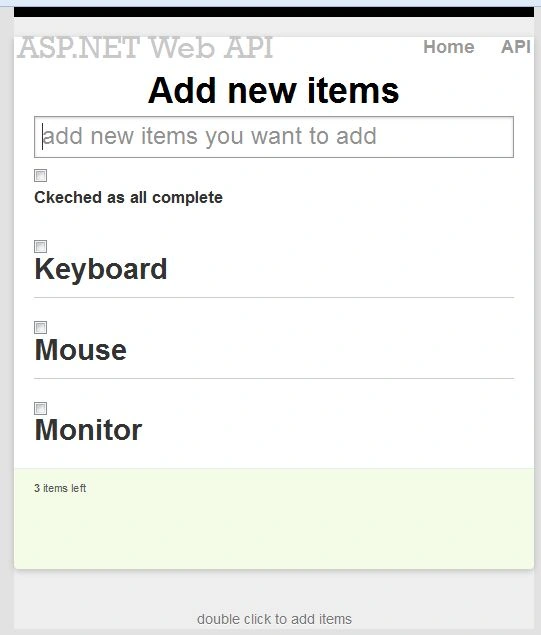
You can delete these items. First check the cheakbox for deleting items. Then click on "Clear items".
Join the conversation! Your thoughts help the community grow.