

Introduction
- Key features of the Ethernet card
- How to connect the Arduino Uno
- Configuration for Internet access
- Test the connectivity of Ethernet network
- Conclusion
Key features of the Ethernet card
- Supply voltage 5V DC.
- To operate must be installed above the Arduino Uno, we will see later in the article how.
- It has an Ethernet controller W5100 with 16k internal memory buffer
- Connection speed ranging from 10 to 100 MB
- It must be connected directly with the SPI port of Arduino.
- It has a slot for SD card.
These are the main features, but for more information, you can see the considerable documentation that already exists here, where we start from the hardware to the final program. The following is the image of the Ethernet Shield.
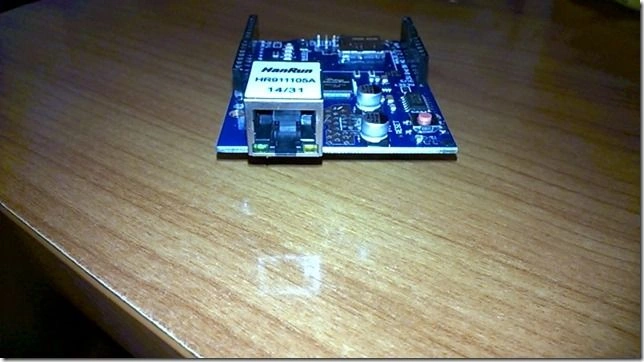
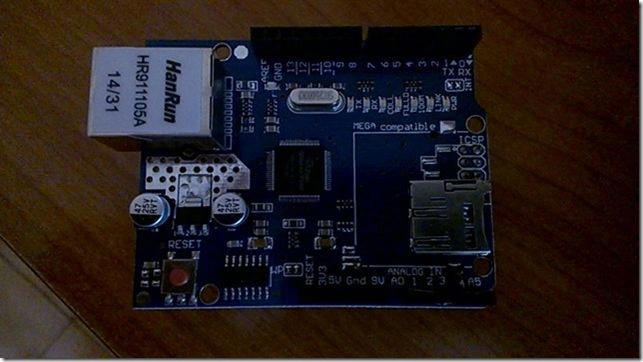 How to connect Ethernet shield on the Arduino Uno
To connect the Ethernet card and very simple, as you can see in the following pictures, just overlay the Arduino Uno, being careful not to bend or damage the pins. You will see that you replicate the network adapter, all links of the Arduino Uno, then inputs PWM, Analog inputs, inputs of transmission and reception, the output voltage of 5v and zero volts to power the circuits and external components and finally the reset button that will perform the reset, both of the Ethernet card that the Arduino board as in the following:
How to connect Ethernet shield on the Arduino Uno
To connect the Ethernet card and very simple, as you can see in the following pictures, just overlay the Arduino Uno, being careful not to bend or damage the pins. You will see that you replicate the network adapter, all links of the Arduino Uno, then inputs PWM, Analog inputs, inputs of transmission and reception, the output voltage of 5v and zero volts to power the circuits and external components and finally the reset button that will perform the reset, both of the Ethernet card that the Arduino board as in the following:
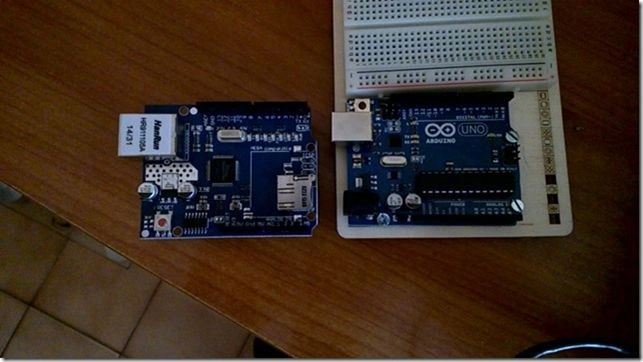 Arduino Uno Ethernet Shield right and left before being assembled.
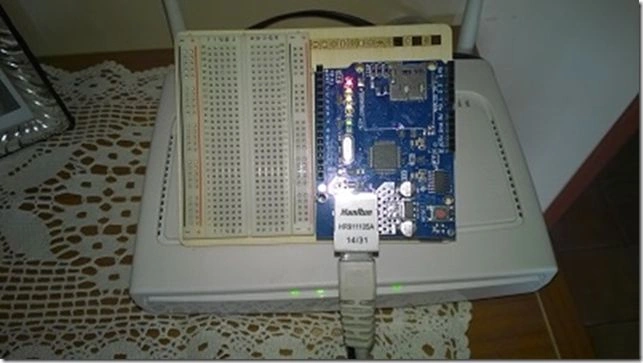
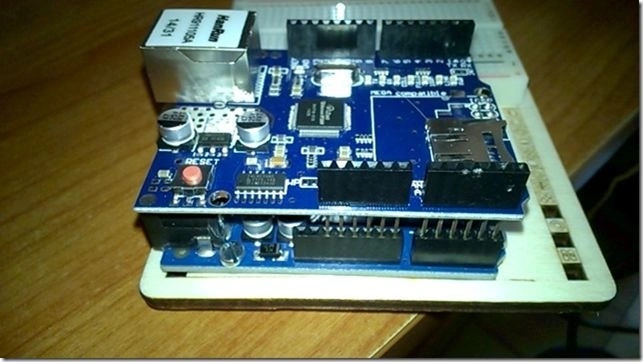 The two boards after assembly. As you can see, the assembly is simple. As you have seen be careful not to damage the pins of the Ethernet card.
Configuration for Internet access
We are past the assembly stage, it's time to configure the adapter so that it can connect to the internet. First, we must connect the Arduino Uno to a power supply, or with the power supply that provides an output voltage of 5V DC and at least 2 amperes, or attaching it directly to the PC through a USB port, providing a voltage necessary for the operation of the card. We must have an Ethernet cable with an RJ45 connector, to be connected to the router that will be the gateway. Now we start the Arduino IDE and create a new sketch of code called "EthernetTest" as shown and we execute a project save.
The two boards after assembly. As you can see, the assembly is simple. As you have seen be careful not to damage the pins of the Ethernet card.
Configuration for Internet access
We are past the assembly stage, it's time to configure the adapter so that it can connect to the internet. First, we must connect the Arduino Uno to a power supply, or with the power supply that provides an output voltage of 5V DC and at least 2 amperes, or attaching it directly to the PC through a USB port, providing a voltage necessary for the operation of the card. We must have an Ethernet cable with an RJ45 connector, to be connected to the router that will be the gateway. Now we start the Arduino IDE and create a new sketch of code called "EthernetTest" as shown and we execute a project save.
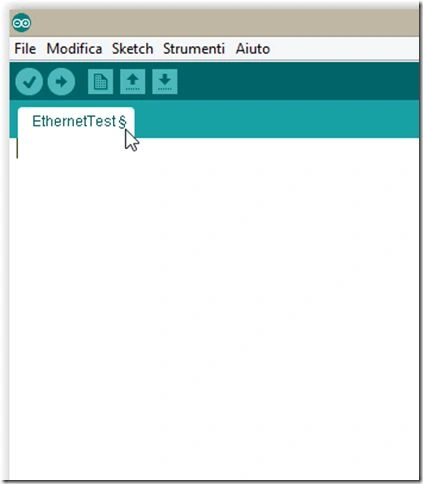 The new project EthernetTest.
Now for the part of the code. The first thing to do after you create and save the file sketch is to include the necessary libraries to use the Ethernet Shield, exactly SPI.h and Ethernet.h.
The new project EthernetTest.
Now for the part of the code. The first thing to do after you create and save the file sketch is to include the necessary libraries to use the Ethernet Shield, exactly SPI.h and Ethernet.h.
- // Importo thee library Ethernet
- #include <SPI.h>
- #include <Ethernet.h>
Find these libraries from the menu Sketch -> Include Library -> Ethernet. You will find that more libraries will be added, but we can have a look at the two mentioned above.
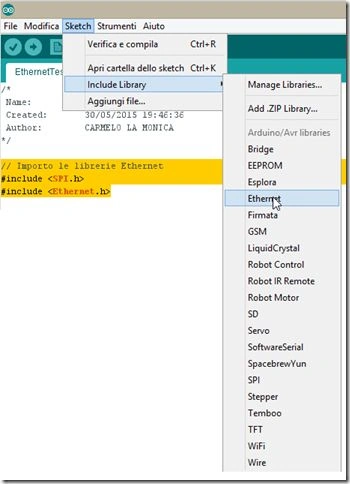 Adding libraries SPI and Ethernet.h on the project.
Now that the necessary libraries have been added, we can start using them. First, we need to define a Media Access Control (MAC) address. It is a unique address for each device that is usually issued by the manufacturer of the network card necessary to identify the device, in our case the Ethernet Shield case if there were more than one. If you do not have this address, we can safely create one, taking care to enter the letter "x" after the first number, because it is an address in hexadecimal numbers. We will enter the MAC address below.
Adding libraries SPI and Ethernet.h on the project.
Now that the necessary libraries have been added, we can start using them. First, we need to define a Media Access Control (MAC) address. It is a unique address for each device that is usually issued by the manufacturer of the network card necessary to identify the device, in our case the Ethernet Shield case if there were more than one. If you do not have this address, we can safely create one, taking care to enter the letter "x" after the first number, because it is an address in hexadecimal numbers. We will enter the MAC address below.
- byte mac[] = { 0xDE, 0xAD, 0xBE, 0xEF, 0xFE, 0xED }; // MAC address
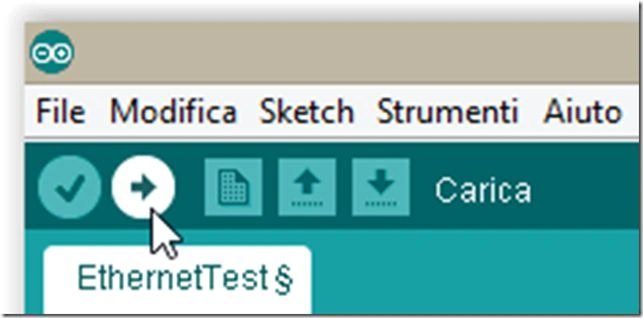
We define a data type with a byte length of six elements, representing the MAC address of the network card. We can still define an Internet Protocol (IP) address. Also, in this case, it is a unique address that identifies a device in a host network. This step is optional and can directly assign the router an IP address automatically to the Ethernet Shield, this means the DHCP service. The last thing to do and implement the begin() method, passing as arguments the array values mac[], whereas for the IP address of the router will assign one dynamically. We have everything you need to configure the network card, it just must implement the methods setup() and loop(). We insert inside the initialization of the serial port, so you can see on the serial monitor the connection status.
- // Imposto una connessione seriale per verificare i dati.
- Serial.begin(9600);
The following sketch is complete.
- /*
- Name: EthernetTest.ino
- Created: 30/05/2015 19:46:36
- Author: CARMELO LA MONICA
- */
- // Importo le librerie Ethernet
- #include <SPI.h>
- #include <Ethernet.h>
- // Impostazioni base
- byte mac[] = { 0xDE, 0xAD, 0xBE, 0xEF, 0xFE, 0xED }; // MAC address
- void setup()
- {
- // Imposto una connessione seriale per la verifica dei dati.
- Serial.begin(9600);
- // Diamo alla Ethernet shield un secondo per inizializzarsi
- delay(1000);
- // Connessione Ethernet usando MAC e IP dinamico
- if(Ethernet.begin(mac) == 0)
- {
- Serial.println("Connesso");
- }
- else
- {
- Serial.println("Errore nella connessione");
- }
- }
- void loop()
- {
- }


Afzaal Ahmad ZeeshanPosted Jun 28, 2015, 12:56 PM
Good one, already waiting for the next version of your article. :)
Pooja BaraskarPosted Jun 2, 2015, 4:50 PM
Great :)
Santhakumar MunuswamyPosted Jun 2, 2015, 3:03 PM
Thanks for good show
Emiliano MussoPosted Jun 2, 2015, 12:54 PM
That's a great article, good work!
Atul GuptaPosted Jun 2, 2015, 7:55 AM
Nice, Thanks For Sharing sir !
NitinPosted Jun 2, 2015, 5:03 AM
nice
Sibeesh VenuPosted Jun 2, 2015, 3:52 AM
Good one.