
Introduction
Open Wampserver on your browser by writing localhost or localhost:8080. In your browser, a page will be displayed.
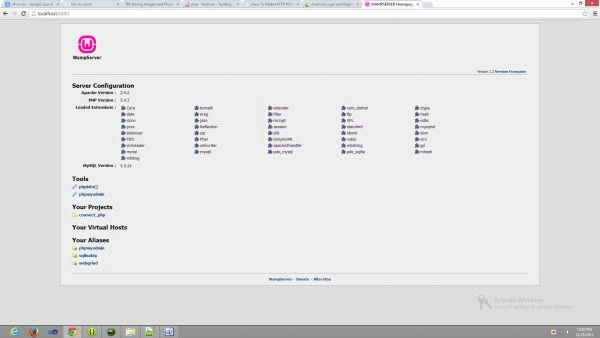
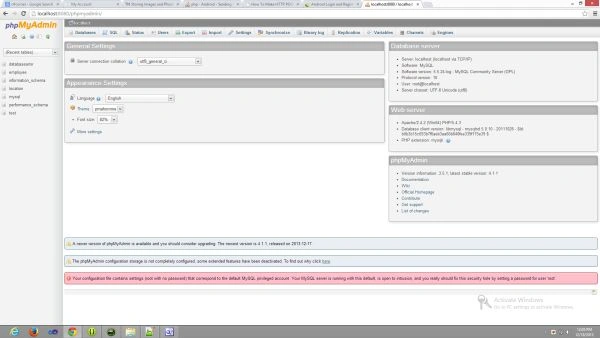
Click on "PhPmyadmin" on the left side.
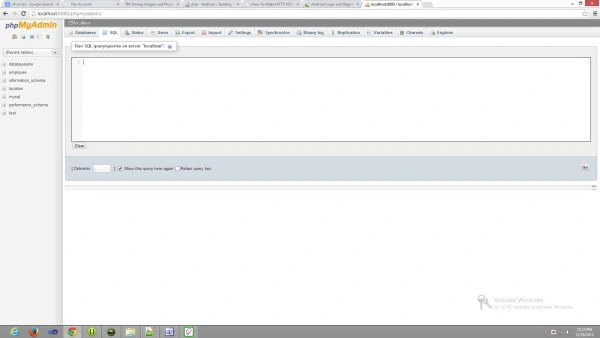
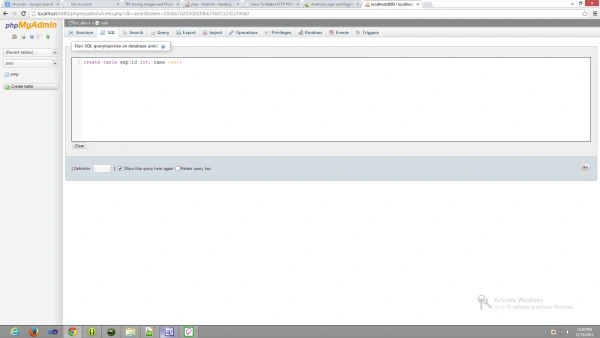
- <?php
- /**
- * A class file to connect to database
- */
- class DB_CONNECT
- {
- // constructor
- function __construct()
- {
- // connecting to database
- $this->connect();
- }
- // destructor
- function __destruct()
- {
- // closing db connection
- $this->close();
- }
- /**
- * Function to connect with database
- */
- function connect()
- {
- // import database connection variables
- require_once __DIR__ . '/db_config.php';
- // Connecting to mysql database
- $con = mysql_connect(DB_SERVER, DB_USER, DB_WORD) or die(mysql_error());
- // Selecing database
- $db = mysql_select_db(DB_DATABASE) or die(mysql_error()) or die(mysql_error());
- // returing connection cursor
- return $con;
- }
- /**
- * Function to close db connection
- */
- function close()
- {
- // closing db connection
- mysql_close();
- }
- }
- ?>
db_config.php
- <?php
- /*
- * All database connection variables
- */
- define('DB_USER', "root"); // db user
- define('DB_WORD', ""); // db word (mention your db word here)
- define('DB_DATABASE', "employee"); // database name
- define('DB_SERVER', "localhost"); // db server
- ?>
Create a PHP file to store information on the server.
Step 8
Create an XML file and write this. In this XML file, you will use two text views, two edittexts, and a button.
- <?php
- /*
- * Following code will create a new product row
- * All product details are read from HTTP Post Request
- */
- // array for JSON response
- $response = array();
- // check for required fields
- if (isset($_POST['id']) && isset($_POST['name'])) {
- $id = $_POST['id'];
- $name = $_POST['name'];
- // include db connect class
- require_once __DIR__ . '/db_connect.php';
- // connecting to db
- $db = new DB_CONNECT();
- // mysql inserting a new row
- $result = mysql_query("INSERT INTO employe_data(id, name) VALUES('$id', '$name')");
- // check if row inserted or not
- if ($result) {
- // successfully inserted into database
- $response["success"] = 1;
- $response["message"] = "Product successfully created.";
- // echoing JSON response
- echo json_encode($response);
- } else {
- // failed to insert row
- $response["success"] = 0;
- $response["message"] = "Oops! An error occurred.";
- // echoing JSON response
- echo json_encode($response);
- }
- } else {
- // required field is missing
- $response["success"] = 0;
- $response["message"] = "Required field(s) is missing";
- // echoing JSON response
- echo json_encode($response);
- }
- ?>
- <?xml version="1.0" encoding="utf-8"?>
- <LinearLayout xmlns:android="http://schemas.android.com/apk/res/android"
- android:layout_width="match_parent"
- android:layout_height="match_parent"
- android:orientation="vertical" >
- <!-- Name Label -->
- <TextView android:layout_width="fill_parent"
- android:layout_height="wrap_content"
- android:text="Employee_Id"
- android:paddingLeft="10dip"
- android:paddingRight="10dip"
- android:paddingTop="10dip"
- android:textSize="17dip"/>
- <!-- Input Name -->
- <EditText android:id="@+id/inputId"
- android:layout_width="fill_parent"
- android:layout_height="wrap_content"
- android:layout_margin="5dip"
- android:layout_marginBottom="15dip"
- android:singleLine="true"/>
- <!-- Price Label -->
- <TextView android:layout_width="fill_parent"
- android:layout_height="wrap_content"
- android:text="Employee_Name"
- android:paddingLeft="10dip"
- android:paddingRight="10dip"
- android:paddingTop="10dip"
- android:textSize="17dip"/>
- <!-- Input Price -->
- <EditText android:id="@+id/inputName"
- android:layout_width="fill_parent"
- android:layout_height="wrap_content"
- android:layout_margin="5dip"
- android:layout_marginBottom="15dip"
- android:singleLine="true"
- />
- <!-- Description Label -->
- <!-- Button Create Product -->
- <Button android:id="@+id/btnCreateProduct"
- android:layout_width="fill_parent"
- android:layout_height="wrap_content"
- android:text="Create "/>
- </LinearLayout>
Step 9
Create a Java class file MainActivity with the following:
- package com.example.adddatatotheserver;
- import java.util.ArrayList;
- import java.util.HashMap;
- import java.util.List;
- import org.apache.http.NameValuePair;
- import org.apache.http.message.BasicNameValuePair;
- import org.json.JSONArray;
- import org.json.JSONException;
- import org.json.JSONObject;
- import android.app.Activity;
- import android.app.ListActivity;
- import android.app.ProgressDialog;
- import android.content.Intent;
- import android.os.AsyncTask;
- import android.os.Bundle;
- import android.util.Log;
- import android.view.View;
- import android.view.View.OnClickListener;
- import android.view.inputmethod.EditorInfo;
- import android.widget.AdapterView;
- import android.widget.AdapterView.OnItemClickListener;
- import android.widget.Button;
- import android.widget.EditText;
- import android.widget.ListAdapter;
- import android.widget.ListView;
- import android.widget.SimpleAdapter;
- import android.widget.TextView;
- public class MainActivity extends Activity
- {
- // Progress Dialog
- private ProgressDialog pDialog;
- // Create the object of JsonParser class
- JSONParser jParser = new JSONParser();
- EditText inputName;
- EditText inputId;
- // url to create send data. This contains the ip address of my machine on which the local server is running. You will write the IP address of your machine
- private static String url = "http://192.168.1.135:8080/connect_php/create_product.php";
- // JSON Node names
- private static final String TAG_SUCCESS = "success";
- @Override
- public void onCreate(Bundle savedInstanceState)
- {
- super.onCreate(savedInstanceState);
- setContentView(R.layout.activity_main);
- // Edit Text
- inputName = (EditText) findViewById(R.id.inputName);
- inputId = (EditText) findViewById(R.id.inputId);
- // Create button
- Button btnCreateProduct = (Button) findViewById(R.id.btnSend);
- // button click event
- btnCreateProduct.setOnClickListener(new View.OnClickListener()
- {
- /*on button click you will call the execute() method with the object of CreateNewId class and onPreExecute() will be called where we start the progress dialogue. After the execution of
- onPreExecute(), doInBackGround method will be called automatically which sends the data to the JsonParser class. In JsonParser class I have created the Http Client to send the data to the server. */
- @Override
- public void onClick(View view)
- {
- // creating new product in background thread
- new CreateNewId().execute();
- }
- });
- }
- /**
- * Background Async Task to Create new product
- * */
- class CreateNewId extends AsyncTask < String, String, String >
- {
- /**
- * Before starting background thread Show Progress Dialog
- * */
- @SuppressWarnings("unused")
- @Override
- protected void onPreExecute()
- {
- super.onPreExecute();
- pDialog = new ProgressDialog(MainActivity.this);
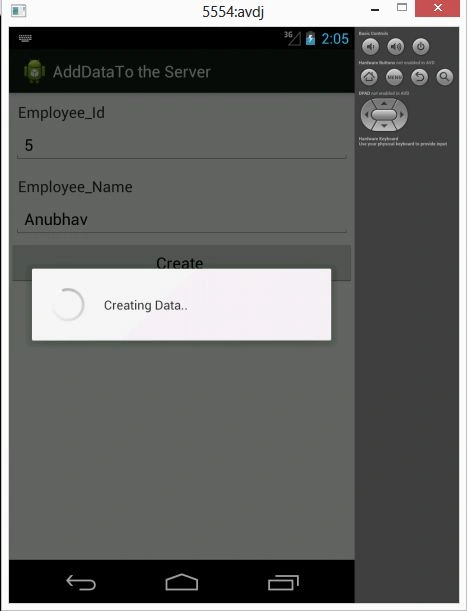
- pDialog.setMessage("Creating Data..");
- pDialog.setIndeterminate(false);
- pDialog.setCancelable(true);
- pDialog.show();
- }
- /**
- * Creating product
- * */
- protected String doInBackground(String...args)
- {
- String name = inputName.getText().toString();
- String id = inputId.getText().toString();
- // Building Parameters
- List < NameValuePair > params = new ArrayList < NameValuePair > ();
- params.add(new BasicNameValuePair("name", name));
- params.add(new BasicNameValuePair("id", id));
- // getting JSON Object
- // Note that create product url accepts POST method
- JSONObject json = jParser.makeHttpRequest(url,
- "POST", params);
- // check log cat fro response
- Log.d("Create Response", json.toString());
- // check for success tag
- try
- {
- int success = json.getInt(TAG_SUCCESS);
- if (success == 1)
- {
- // successfully created product
- // Intent i = new Intent(getApplicationContext(), AllProductsActivity.class);
- //startActivity(i);
- finish();
- // closing this screen
- }
- else
- {
- // failed to create product
- }
- }
- catch (JSONException e)
- {
- e.printStackTrace();
- }
- return null;
- }
- /**
- * After completing background task Dismiss the progress dialog
- * **/
- protected void onPostExecute(String file_url)
- {
- // dismiss the dialog once done
- pDialog.dismiss();
- }
- }
- }
Step 10
Create another Java class file JsonParser with the following:
- package com.example.adddatatotheserver;
- import java.io.BufferedReader;
- import java.io.IOException;
- import java.io.InputStream;
- import java.io.InputStreamReader;
- import java.io.UnsupportedEncodingException;
- import java.util.List;
- import org.apache.http.HttpEntity;
- import org.apache.http.HttpResponse;
- import org.apache.http.NameValuePair;
- import org.apache.http.client.ClientProtocolException;
- import org.apache.http.client.entity.UrlEncodedFormEntity;
- import org.apache.http.client.methods.HttpGet;
- import org.apache.http.client.methods.HttpPost;
- import org.apache.http.client.utils.URLEncodedUtils;
- import org.apache.http.impl.client.DefaultHttpClient;
- import org.json.JSONException;
- import org.json.JSONObject;
- import android.util.Log;
- public class JSONParser
- {
- static InputStream inputStream = null;
- static JSONObject jObject = null;
- static String jsonString = "";
- // constructor
- public JSONParser()
- {
- }
- // function get json from url
- // by making HTTP POST or GET mehtod
- public JSONObject makeHttpRequest(String url, String method, List < NameValuePair > params)
- {
- // Making HTTP request
- try
- {
- // check for request method
- if (method == "POST")
- {
- // request method is POST
- // defaultHttpClient
- DefaultHttpClient client = new DefaultHttpClient();
- HttpPost post = new HttpPost(url);
- post.setEntity(new UrlEncodedFormEntity(params));
- HttpResponse httpResponse = client.execute(post);
- HttpEntity entity = httpResponse.getEntity();
- inputStream = entity.getContent();
- }
- else if (method == "GET")
- {
- // request method is GET
- DefaultHttpClient httpClient = new DefaultHttpClient();
- String paramString = URLEncodedUtils.format(params, "utf-8");
- url += "?" + paramString;
- HttpGet httpGet = new HttpGet(url);
- HttpResponse httpResponse = httpClient.execute(httpGet);
- HttpEntity httpEntity = httpResponse.getEntity();
- inputStream = httpEntity.getContent();
- }
- }
- catch (UnsupportedEncodingException e)
- {
- e.printStackTrace();
- }
- catch (ClientProtocolException e)
- {
- e.printStackTrace();
- }
- catch (IOException e)
- {
- e.printStackTrace();
- }
- try
- {
- BufferedReader bufferedReader = new BufferedReader(new InputStreamReader(
- inputStream, "iso-8859-1"), 8);
- StringBuilder stringBuilder = new StringBuilder();
- String line = null;
- while ((line = bufferedReader.readLine()) != null)
- {
- stringBuilder.append(line + "\n");
- }
- inputStream.close();
- jsonString = stringBuilder.toString();
- }
- catch (Exception e)
- {
- Log.e("Buffer Error", "Error converting result " + e.toString());
- }
- Log.d("debug", "string: " + jsonString);
- // try parse the string to a JSON object
- try
- {
- jObject = new JSONObject(jsonString);
- }
- catch (JSONException e)
- {
- Log.e("JSON Parser", "Error parsing data " + e.toString());
- }
- // return JSON String
- return jObject;
- }
- }
Step 11
Android Manifest.Xml file
In the Android Manifest.xml file give the internet permission as in the following:
- <?xml version="1.0" encoding="utf-8"?>
- <manifest xmlns:android="http://schemas.android.com/apk/res/android"
- package="com.example.adddatatotheserver"
- android:versionCode="1"
- android:versionName="1.0" >
- <uses-sdk
- android:minSdkVersion="8"
- android:targetSdkVersion="18" />
- <application
- android:allowBackup="true"
- android:icon="@drawable/ic_launcher"
- android:label="@string/app_name"
- android:theme="@style/AppTheme" >
- <activity
- android:name="com.example.adddatatotheserver.MainActivity"
- android:label="@string/app_name" >
- <intent-filter>
- <action android:name="android.intent.action.MAIN" />
- <category android:name="android.intent.category.LAUNCHER" />
- </intent-filter>
- </activity>
- </application>
- <uses-permission android:name="android.permission.INTERNET"></uses-permission>
- <uses-permission android:name="android.permission.ACCESS_NETWORK_STATE" />
- </manifest>
Step 12
Enter data to send
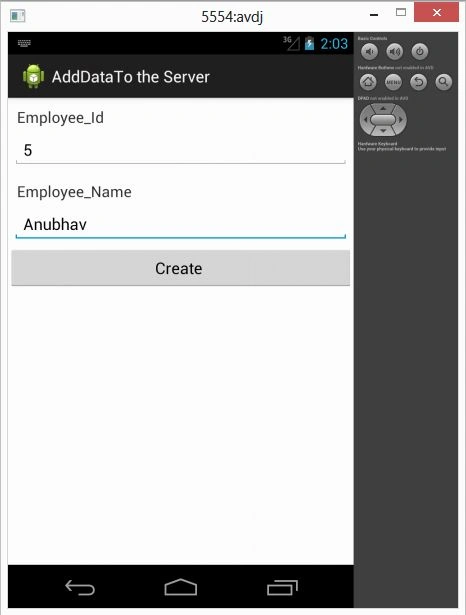 Progress
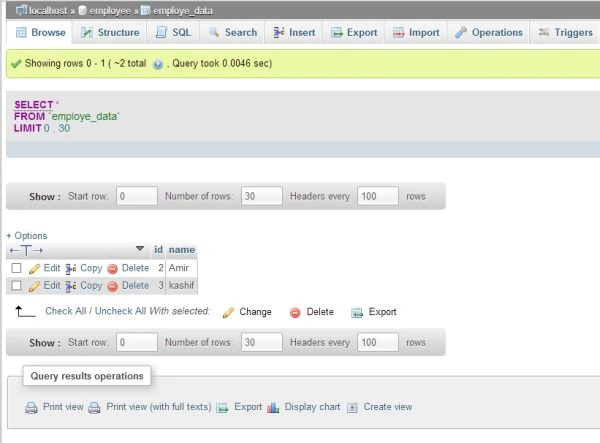
Data on the Server
Angus CameronPosted Dec 16, 2020, 4:37 AM
Amir, this is a very helpful article but there is some detail I would like please, eg the field names you have created or the SQL query. Also the names of all the php files and the xml file. Finally the location of the php files. Thanks
Safdar IqbalPosted Feb 16, 2017, 2:04 PM
You are using xamp server , but i have make windows form .net application , then how can i make connection?