This article has been excerpted from book "Graphics Programming with GDI+".
We just saw how to print text files. Now let's talk about how to print images and graphics items such as lines, rectangle, and ellipses. You probably have a pretty good idea how printing works. It's all in the magic of the Graphics object available through PrintPageEventArgs. Once we have a printer's Graphics object, we call draw and fill methods, to print graphics items. In this section we will create an application that shows how to print simple graphics objects, including lines, curves, rectangles, and images.
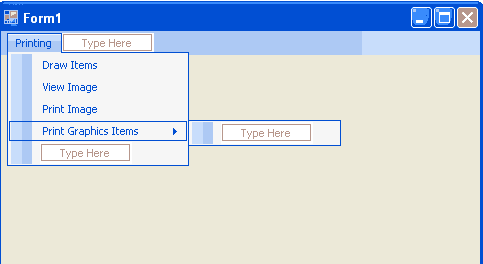
Again, we create a Windows application and add a main menu to the form. We add four menu items to the main menu. The final form looks like Figure 11.13. As you might guess, the Draw Items and View Image menu items will draw graphics objects and show an image, respectively. The Print Image and Print Graphics Items menu items will print the image and the graphics items, respectively.
The next step is to add a reference to the System.Drawing.Printing namespace.
Printing Graphics Items
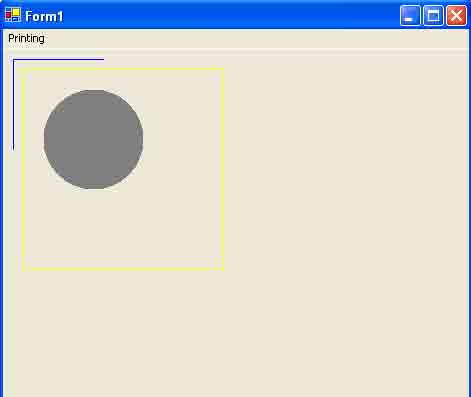
Let's write code for the menu items. We'll do the Draw Items first, as in Listing 11.24. This menu item draws two lines, a rectangle, and an ellipse. First we create a Graphics object using the Form.CreateGraphics method and call the DrawLine, DrawRectangle, and FillEllipse methods.
LISTING 11.24: Drawing graphics items
private void DrawItems_Click(object sender, System.EventArgs e)
{
//Create a Graphics object
Graphics g = this.CreateGraphics();
g.Clear(this.BackColor);
//Draw graphics items
g.DrawLine(Pens.Blue, 10, 10, 10, 100);
g.DrawLine(Pens.Blue, 10, 10, 100, 10);
g.DrawRectangle(Pens.Yellow, 20, 20, 200, 200);
g.FillEllipse(Brushes.Gray, 40, 40, 100, 100);
//Dispose of object
g.Dispose();
}

FIGURE 11.13: A graphics-printing application
Figure 11.14 shows the output from Listing 11.24.
Now let's write code for Print Graphics Items. We want to print the output shown in Figure 11.14. We create a PrintDocument object, and add a PrintPage event handler, and call the Print method. The PrintPage event handler draws the graphics items.
Listing 11.25 contains two methods. The PrintGraphicsItems_Click method is a menu click event handler that creates a PrintDocument object, sets its PrintPage event, and calls the Print method. The second method PrintGraphicsItemsHandler, simply calls the draw and fill methods of PrintPageEventArgs.Graphics.

FIGURE 11.14 Drawing simple graphics items
LISTING 11.25: Printing graphics item
private void PrintGraphicsItems_Click(object sender, System.EventArgs e)
{
//Create a PrintDocument object
PrintDocument pd = new PrintDocument();
//Add PrintPage event handler
pd.PrintPAge += new PrintPageEventHandler
(this.PrintGraphicsItemsHandler);
//Print
pd.Print();
}
private void PrintGraphicsItemHandler(object sender, PrintPageEventArgs ppeArgs)
{
//Create a printer Graphics object
Graphics g = ppeArgs.Graphics;
//Draw graphics items
g.DrawLine(Pens.Blue, 10, 10, 10, 100);
g.DrawLine(Pens.Blue, 10, 10, 100, 10);
g.DrawRectangle(Pens.Yellow, 20, 20, 200, 200);
g.FillEllipse(Brushes.Gray, 40, 40, 100, 100);
}
If you run the application and check on Print Graphics Items, the printer will generate output that looks like Figure 11.14.
Printing Images
Similarly, the DrawImage method of PrintPageEventArgs.Graphics prints an image to the printer, which then prints that image onto paper.
Before we add code for the View Image menu item, we need to add two application scope variables as follows:
private Image curImage = null;
private string curFileName = null;
View Image lets us browse for an image and then draws it on the form. As Listing 11.26 shows, we create a Graphics object using Form.CreateGraphics. Then we use OpenFileDialog to browse files on the system. Once a file has been selected, we create the Image object by using Image.FromFile, which takes the file name as its only parameter. Finally, we use DrawImage to draw the image.
LISTING 11.26: Viewing an image
private void ViewImage_Click(object sender, System.EventArgs e)
{
//Create a Graphics object
Graphics g = this.CreateGraphics();
g.Clear(this.BackColor);
//Call OpenFileDialog, which allows to browse images
OpenFileDialog openDlg = new OpenFileDialog();
openDlg Filter =
"All Image files | *.bmp; *.gif; *.jpg; *.ico;" +
"*.emf, .wmf | Bitmap files (.bmp; *.gif; *.jpg;" +
"*.ico) | *.bmp; *.gif; *.jpg; *.ico |" +
"Meta Files (*.emf; *.wmf) | *.emf; *.wmf";
string filter = openDlg.Filter;
//Set InitialDirectory, Title, and ShowHelp properties
openDlg.InitialDirectory =
Environment.CurrentDirectory;
OpenDlg.Title = "Open Image File";
oepnDlg.ShowHelp = true;
//If OpenFileDialog is OK
if (openDlg.ShowDialog() == DislogResult.OK)
{
//Get the file name
curFileName = openDlg.FileName;
//Create an Image object from file name
curImage = Image.FromFile(curFileName);
}
if (curImage != null)
{
//Draw image using the DrawImage method
g.DrawImage(curImage, AutoScrollPosition.X,
AutoScrollPosition.Y,
curImage.Width, curImage.Height);
}
//Dispose of object
g.Dispose();
}
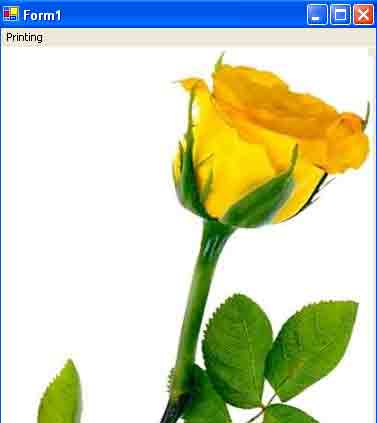
Now we run the application and select an image. Figure 11.15 shows the output.
Now let's write a Print Image item click handler. This option prints an image that we're currently viewing on the form. As in the previous example, we create a PrintDocument, add a PrintPage event handler, and call the Print method. This time, however, instead of using the DrawRectangle and DrawLine methods, we us the DrawImage method, which draws the image.
As Listing 11.27 shows, our code creates a PrintDocument object, sets the PrintPage event of PrintDocument and the PrintPage event handler, and calls PrintDocument.Print. The PrintPage event handler calls DrawImage.

FIGURE 11.15: Viewing an image
LISTING 11.27: Printing an image
private void PrintImage_Click(object sender, System.EventArgs e)
{
//Create a PrintDocument object
PrintDocument pd = new PrintDocument();
//Add the PrintPage event handler
pd.PrintPage += new PrintPageEventHandler
(this.PrintImageHandler);
//Print
pd.Print();
}
private void PrintImageHandler(object sender, PrintPageEventArgs ppeArgs)
{
//Get the Graphics object from PrintPageEventArgs
Graphics g = ppeArgs.Graphics;
//If Graphics object exists
if (curImage != null)
{
//Draw image using the DrawImage method
g.DrawImage(curImage, 0, 0,
curImage.Width, curImage.Height);
}
}
If we run the application, open and view a file, and click the Print Image menu item, we get a printout that looks like Figure 11.15.
Conclusion
Hope the article would have helped you in understanding image class methods and properties in GDI+. Read other articles on GDI+ on the website.
 |
This book teaches .NET developers how to work with GDI+ as they develop applications that include graphics, or that interact with monitors or printers. It begins by explaining the difference between GDI and GDI+, and covering the basic concepts of graphics programming in Windows. |