Using HTML Helpers
HTML Helpers are used to create HTML markup to create HTML Controls. HTML Helper is just a method that returns an HTML string. There are three kinds of HTML Helpers:
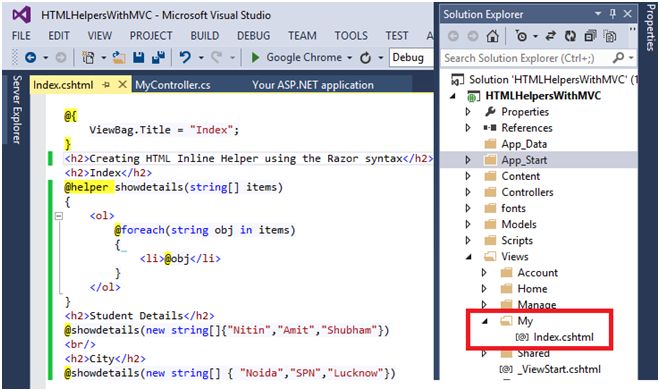
- Inline HTML Helpers: These are created by the @helper tag of Razor Syntax. These Helpers can be reused only on the same view.
- Built-In HTML Helpers: These HTML Helpers are extension methods on the HtmlHelper class. These are categorized in to three parts:
- Standard HTML Helpers: These helpers are used to create the most common types of HTML elements.
- Strongly Typed HTML Helpers: The HTML is generated through Model Class Properties. These helpers work on lambda expression.
- Templated HTML Helpers: These helpers defines what HTML elements are required to render based on properties of our Model class.
- Standard HTML Helpers: These helpers are used to create the most common types of HTML elements.
- Custom HTML Helpers: You can also create your own custom helper methods by creating an extension method on the HtmlHelper class or by creating static methods within a utility class.
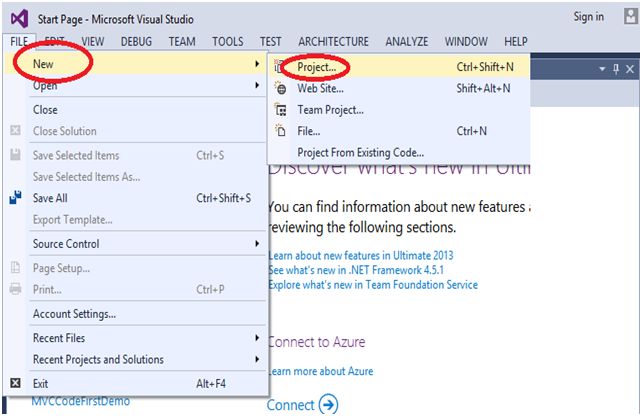
Step 1: Open the Visual Studio and select the “File” menu, New, then Project.
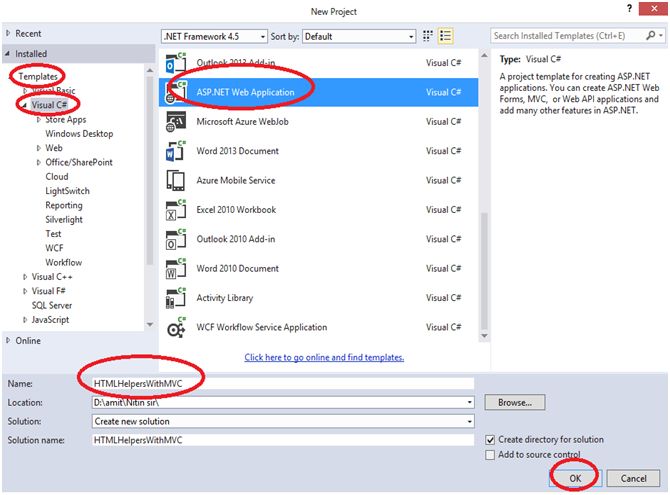
In the following figure select “Templates”, Visual C#, ASP.NET Web Application, and here I gave the name of project as “HTMLHelpersWithMVC.”
- You can give the project name as you wish.
- And then click on “OK” button.
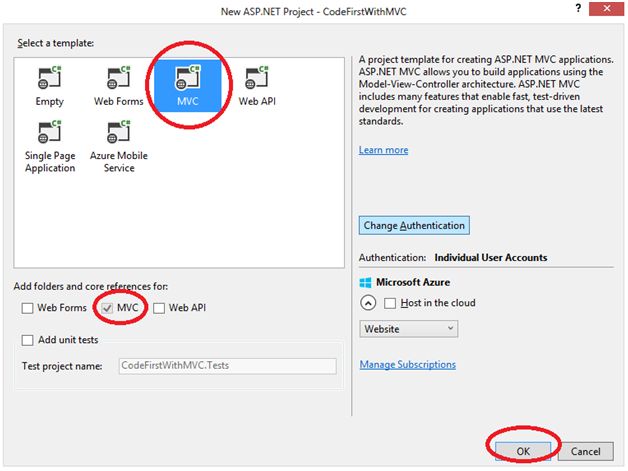
- In the following figure as you can see the default MVC will be selected, select MVC and then click “OK” button.
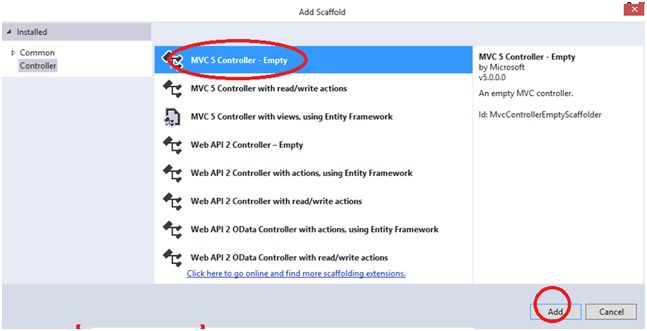
- First, I want to create a Controller, so right click on "Controllers" folder and click on “Add”, then click on to Controller, to add a Controller.

- Select the MVC 5 Controller - Empty.
- Click on to the “Add” button to add a Controller.
- Here I gave the “MyController” name to my Controller.
- Click on to the “Add” button.
- You can give the Controller name as you wish.

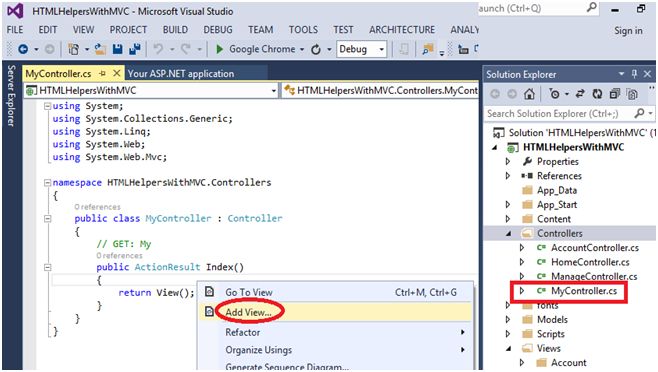
- In the “MyController”, right click near return view(); to add a view.
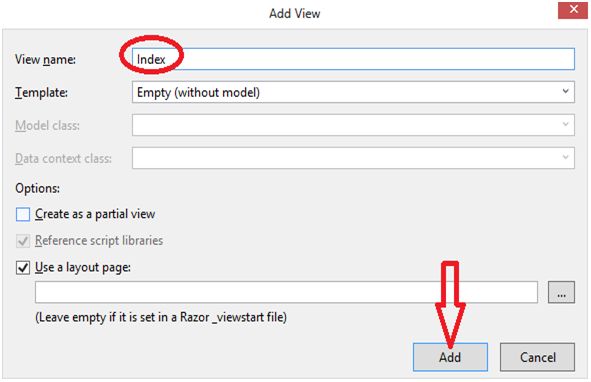
- In the following figure, the view name is by default Index, and Templates name is by default Empty (without model).
- Click on “Add” button to add a view.
- Here is the first of all we have taken in the Inline HTML Helpers example, where we can show the items in Inline format.
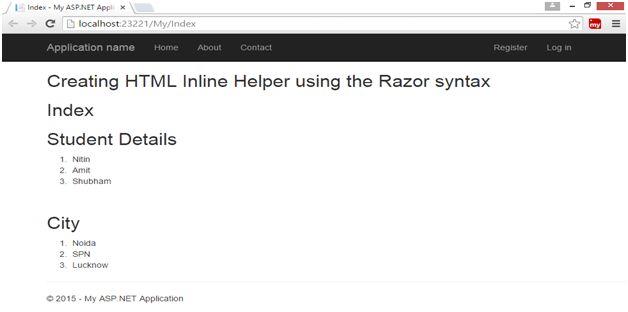
- This is the output of Inline HTML Helpers:
- Now I’m going to create Built-In Type HTML Helpers:
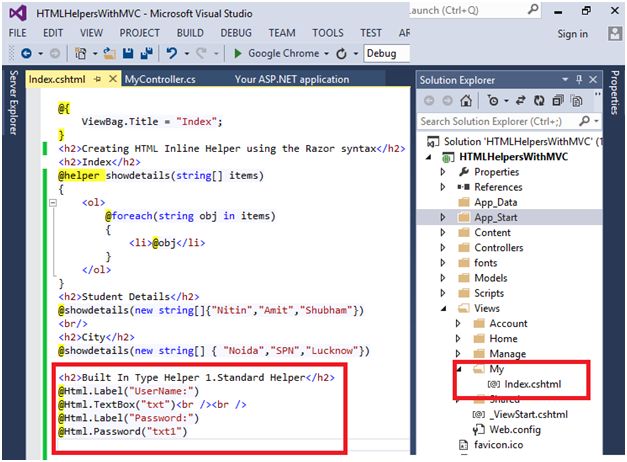
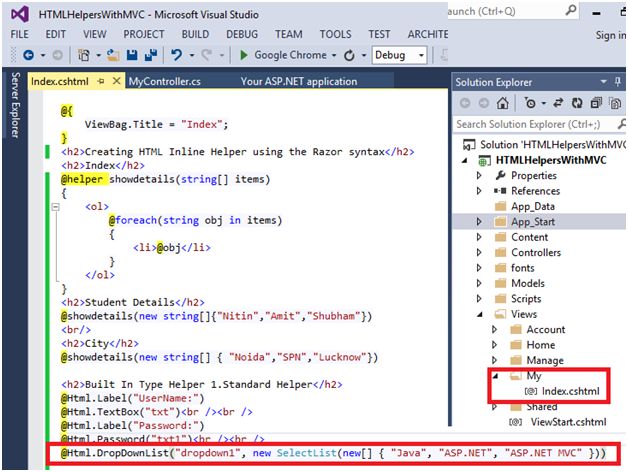
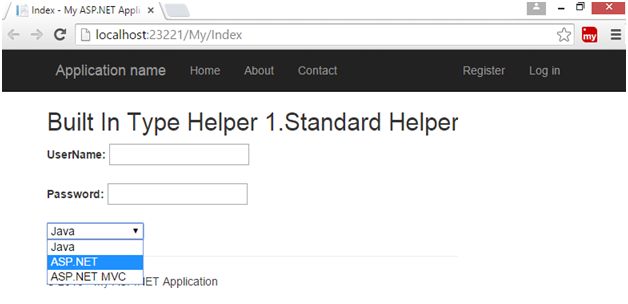
- Firstly, I’m using the Standard HTML Helpers like HTML text boxes, Password, Dropdown list, etc.

- Now I’m going to create Strongly Typed HTML Helpers-
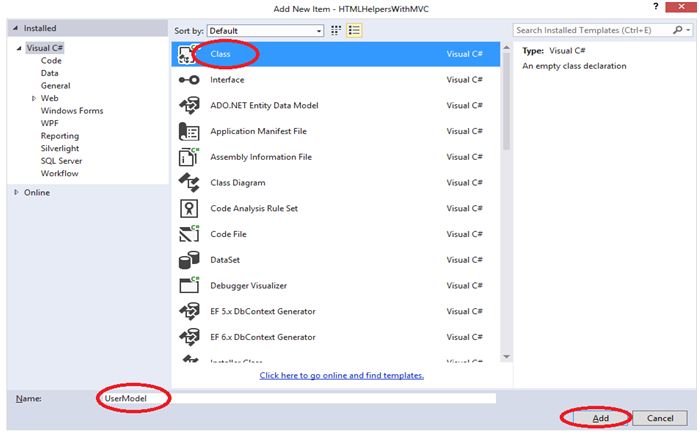
- For this I need to create a Model using a Model folder, right click on to Models folder, click on “Add” button and add a class.
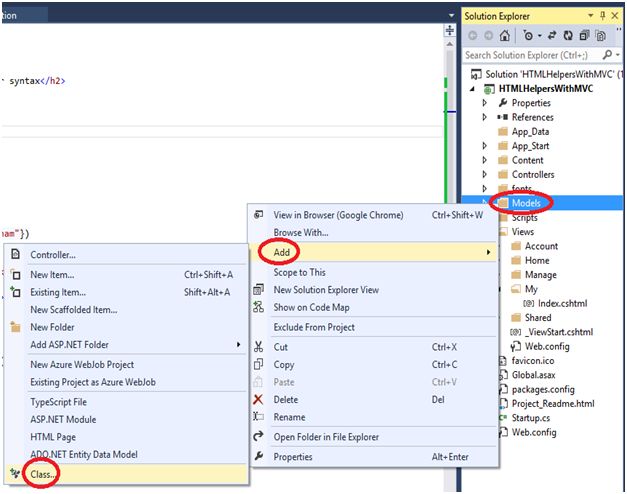
- Select the class name and give the name of this class “UserModel”.
- Click on to the “Add” button.
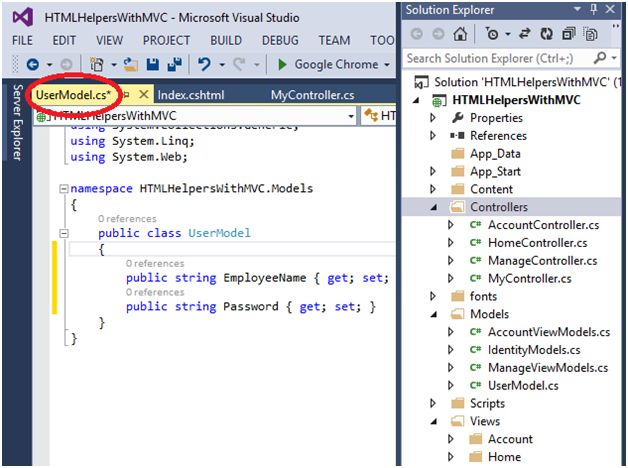
- In the Model Class, we have to create two properties, EmployeeName and Password.
To demonstrate, I want to add a new Controller, so right click on the Controllers folder and click on Add. Click on Controller to add a new Controller.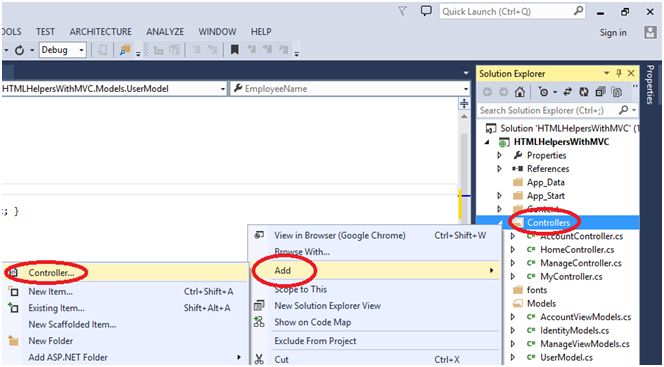
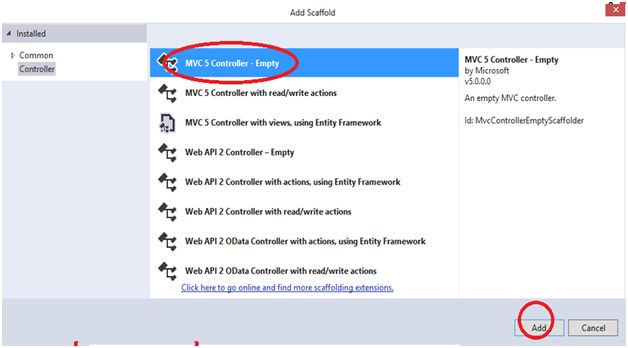
- Select the MVC 5 Controller - Empty.
- Click on “Add” button to add a Controller.
- So give the Controller name “SignInController”.
- Click on “Add” button.

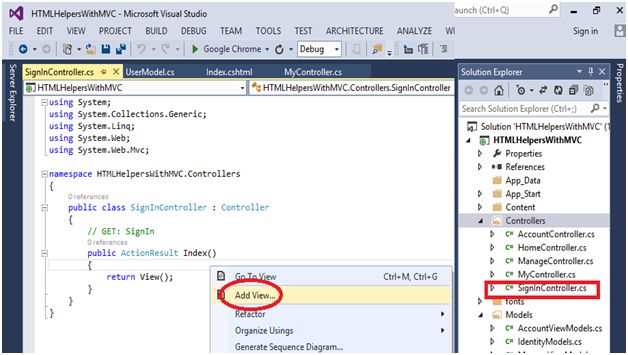
- Here we need to create a particular view, right click near return view(); and click “Add View”.
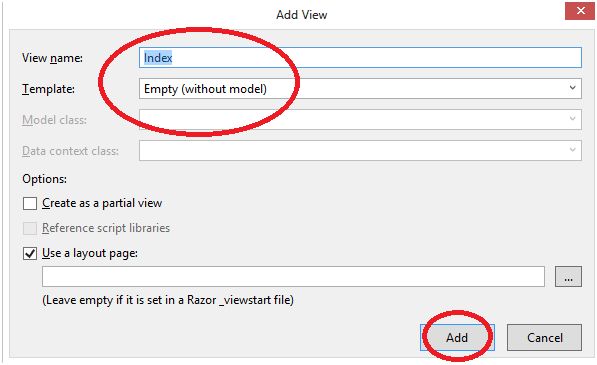
- The View name by default is Index and Template name by default is Empty.
- Click on Add button.
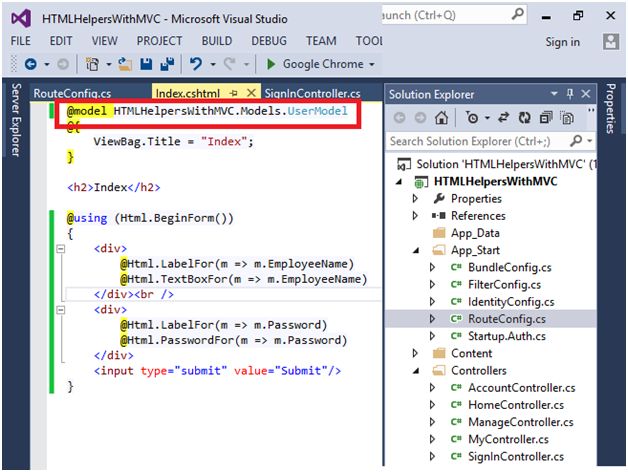
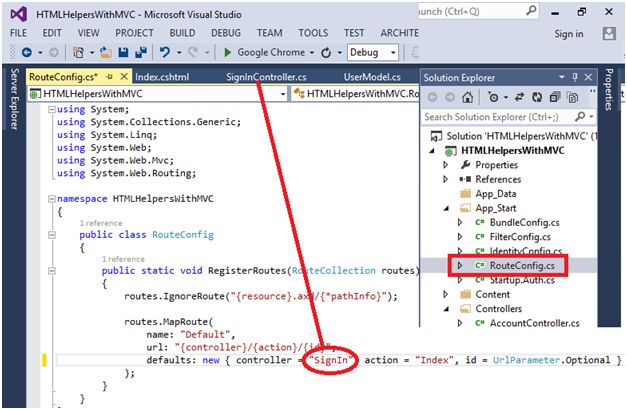
- In the RouteConfig.cs, change the Controller name, write the “SignIn”.
- Now run the Project, press F5 key to run the project.

- Now I’m going to create Templated HTML Helpers-
- In MyController.cs, right click near return view(); to add a view.
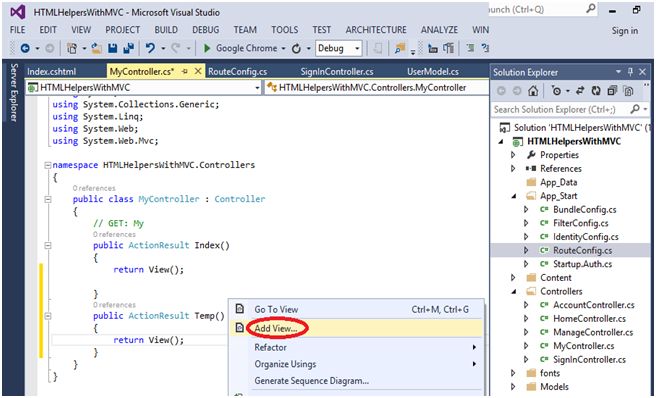
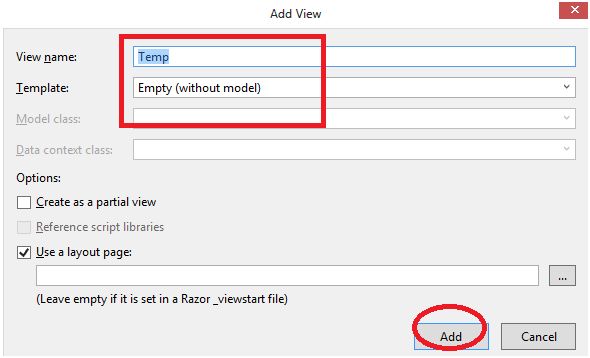
- The View Name is by default “Temp” and Template Name is by default Empty.
- Click on to the “Add” button.
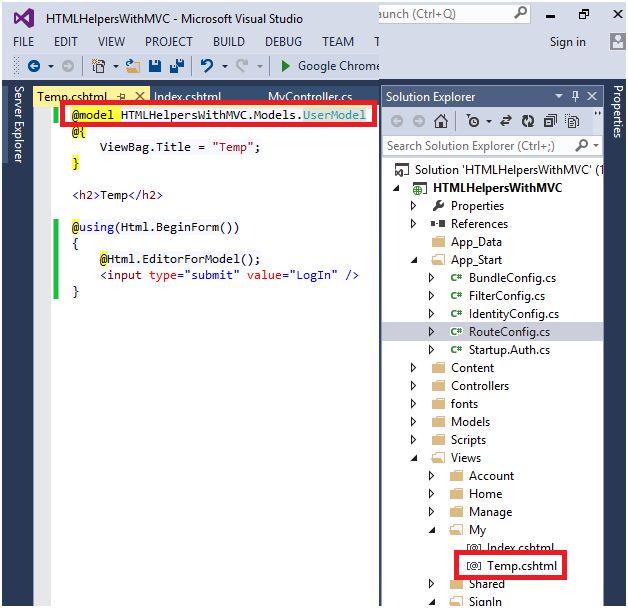
- Change the Controller and action name according to the View and Controller name in the RouteConfig.cs file.
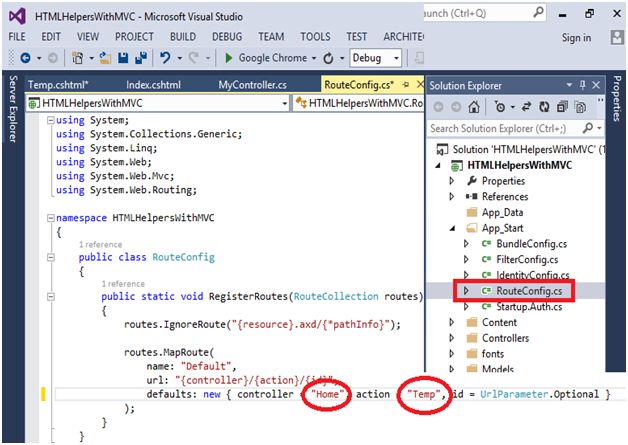

- Now I’m going to create Custom HTML Helpers:
- First of all we need to create a Controller, so right click on Controllers folder, select “Add” and then Controller to add a Controller.
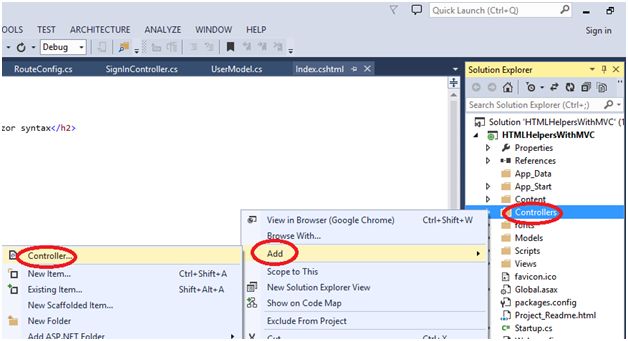
- Select the MVC 5 Controller - Empty.
- Click on “Add” button to add a Controller.
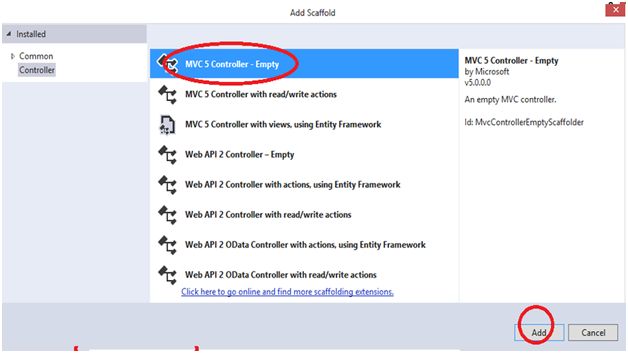
- So give the Controller name “CustomController”.
- Click on “Add” button.

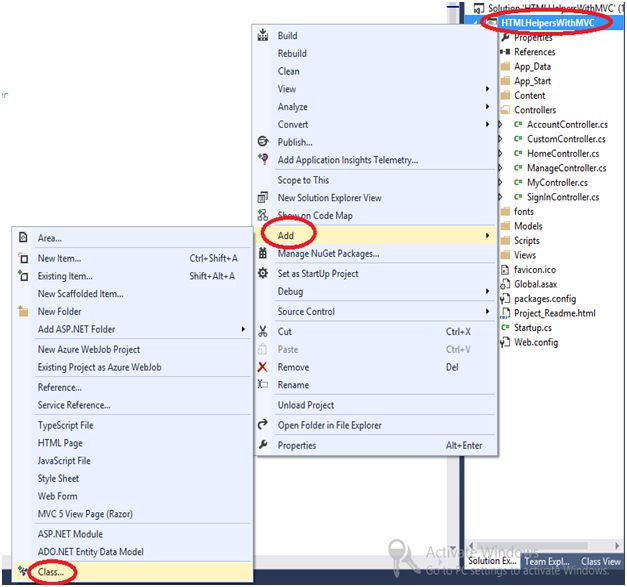
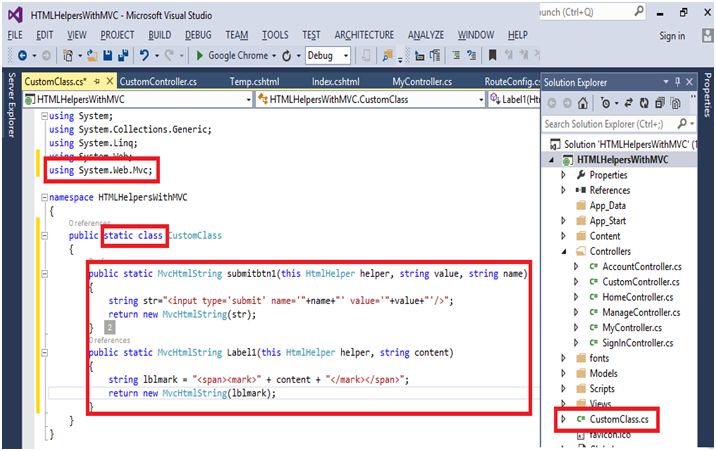
- Now we need to create a class.
- Right click on to the Project and choose “Add” and then click on “class” to add a Class.
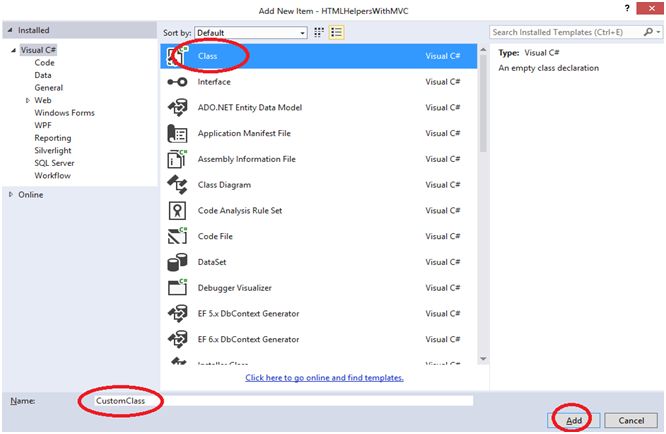
- Select the Class and give the “CustomClass” name of the class.
- Click on to the “Add” button.
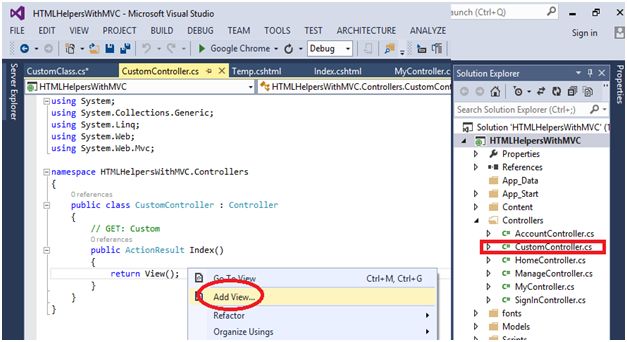
- In the “CustomController.cs”, we need to add a View, so right click near view and click on “Add View”.
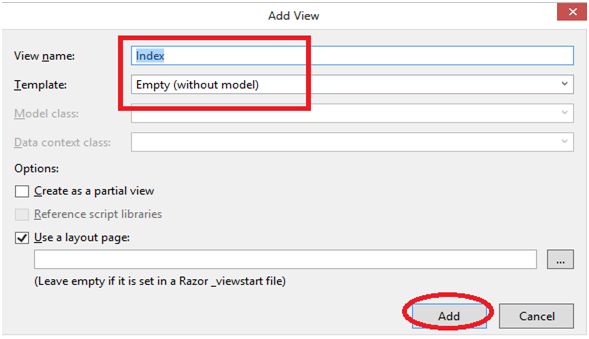
- Click on the “Add” button.
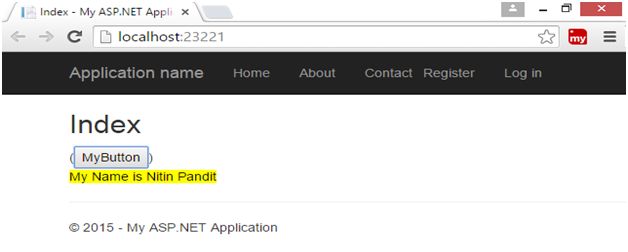
- In the view page take a button and a Label.

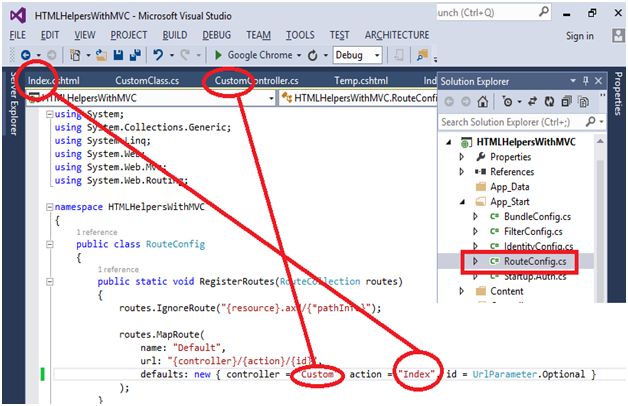
- In the RouteConfig.cs, change the name of Controller and action.
- Run the project by pressing F5.
- The final output is here.
Thanks for reading this article and stay connected with my articles.
Read more articles on ASP.NET MVC 5:
Author
Nitin Pandit
10
66.4k
31.5m
