Publish ASP.NET App on IIS
In previous parts of this series, we learned how to create a simple ASP.NET MVC 5.0 Web application using Visual Studio.
Now let's publish our app on IIS and run it.
So let's start.
We have an ASP.NET MVC 5.0 application in Visual Studio 2015 so open the web site solution and see, we already have a controller and view that is already running but not on IIS, running on IISExpress.

And this is the view output in the browser.

The URL is http://localhost:6339/Home/Index. It can be anything because it's running by IISExpress. That is, it allows you to run each website on a unique port number. If you want to see that then you may open the IISExpress Taskbar.

So now if you want to publish your web site to IIS (Localhost) then check your Visual Studio to ensure it is running in Administrator mode because we can use IIS only in Administrator mode. If it is not running in Administrator mode then restart your Visual Studio to “Run as Administrator” and open your existing website.

Now open Solution Explorer and right-click on the project file and click on Publish.

In the new window there will be three options to publish a website.
Microsoft Azure Website
We can use this option if we want to publish my website directly to a Microsoft Windows Azure Cloud Server as a Web App. We'll see this option in the next article how to publish on Windows Azure.
Import
We can use this option if we have directly a “.publishsettings” extension file with all the settings to define the server IP address and all the required settings for a web site. Since we already have a web app on Windows, download the publish settings file and import that file into this window and just publish it so there is no need to define anything more, just click on publish after selecting that file and use it from anywhere.
Custom
We'll use this option when we need to define all the server publish settings manually, like Server Name, website name, location and more.
So now select the last option from this window, that is Custom and click on "Next".

Provide a new Custom profile name for your website and click on OK.

Now there is some options that we need to fill in before publishing and also are required like first Server Name where you need to enter IP address or Server Name where we must publish and then fill in the website Name that is the required web URL for Web site on Localhost.
Before clicking on Next click on Validate Connection to test all the settings entered by you to verify whether they are correct.

After clicking on Validate Connection if all the settings are verified correctly it allows you to go Next so now click on the Next Button.

In the next setting section you will see the list local database in your ASP.Net web site but we don't have any local database in my project so now go to Next.

This is the last step to publish an the ASP.Net website, so this option is only used to select files that we must publish and also use to preview before publishing.
Now just click Start Preview option.

Then it'll show all the files from your solution that we must publish on the URL entered by you.
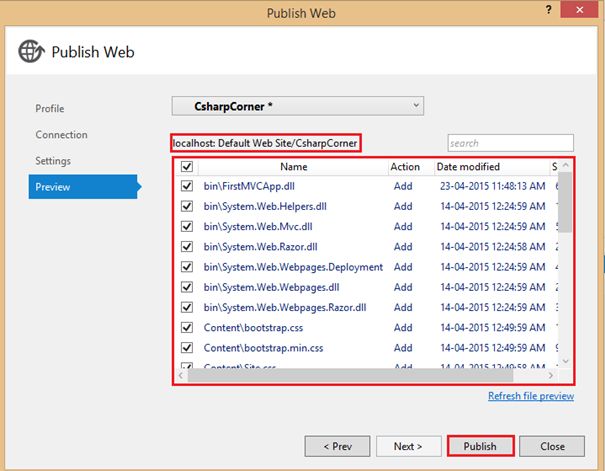
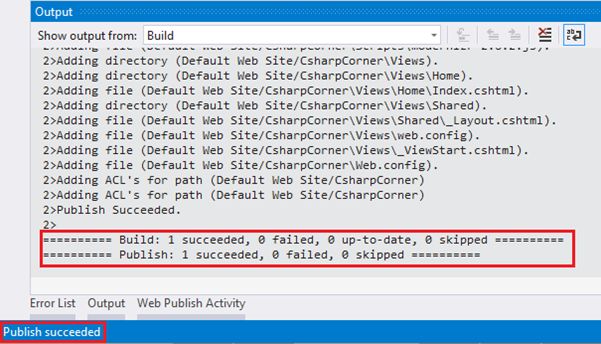
Finally when you click on Publish the build process will start then the publish process starts. You can see in the Output window if all will is fine the then you will get Publish Succeeded.
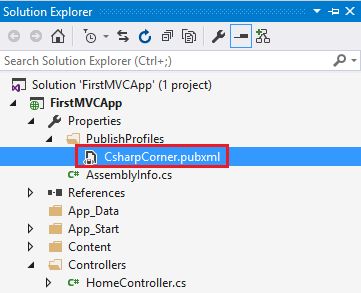
After a successfully published project you will get a new “.pubxml” extension file in your project solution that contains all the settings that are required to publish in XML format.
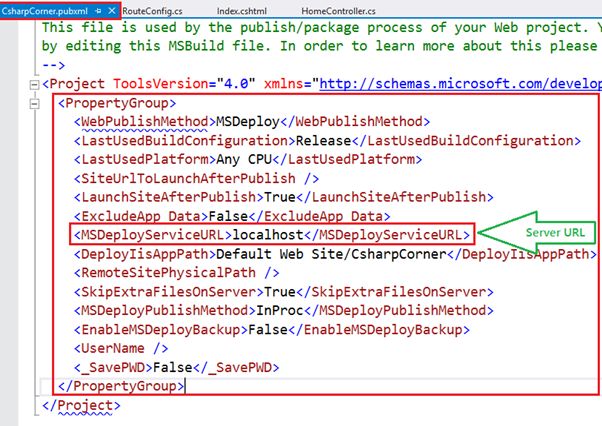
If you want to see that code so open it and see all the code.
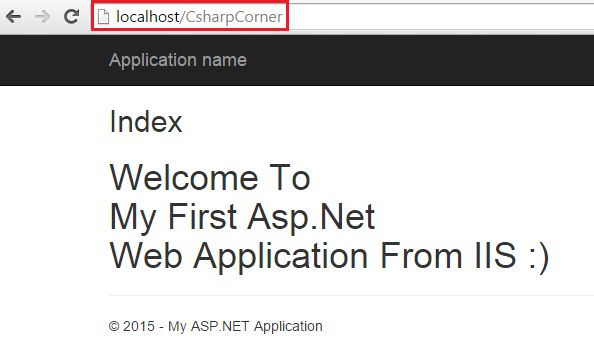
Now go to any browser that you have and enter the Website URL on which you publish on IIS.

Finally we get the same output that was on IISExpress.
Thanks guys. I hope you enjoyed my article, How to Publish an ASP.Net MVC 5.0 Application on IIS.
Thanks Again.
