Partial Views In ASP.NET MVC
What is a Partial Views in ASP.NET MVC
Partial view is just like a WEB User Control in ASP.NET web form technology.
Partial views are used to componentize Razor views and make them easier to build and update. Partial views can also be returned directly from controller methods. In this case, the browser still receives text/html content but not necessarily HTML content that makes up an entire page.
To create the reusable components we will use the Partial Views. There are two types of Partial Views:
1. Static Partial View: Static Partial View is used to render the static data.
- @{Html.RenderPartial(“_PartialView”);} - It will return the void. Displays the output on your view page.
- @Html.Partial(“_PartialView”); - It will return MVC HTML string, you can store it in a particular variable.
2. Dynamic Partial View: Dynamic Partial Views are used to implement the dynamic data.
- @{Html.RenderAction(“_PartialView”);} - It will return MVC HTML string.
- @Html.Action(“_PartialView”);
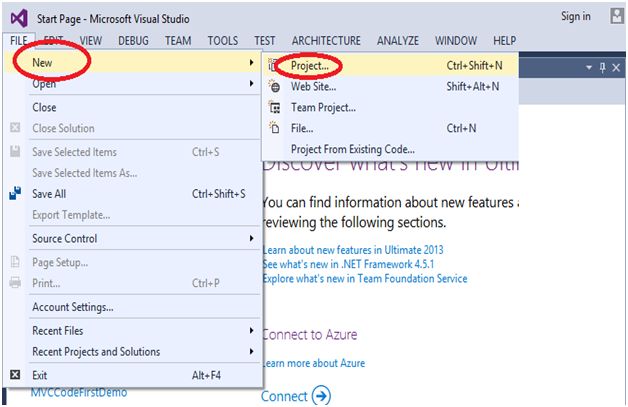
Open Visual Studio and select “FILE", New, then Project.
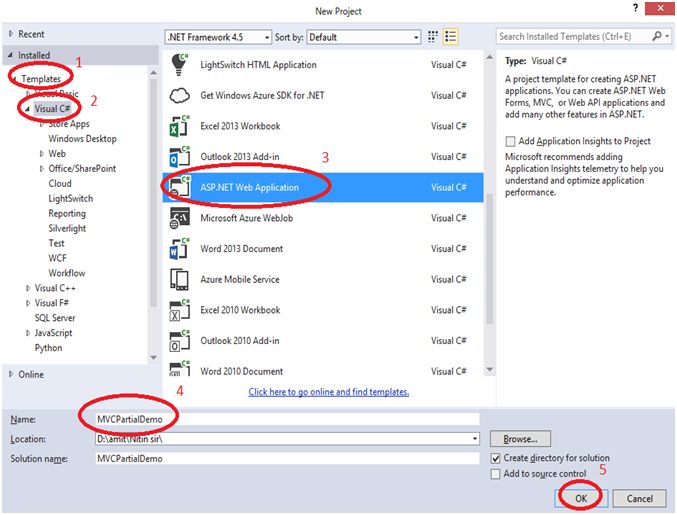
In the following figure select “Templates”, Visual C#, then ASP.NET Web Application, and here I gve the name of project “HTMLHelpersWithMVC”.
You can give the project name as you wish.
And then click on “OK” button.
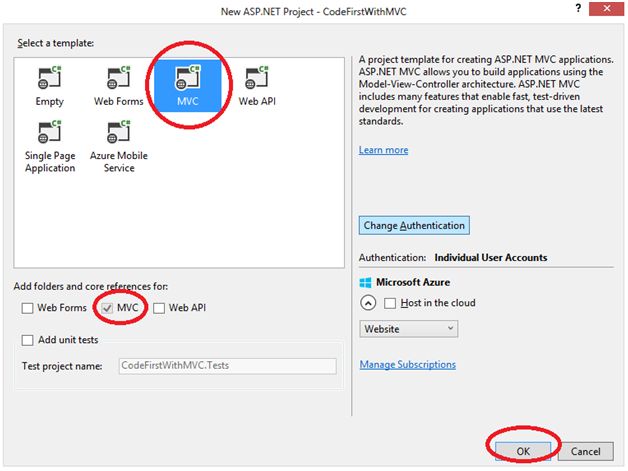
In the following figure as you can see the default MVC will be selected, select MVC and then click “OK” button.
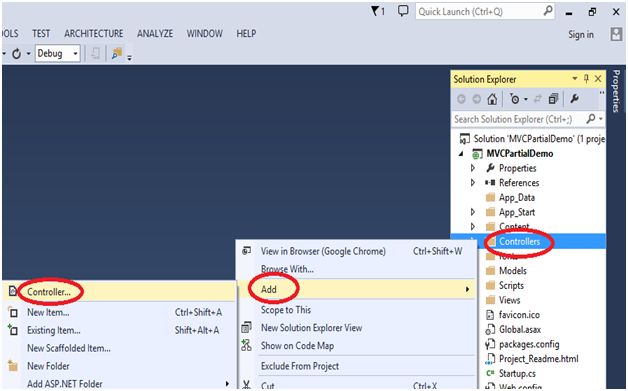
Firstly, I want to create a Controller, so right click on to "Controllers" folder and click on “Add” and then click on to Controller, to add a Controller.
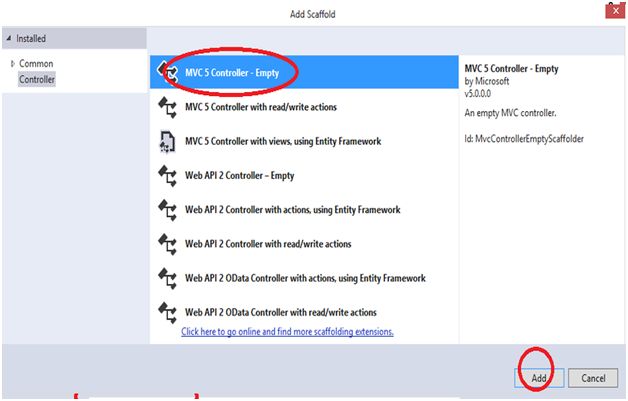
Select the MVC 5 Controller - Empty.
Click on “Add” button to add a Controller.
Here I gave “MyController” name to Controller; you can give any name to your Controller as you wish.
Click on “Add” button.

In the following figure, we have an Index(), so to add a view, right click on Index() and click on “Add View”.
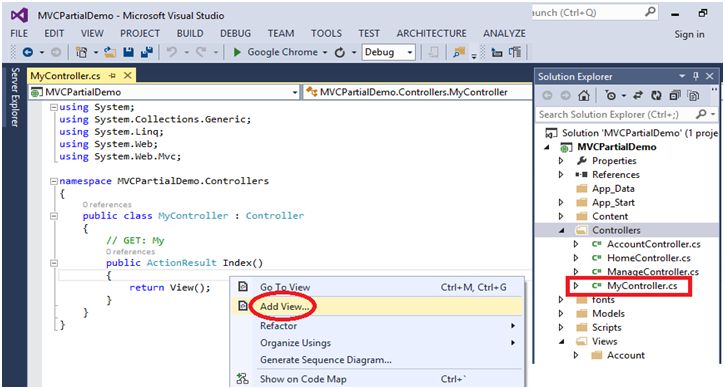
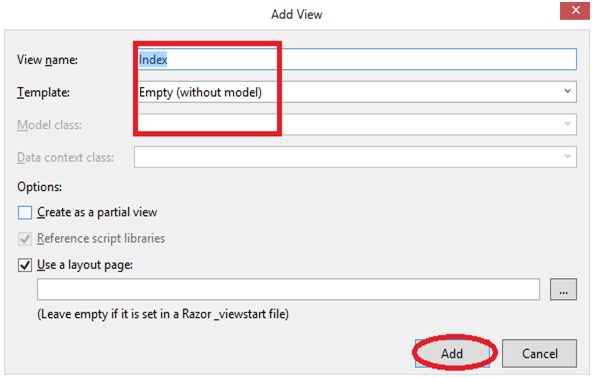
It’s a simple view, not a partial view.
Here, I’m creating the “Index” view.
Click on to the “Add” button.
In the shared folder we have a “_Layout.cshtml” which is a basic designing part.
Here, I’m going to implement a simple method of static partial view that is the HTML.renderPartial.
So just cut the footer section, displayed in red area.
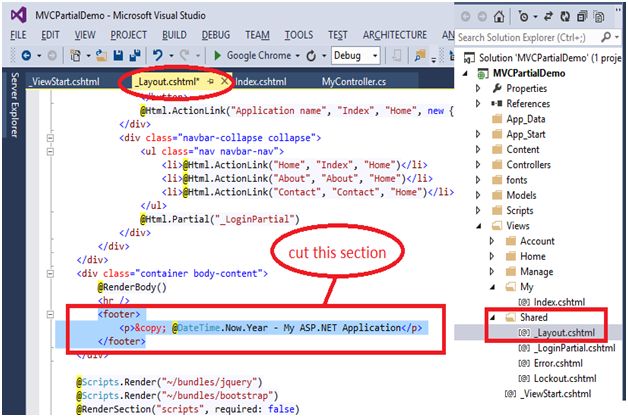
Here, I need to create a partial view for our above footer section.
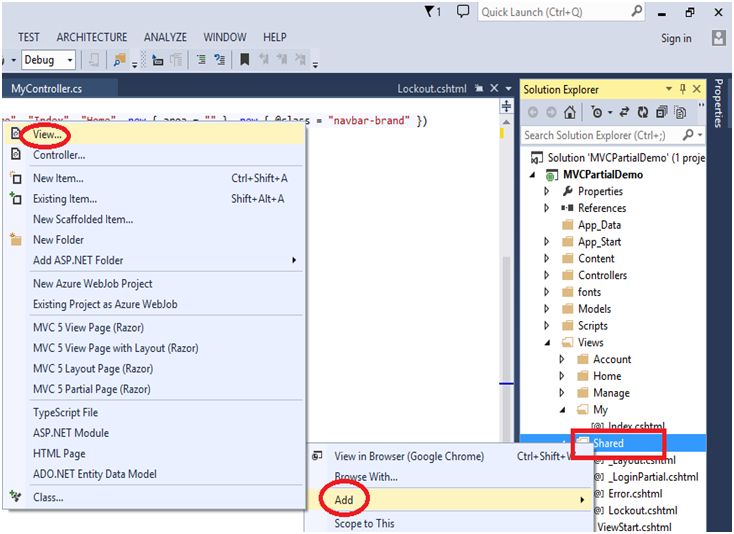
Right click on Shared folder, click ‘Add”, and then add “View”.
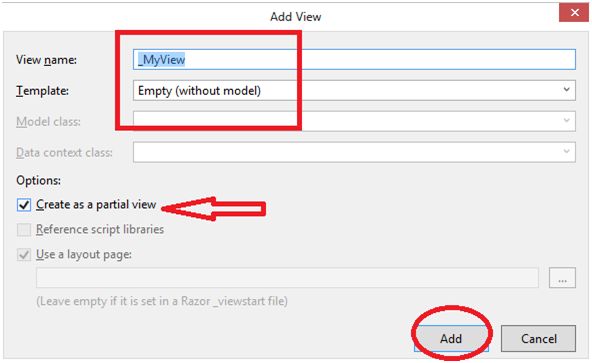
Here in the view name I have used (_), because it is a naming convention. Whenever you are going to add a partial view you must use (_).
Check the “Create as a partial view".
Click on “Add” button.
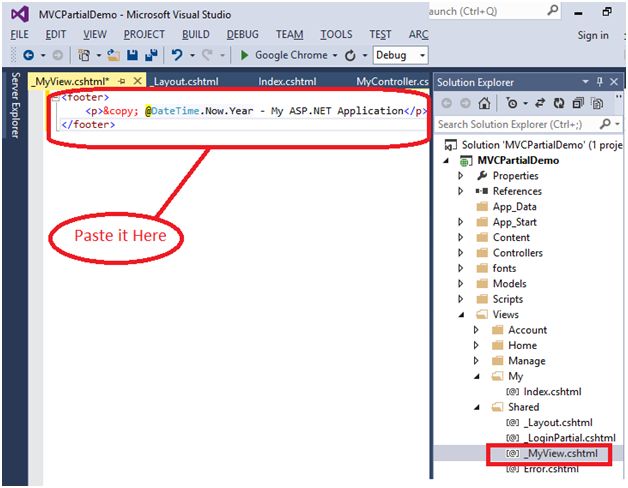
The cut section of footer above should be paste over here in the partial view page.
Cut the following section in the “_Layout.cshtml” page.
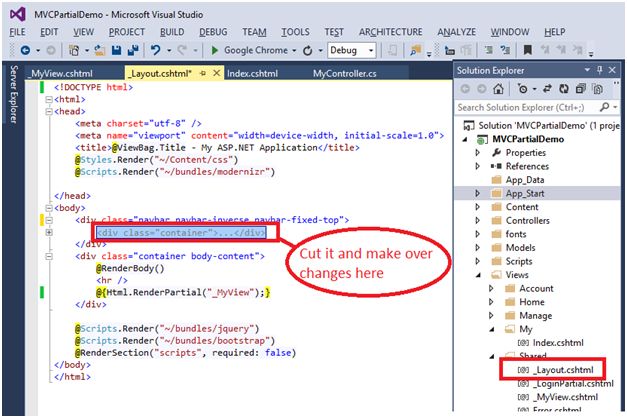
Here, I’m going to create another partial view.
Right click on “Shared” Folder, click on “Add” and then click on “View”, to add a view.
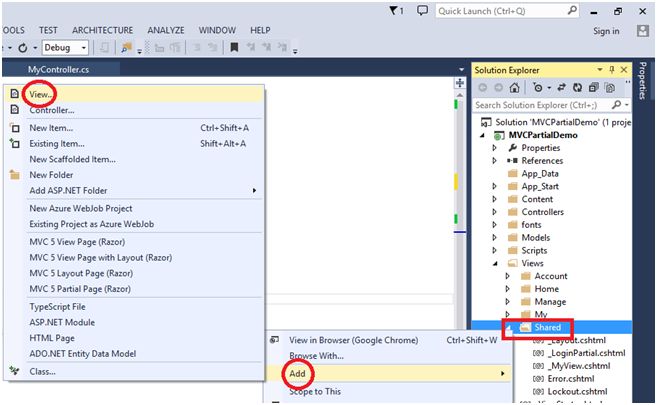
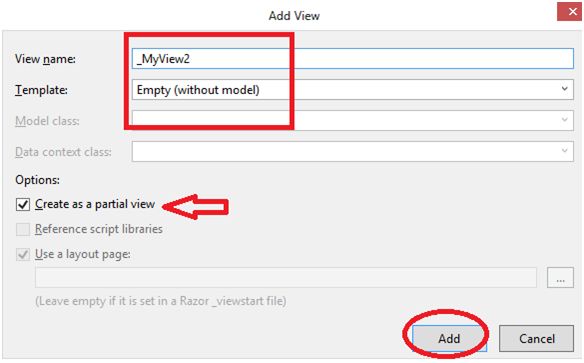
As I told, if we are adding a partial view then we use the (_), in the starting of the view name.
So, here I gave the “_MyView2” name to my view.
Click on “Add” button.
Now paste the above cut section in the following view:
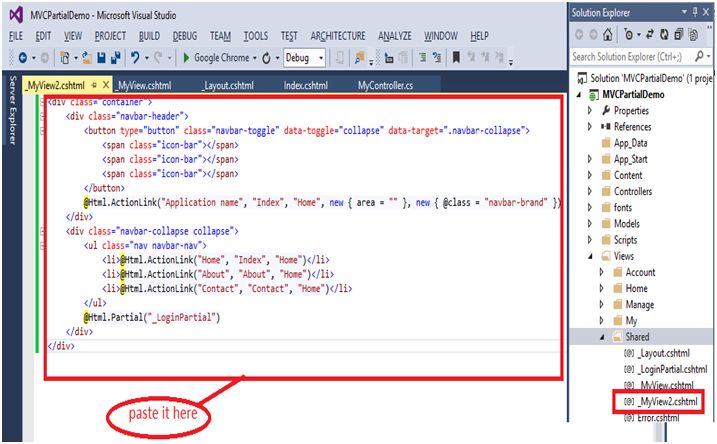
Make some changes over here, in my “_Layout.cshtml” page.

Press F5 to run the application.
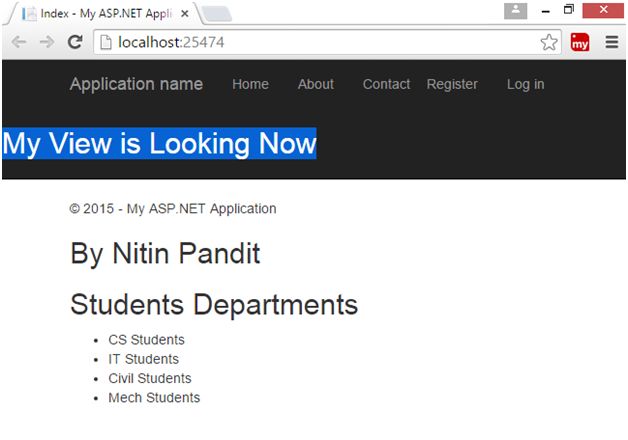
So here is the following output:
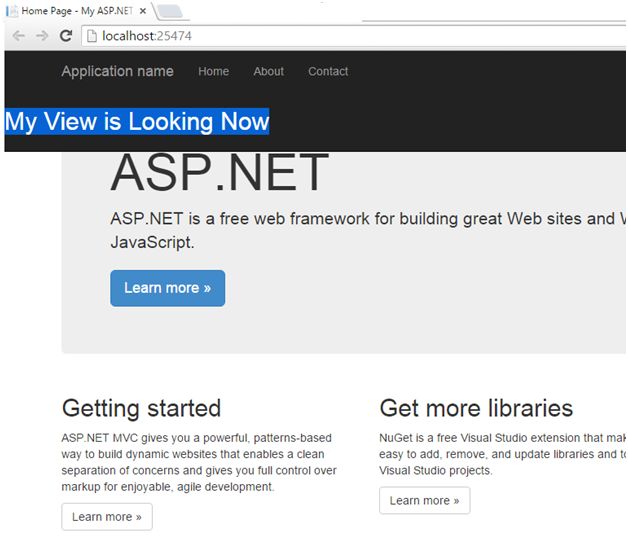
In this section we have learned about how we can use static part.
Now we are going to learn about the second part that is Dynamic Partial views.
Here, I’ m going to perform another return type that is the “PartialViewResult”. And my action name would be Students():
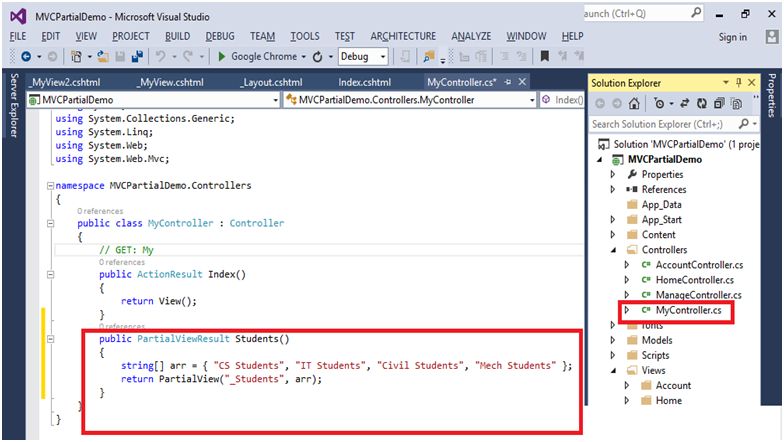
So, let me create another partial view.
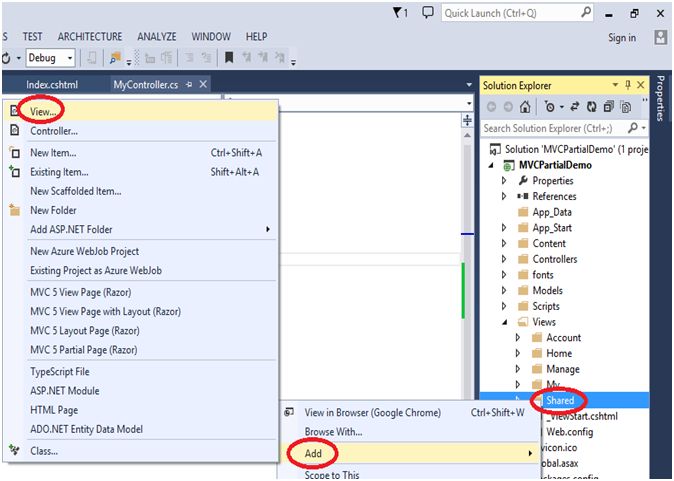
Right click on “Shared” folder, go to “Add”, and click on “View”.
My View name would be “_Students”.
Click on to “Add” to add a partial view with the name “_Students”.
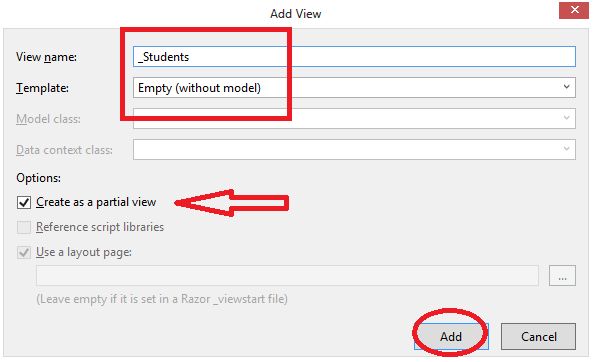
Now I want to render all the Students.
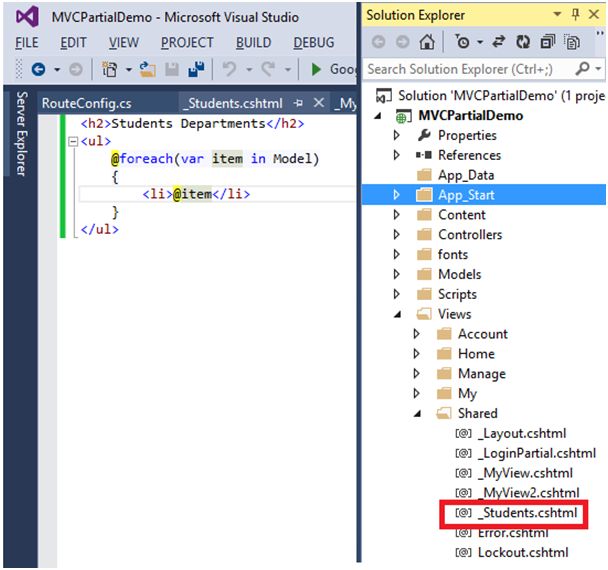
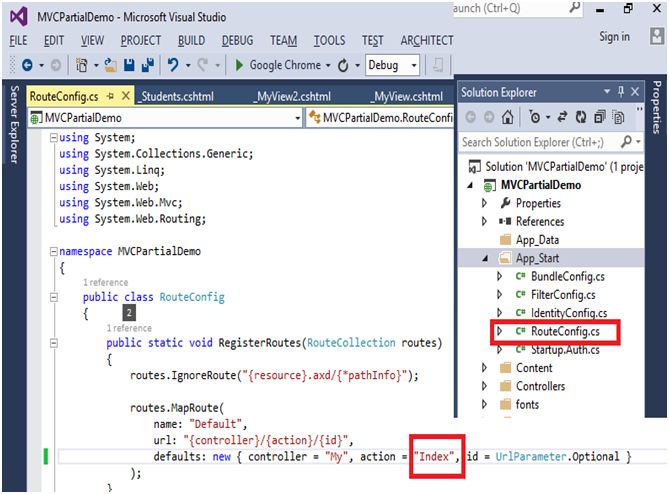
Now make changes in the “App_Start” folder in “RouteConfig.cs”.
The Controller name is “My” and the action would be “Students”.
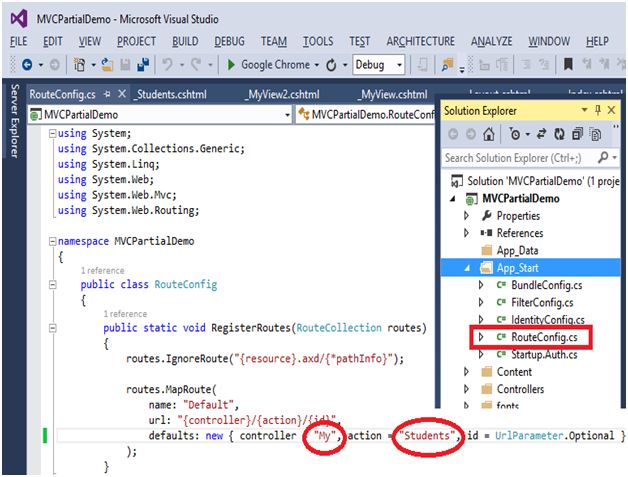
Now run the application, press F5 key.
We have the output.
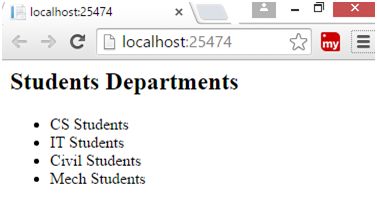
In this section we learned about how we can use render partial by using the render action method.
If you want to implement it in your “_Layout.cshtml”, then it is a very easy task.
Go to your “_Layout.cshtml” page and make changes:
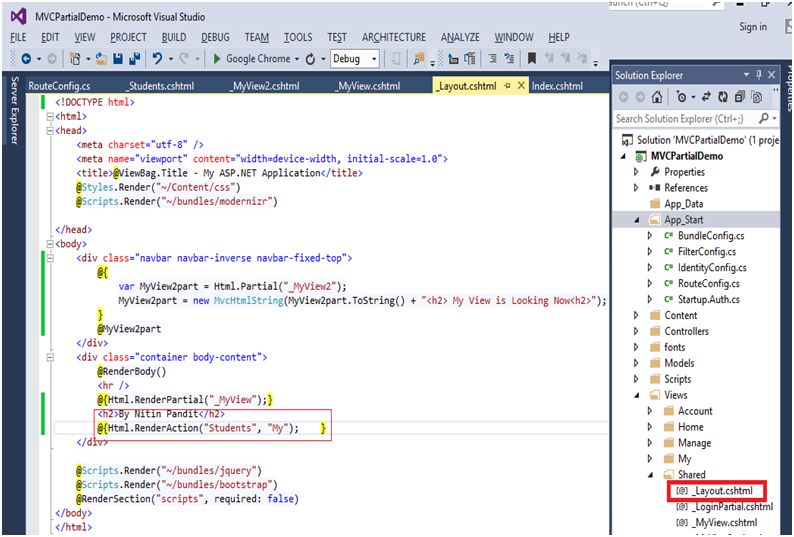
Change the action name in the “RouteConfig.cs”. My action name would be “Index” action.
Now the header section would be large.
