Entity Framework Code First Approach
Previously, we saw Database First approach. In this article we’ll learn how to use code first approach ASP.NET MVC project which is most useful in those projects which you want to create from scratch, so do the same as what I will do in the following step-by-step approach.
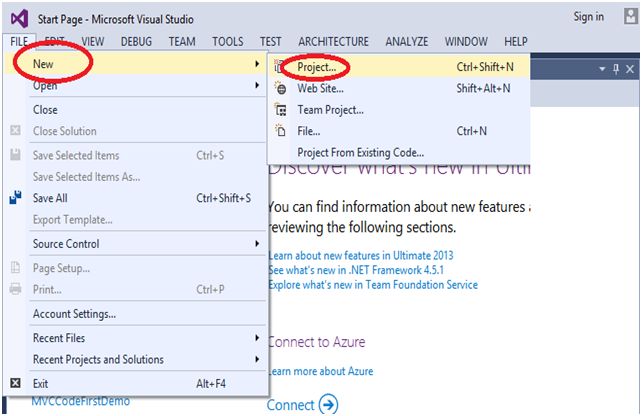
Step 1: Open Visual Studio and select the “File” menu, New, then click Project.
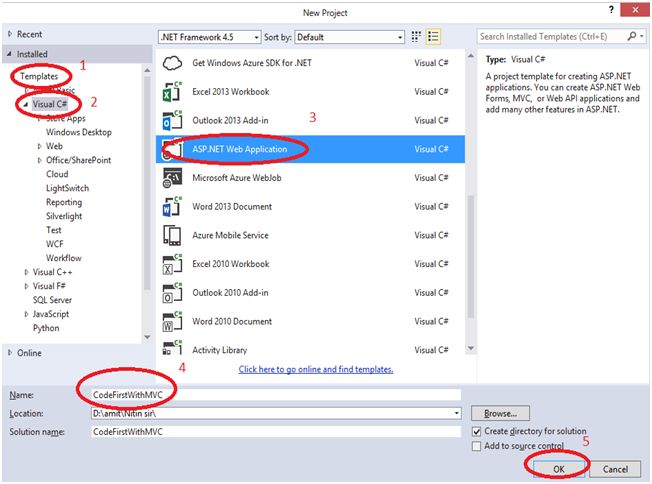
Step 2: In the following figure select “Templates”, Visual C#, then ASP.NET Web Application, and here I gave the name of the project “CodeFirstWithMVC”.
- You can give the project name as you wish.
- And then click on the “OK” button.
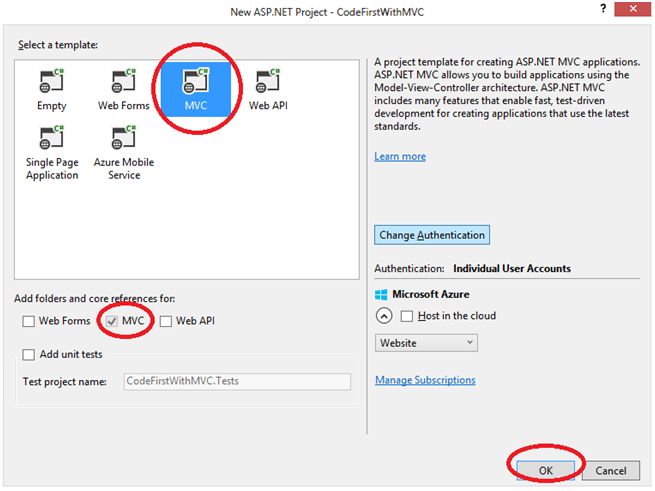
- In the below figure as you can see the default MVC will be selected, select MVC and then click “OK” button.
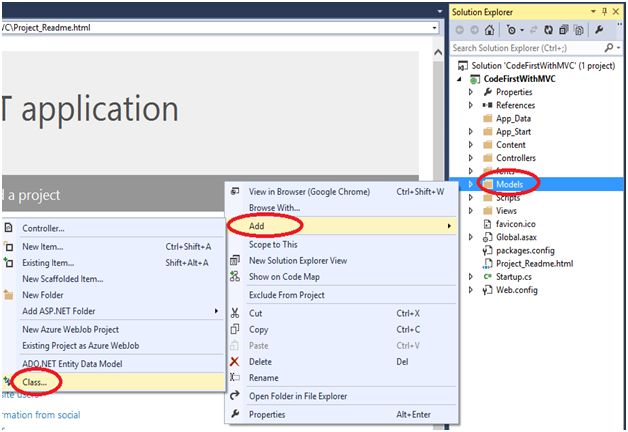
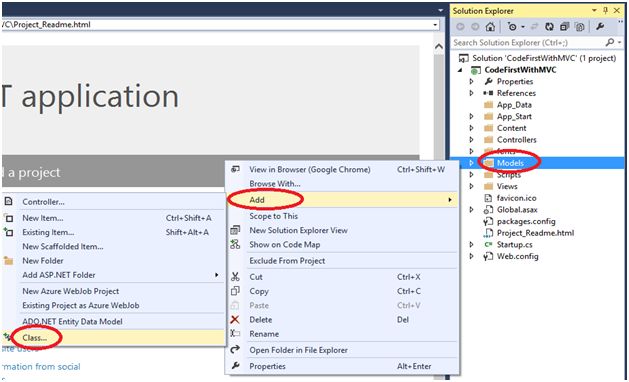
- First I want to create a Model. Click on Models folder, Add, then click Class.
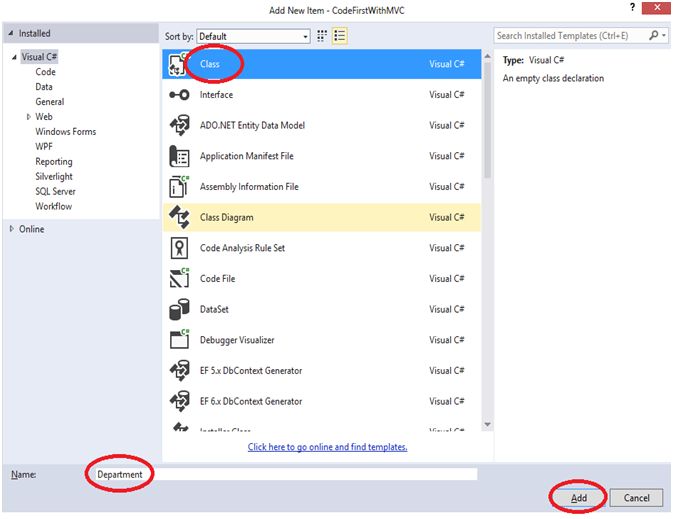
- Select the “Class” and let's say the class name is “Department”.
- Click on “Add” button to create a “Department” Model.
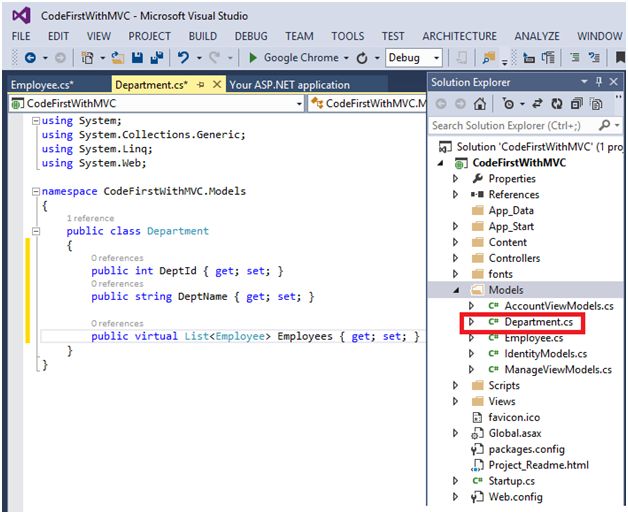
- In the below figure I have taken two properties, DeptId and DeptName, and List of second model that will be “Employee” Model.
- Now we have to create our Second Model. Click Models, Add, then Class.
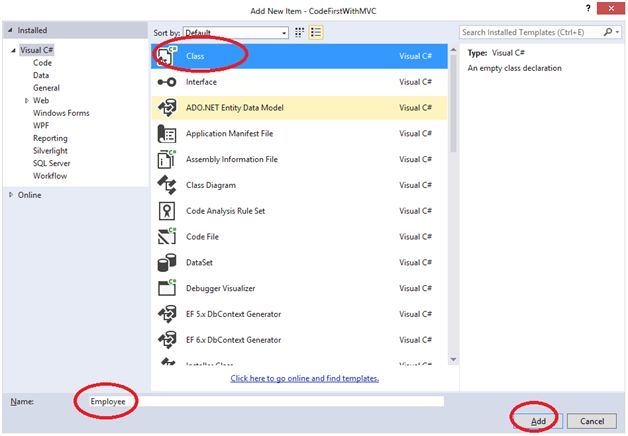
- Select the “Class” and give the “Employee” name to second Model and click on to Add button.
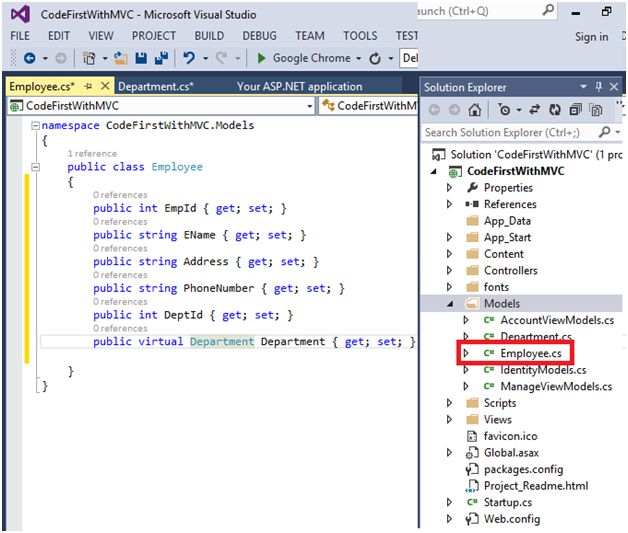
- In the Employee.cs, we have four properties that is EmpId, EName, Address, PhoneNumber.
- In this case the Department can have one to many relationships with the Employee.
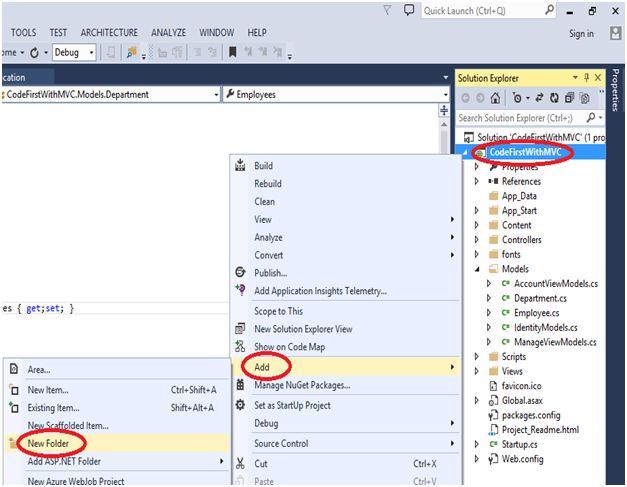
- Now we have to create our Context so let’s right click on the Project and click on the Add, then New Folder to add a new folder.
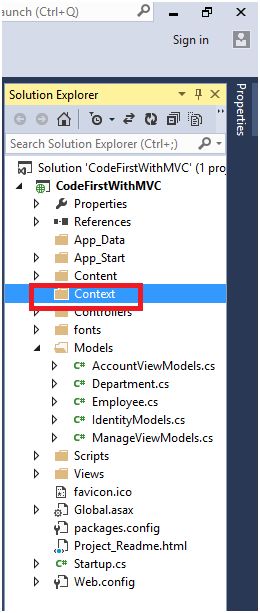
- Now in the Context, we have to create a class, as you can see the Context folder in the figure (In red circle).
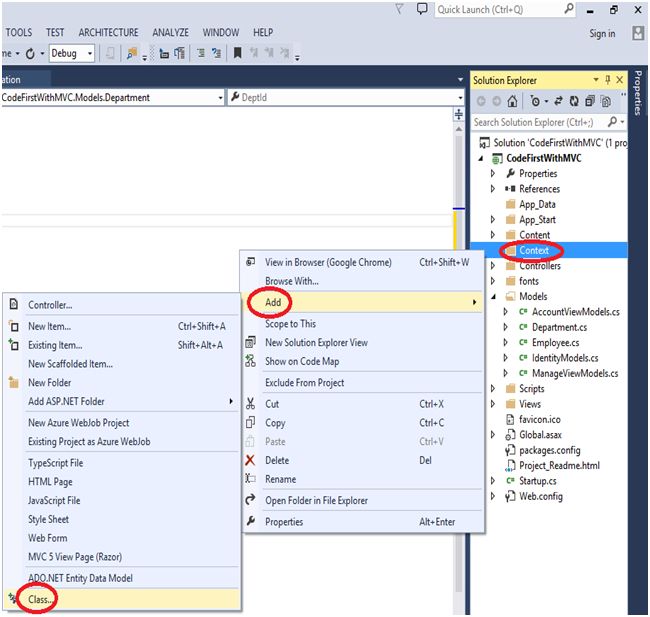
- Right click on to the Context folder and Add a new Class.
- Select the Class and give the class name “DepartmentContext” to class name, click on to the “Add” button.
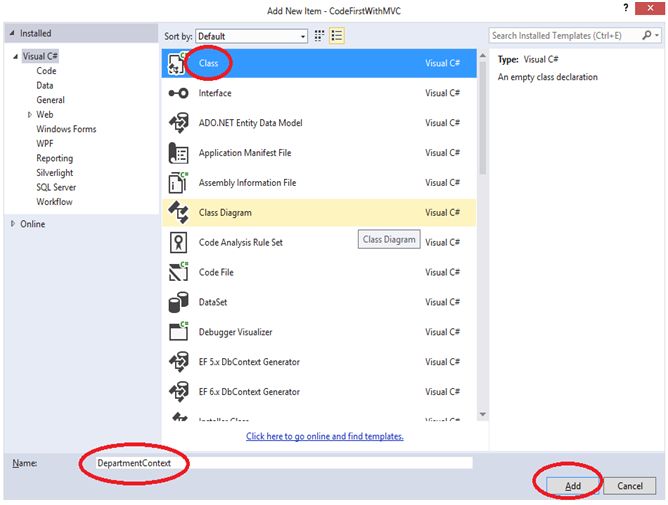
- So the DepartmentContext is inherited by DbContext.
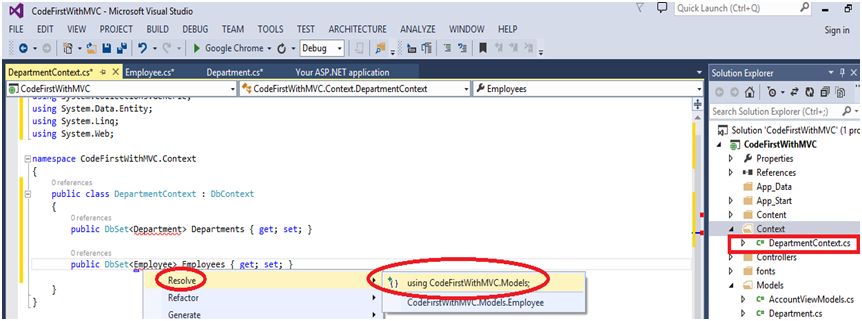
- Right click on to the near DbContext, Click on to the “Resolve” and then using System.Data.Entity;
- DbContext is the base class of the entity framework.

- In the below figure we have to take the DbSet for adding and querying in the database.
- So this is our DepartmentContext.
- We have to resolve the Department and Employee.
- Right click on to the Employee and select the “Resolve”, and select “using CodeFirstWithMVC Models;
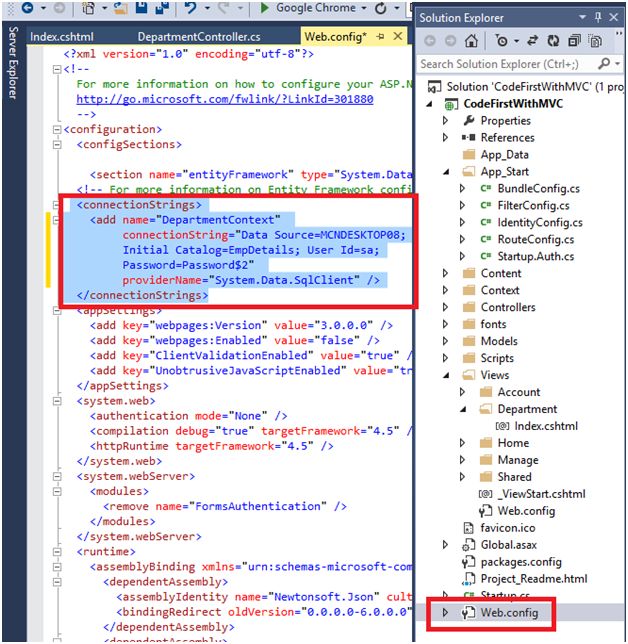
- Now we have to configure our Connection String, so go to the Web.Config, where you can see the default connection string.
- We have to change this connection string.
- If you are using the local database, give the local database name to the connection string.
- Initial catalog is that where we will give the name of our database which I would want to see in the SQL Server.
- If we are using the localhost we can also give the “UserName” and “Password”, as you can see in the following figure:
- Now we have to take a controller.
- Right click on to the Controllers Folder to add a Controller.
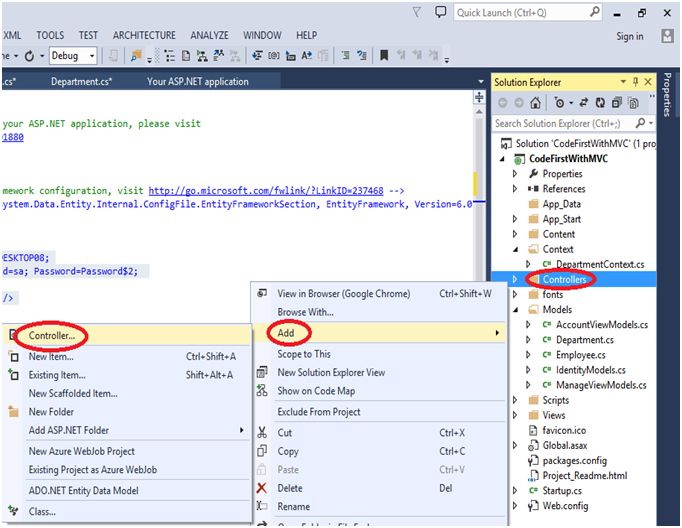
- You can select the Empty Controller or Read/Write Controller.
- We are going to use "MVC 5 Controller with read/write actions".
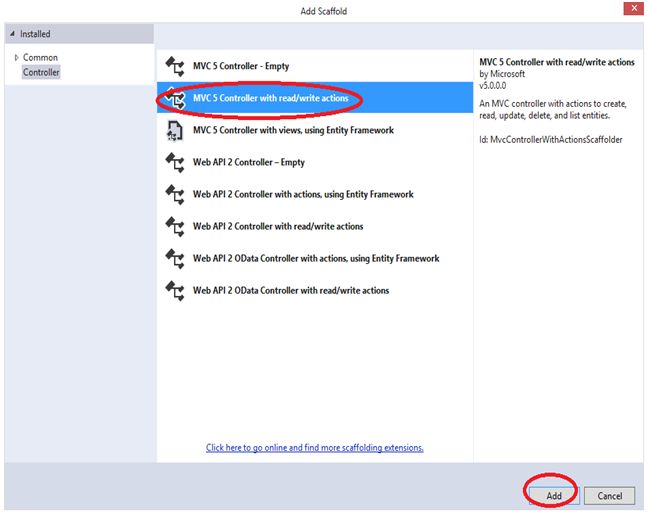
- Let’s say the Controller name is “DepartmentController”. You can choose the Controller name as you wish.

- First of all we need to write our Context.
- We have taken the DepartmentContext.
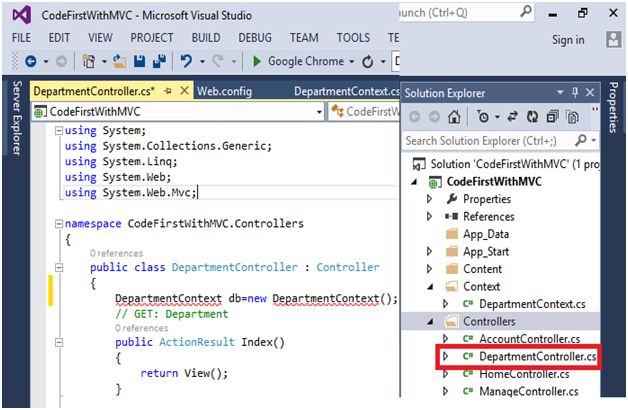
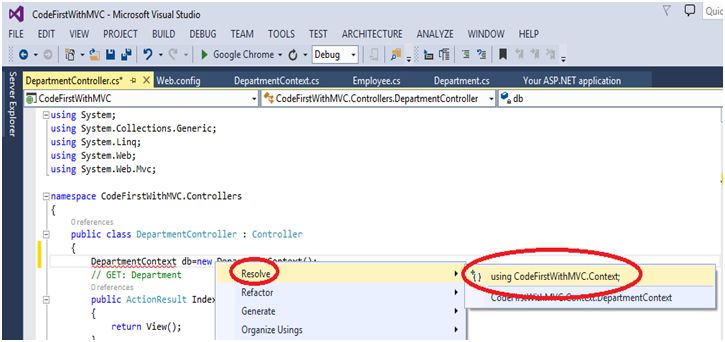
- We need to resolve our Context.
- So right click on to the DepartmentContext and click on Resolve, and then click using CodeFirstWithMVC.Context.
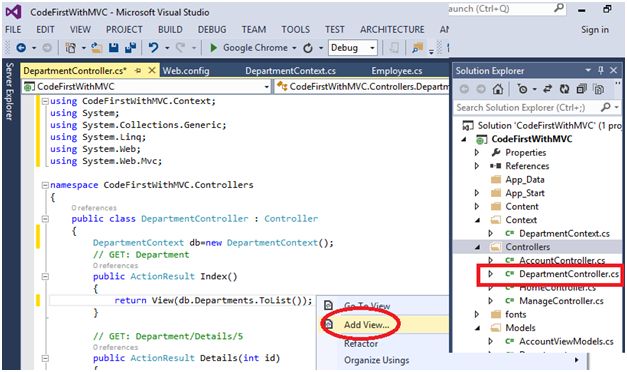
- Now we need to add View.
- Right click near Department.ToList() and add a “View”.
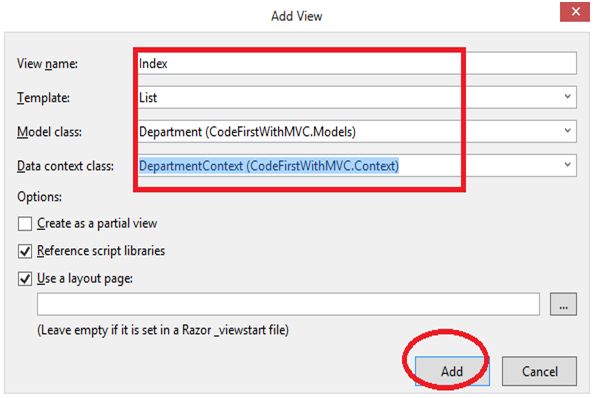
- In the following figure the view name is default “Index” and select the Template name “List” from the drop down menu. Model class will we Department (CodeFirstWithMVC.Models) and in the last context class will be the DepartmentContext(CodeFirstWithMVC.Context).
- Click on to the “Add” button.
- Than Visual Studio will create the View with Razor syntax.
- Run the project, press F5.
Note: You should rebuild the solution before you want to run the project. - So now, run the project and you can see the following figure:

- After running the project check the database name in the SQL Server Management.
- Refresh the database and you can't find the database name which you gave in your Initial Catalog. Here I gave the “EmpDetails” in the Initial Catalog.

- Here we need to call our Department Controller, so mention the Controller name in the URL and refresh the page.
In the below figure, here's the final output.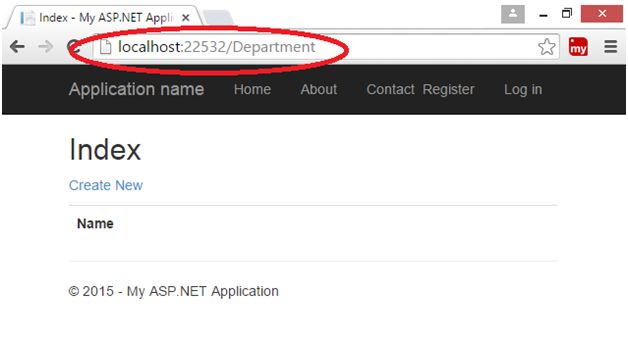
- After this now we can check our database.
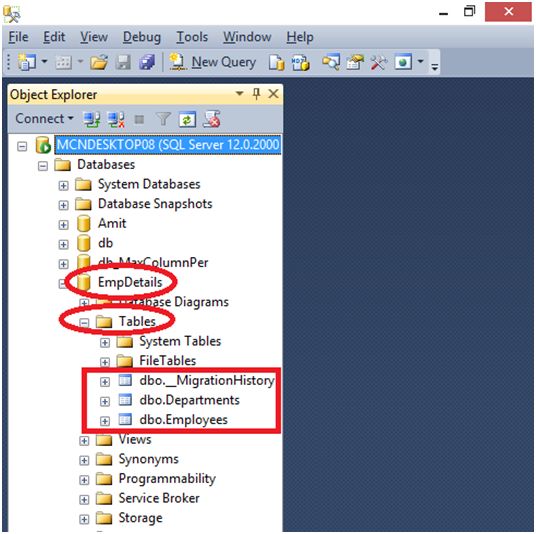
- Our database is created with the “EmpDetails” name in the SQL Server.
- There are two tables of Departments and Employee.
- This is our Code First Approach with the ASP.NET MVC.
- We can check the fields of particular tables.
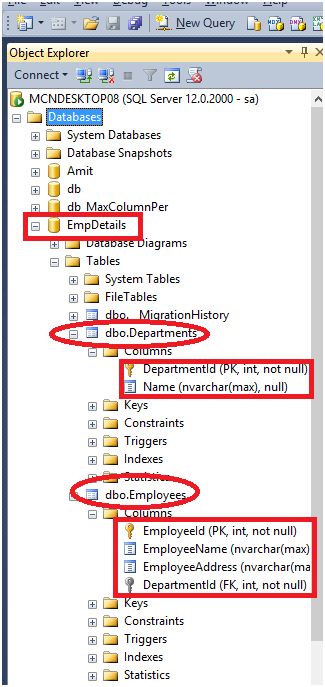
- We can also check the relationship among the table.
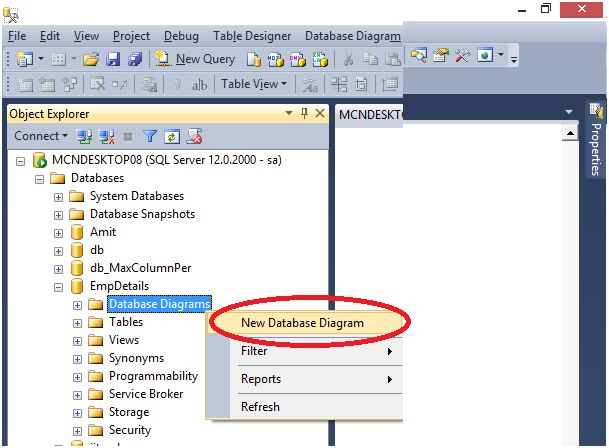
- Right click on to the Database Diagrams and click on to the New Database Diagram.
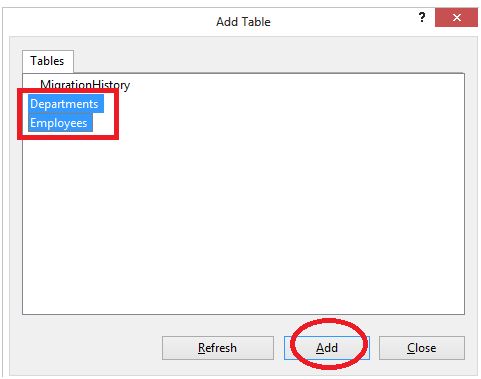
- Select the both tables and click on to “Add” button.
- As you can see in the following figure the relationship between both the tables.

Read more articles on ASP.NET:
Author
Nitin Pandit
8
58.2k
31.4m
