Introduction to Angular 8 (Day 1)
Angular 8 is the latest production version of Angular. This Angular 8 tutorial, learn how to build large scale websites using Angular 8 in 10 days.
This latest release by Google’s Angular Framework contains many attractive features along with some enhancement on the existing features. Angular 8 has arrived with a bunch of workflow and a new list of powerful and important features which Angular developers will appreciate it as a core framework like Angular Material Library and along with command-line interface. Google also has enabled Angular Console as a major launch partner for running Angular Projects, integrating Angular with Firebase with the help of angular/fire packages, along with StackBlitz integrated IDE and NativeScript support for building native mobile apps with Angular. So, in a simple way, we can say that Angular 8 provides a group of new generation libraries and frameworks which came to support the development of more productive, flexible, maintainable and testable web applications.
What is Angular?
Angular is basically is an open-source, JavaScript-based client-side framework that helps us to develop a web-based application. Actually, Angular is one of the best frameworks for developing any Single Page Application or SPA Applications. The definition of Angular according to the official documentation of Angular in the angular.io web site –
“Angular is a structural framework for dynamic web applications. It lets you use HTML as your template language and lets you extend HTML's syntax to express your application components clearly and succinctly. Its data binding and dependency injection eliminate much of the code you currently have to write. And it all happens within the browser, making it an ideal partner with any server technology.” – (courtesy – Angular Conference, 2014).
So, in a very simple word, Angular is -
- An MVC based structure framework
- A Framework for developing SPA (Single Page Application) based application
- Support client-side templating features.
- Provides us a facility to perform unit test so that our code can be tested before deployment.
Benefits of Using Angular
Angular is a client-side based on an open-source framework maintained by Google. The library is capable of very first reading the HTML page, which provides additional custom tag attributes embedded into it. Those attributes are interpreted as directives that instruct Angular Framework to bind input or output parts of the page to a model that is represented by standard JavaScript variables. The values of those JavaScript variables can be manually set within the code or retrieved from static or dynamic JSON resources including any server-side data provider like REST API or others.
The main benefits of using Angular in web applications are:-
- Angular modifies the page DOM directly instead of adding inner HTML code which is faster.
- Data binding does not occur on each control or value change (no change listeners) but at particular points of the JavaScript code execution. That dramatically improves performance, as a single bulk Model/View update replaces hundreds of cascading data change events.
- There is no need to use observable functions. Angular analyzes the page DOM and builds the bindings based on the Angular-specific element attributes. That requires less writing, meaning the code is cleaner, easier to understand, and has fewer errors.
- Extended features such as dependency injection, routing, animations, view encapsulation, and more are available.
- It is supported by IntelliJ IDEA and Visual Studio .NET IDEs.
- It is supported by Google and a great development community.
- Angular is a comprehensive solution for rapid front-end development. It does not need any other plugins or frameworks.
- Angular is unit testing ready, and that is one of its most compelling advantages.
Why Angular is known as Framework?
So before start discussing Angular, before that we need to understand What is Angular? Why did we call Angular as a Framework? As per the dictionary definition, a framework is an essential supporting structure. This single sentence definition very nicely sums up the Angular. But in spite of that, Angular provides a large and helpful ecosystem in which we can find many new tools and utilities, through which we can solve our problem and also can consider those for the new application structure and design. So, if we want to make our life harder and complex, then we need to write and develop our framework.
So, in real life, it is not possible to develop a framework for ourselves. That’s why need to use any existing framework which supports our ideas and requirements. A good and stable framework like Angular is already tested and well understood by the others. The use of frameworks isn’t uncommon; many programmers from all environments of coding rely on them. Business application developers use frameworks, such as the Microsoft Entity Framework, to ease their pain and speed up development when building database-related applications. For example, Java programmers use the LibGDX framework to help them create games. I hope I have explained to you the need for a framework and, more specifically, the fact that AngularJS is a great choice.
What’s new in Angular 8?
Angular 8 was officially announced in just a few days ago i.e. on 23rd May 2019. The new release version is not a complex major update. But still, this version contains many features include some opt-in features. Also, this version contains some new features and also upgradation of the previous version features. Some of the important features which included in Angular 8 versions are –
- Typescript 3.4 or above support
- Ivy Renderer Engine Support
- Introduce the new build tool called Bazel as an opt-in features
- Provide options for differential loading for performance optimization
- Changes in the dynamic module loading concept
- Provide the support for Web Worker
- Provide Support SVG template

If you want to know much more about what’s new in Angular 8 then you can refer the below articles as a reference –
What's New In Angular 8.0Install Prerequisites for Angular8
If we want to develop an application in Angular 8, then we need to configure and install the below prerequisites for the environments of the Angular 8 –
- Latest Node JS i.e. LTA 10.16 or above
- Install Typescript version 3.4 or above
- Need to install any IDE like Visual Studio Code or Microsoft Visual Studio 2015 or above
- Also, required to install Angular CLI to run the angular project
What is TypeScript?
As all, we know that Angular 8 or earlier versions (up to Angular 2.0) is heavily depends on Typescript language. So, it is necessary to understand some basic concepts of Typescript. Typescript is basically a super-set scripting language of JavaScript. So, as per Google, the definition of Typescript is -
“TypeScript is a free and open-source programming language developed and maintained by Microsoft. It is a strict syntactical superset of JavaScript and adds optional static typing to the language. Anders Hejlsberg, the lead architect of C# and creator of Delphi and Turbo Pascal, has worked on the development of TypeScript.”
Typescript provides much more privilege related to declarative programming like interfaces, classes, modules, static typings over the popular Javascript library and code to the developers. Typescript is totally based on the OOPs concept. Actually, Typescript is basically acted as a transpiler. Although we can develop and compile the code in Typescript. But it is actually a transpiler. Since code written in Typescript has been converted into another language like Javascript after compilation. And then compiled Javascript-based code is run in the browser for the application. So, in a simple word, transpiler means it basically converts one language to another language.
Some Basic Syntax of TypeScript
In this section, we will demonstrate some basic syntax or annotations in Typescript in compared to the JavaScript.
| JavaScript | TypeScript |
| var num = 5; | var num : number = 5; |
| var num = “Speros”; | var num : string = “Speros”; |
| var anydata = 123; | var anydata : any = 123; |
| var list = [1,2,3]; | var list : Array<number> = [1,2,3]; |
|
function square(num){
return num * num ;
}
|
function square(num : number) : number {
return num * num ;
}
|
The above table shows some basic syntax related to the variable declaration or function declaration. In spite of that, we can also create any class and its related functionalities or objects in Typescript.
Create New Project using Angular CLI
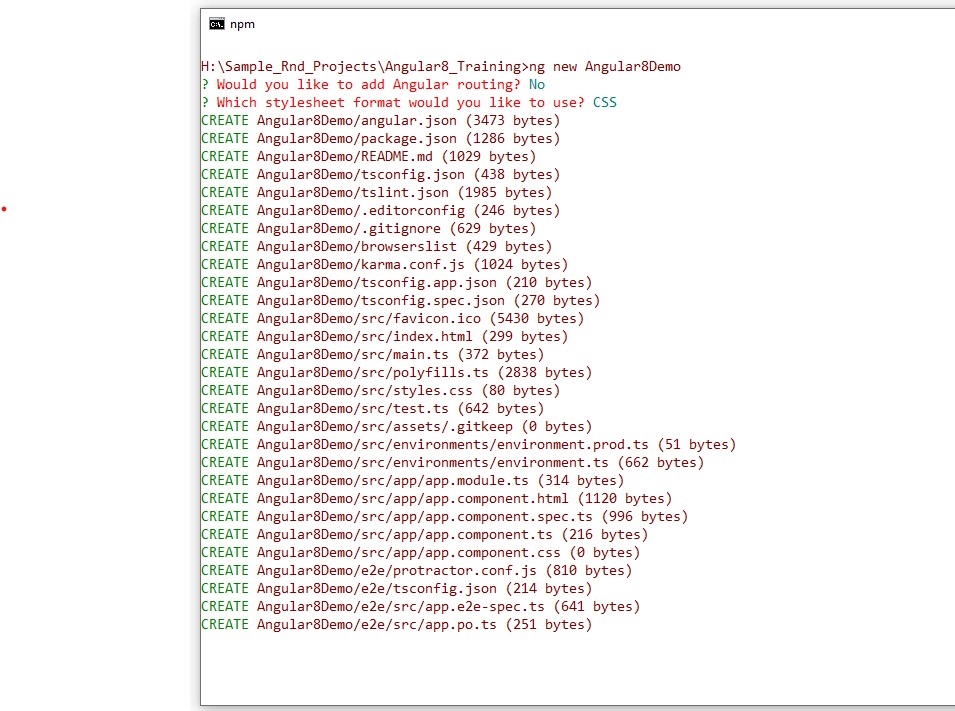
If we want to create a new project on Angular 8, we can use the Angular CLI Commands for that. So, create a new project using Angular CLI we need to perform the below steps –
- Open the Command Prompt and create a folder
- Now run the command - ng new AngularDemo
- Now, Put “N” for Would you like to Add Angular Routing options (Since it needs to be Y when we want to use Routing in our applications).
- Choose stylesheet style as CSS and then press enter

Now, Angular CLI will create required files for running the Angular Projects along with related packages which will be downloaded in the node_modules folder.
About Project Folder Structure
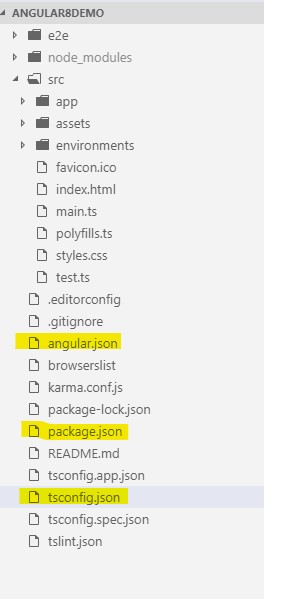
During the Angular Project creation, Angular CLI create a new folder as per project name i.e. Angular8Demo. So, now open that project in any code editor like Visual Studio Code or Microsoft Visual Studio. The said project folder contains the below folder structure –

The created project contains the following folders –
- e2e - This folder is for an end to end testing purposes. It contains the configuration files related to performing the unit test of the projects.
- node_modules - This folder contains the downloaded packages as per the configuration.
- src - This folder contains the actual source code. It contains 3 subfolders as –
- app - App folder contains the Angular project-related files like components, HTML files, etc.
- assets - Assets folder contains any static files like images, stylesheets, custom javascript library files (if any required), etc.
- environments - Environments folder contains the environment-related files which are required during deployment or build of the projects.
About Different Config Files
When we create any Angular based project using Angular CLI, then every time it will create 3 different configuration files which help us to configure the projects along with its related dependencies. These configuration files are –
tsconfig.json – If tsconfig.json files exist within the project root folder, that means that the project is a basically TypeScript project. The tsconfig.json file specifies the root files and the compiler options required to compile the project. Sample of tsconfig.json as below –
- {
- "compileOnSave": true,
- "compilerOptions": {
- "baseUrl": "./",
- "outDir": "./dist/out-tsc",
- "sourceMap": true,
- "declaration": false,
- "module": "esnext",
- "moduleResolution": "node",
- "emitDecoratorMetadata": true,
- "experimentalDecorators": true,
- "importHelpers": true,
- "target": "es2015",
- "typeRoots": [
- "node_modules/@types"
- ],
- "lib": [
- "es2018",
- "dom"
- ]
- }
- }
package.json – package.json is basically a JSON file that contains all information related to the required packages for the project. Also, with the help of this configuration files, we can maintain the Project Name and its related version by using the “name” and “version” property. Also, we can provide the build definition of the project using this file.
- {
- "name": "angular8-demo",
- "version": "0.0.0",
- "scripts": {
- "ng": "ng",
- "start": "ng serve",
- "build": "ng build",
- "test": "ng test",
- "lint": "ng lint",
- "e2e": "ng e2e"
- },
- "private": true,
- "dependencies": {
- "@angular/animations": "~8.0.0",
- "@angular/common": "~8.0.0",
- "@angular/compiler": "~8.0.0",
- "@angular/core": "~8.0.0",
- "@angular/forms": "~8.0.0",
- "@angular/platform-browser": "~8.0.0",
- "@angular/platform-browser-dynamic": "~8.0.0",
- "@angular/router": "~8.0.0",
- "rxjs": "~6.4.0",
- "tslib": "^1.9.0",
- "zone.js": "~0.9.1"
- },
- "devDependencies": {
- "@angular-devkit/build-angular": "~0.800.0",
- "@angular/cli": "~8.0.2",
- "@angular/compiler-cli": "~8.0.0",
- "@angular/language-service": "~8.0.0",
- "@types/node": "~8.9.4",
- "@types/jasmine": "~3.3.8",
- "@types/jasminewd2": "~2.0.3",
- "codelyzer": "^5.0.0",
- "jasmine-core": "~3.4.0",
- "jasmine-spec-reporter": "~4.2.1",
- "karma": "~4.1.0",
- "karma-chrome-launcher": "~2.2.0",
- "karma-coverage-istanbul-reporter": "~2.0.1",
- "karma-jasmine": "~2.0.1",
- "karma-jasmine-html-reporter": "^1.4.0",
- "protractor": "~5.4.0",
- "ts-node": "~7.0.0",
- "tslint": "~5.15.0",
- "typescript": "~3.4.3"
- }
- }
angular.json – angular.json file is an Angular Application Environment based JSON file which contains all the information related to the project build and deployment. It tells the system which files need to change when we use ng build or ng serve command.
main.ts - The main.ts file acts as the main entry point of our Angular application. This file is responsible for the bootstrapper operation of our Angular modules. It contains some important statements related to the modules and some initial setup configurations like
- enableProdMode – This option is used to disable Angular’s development mode and enable Productions mode. Disabling Development mode turns off assertions and other model-related checks within the framework.
- platformBrowserDynamic – This option is required to bootstrap the Angular app n the browser.
- AppModule – This option indicates which module acts as a root module in the applications.
- environment – This option stores the values of the different environment constants.
- import { enableProdMode } from '@angular/core';
- import { platformBrowserDynamic } from '@angular/platform-browser-dynamic';
- import { AppModule } from './app/app.module';
- import { environment } from './environments/environment';
- if (environment.production) {
- enableProdMode();
- }
- platformBrowserDynamic().bootstrapModule(AppModule)
- .catch(err => console.error(err));
@ngModule Metadata
In every Angular application, at least one angular module file is required. An Angular application may contain more than one Angular module. Angular modules is a process or system to assemble multiple angular elements, like components, directives, pipes, service, etc. so that these Angular elements can be combined in such a way that all elements can be related with each other and ultimately create an application.
In Angular, @NgModule decorator is used to defining the Angular module class. Sometimes, this class is called a NgModule class. @NgModule always takes a metadata object, which tells Angular how to compile and launch the application in the browser. So, to define the Angular module, we need to define some steps as follows:
- First, we need to import Angular BrowserModule into the Angular module file at the beginning. This BrowserModule class is responsible for running the application in the browser.
- In the next step, we need to declare the Angular elements like component within the Angular module so that those components or elements can be associated with the Angular module.
In the last step, we need to mention one Angular component as a root component for the Angular module. This component is always known as a bootstrap component. So, one Angular module can contain hundreds of components. But out of those components, one component needs to be a root or bootstrap component that will be executed first when the Angular module will be bootstrapped in the browser.
- import { BrowserModule } from '@angular/platform-browser';
- import { NgModule } from '@angular/core';
- import { AppComponent } from './app.component';
- @NgModule({
- declarations: [
- AppComponent
- ],
- imports: [
- BrowserModule
- ],
- providers: [],
- bootstrap: [AppComponent]
- })
- export class AppModule { }
Demo 1: First Program
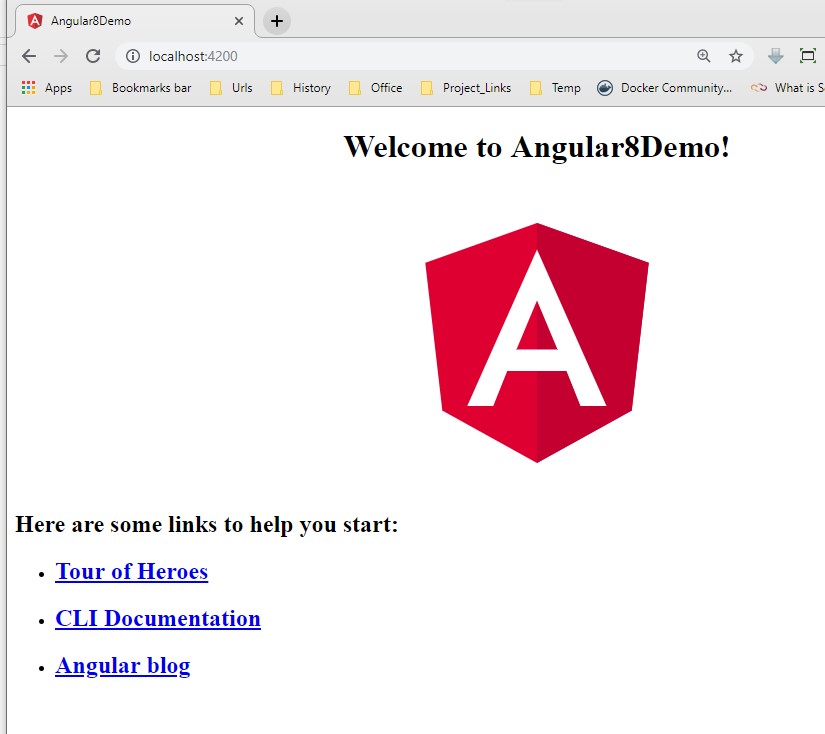
So, when we create an Angular Project using Angular CLI, it creates new projects along with a module and a default component file. These files normally exist within the app folder. So, first, simply run the Angular Project using ng serve command and the below output will be visible in the browser.

Now, we make some changes in the app.component.ts file and app.component.html file as below –
Code of app.component.ts
- import { Component } from '@angular/core';
- @Component({
- selector: 'app-root',
- templateUrl: './app.component.html',
- styleUrls: ['./app.component.css']
- })
- export class AppComponent {
- title = 'Welcome to Angular 8 Learning Series...';
- }
Code of app.component.html
- <!--The content below is only a placeholder and can be replaced.-->
- <div style="text-align:center">
- <h1>
- Welcome to {{ title }}!
- </h1>
- <img width="300" alt="Angular Logo" src="data:image/svg+xml;base64,PHN2ZyB4bWxucz0iaHR0cDovL3d3dy53My5vcmcvMjAwMC9zdmciIHZpZXdCb3g9IjAgMCAyNTAgMjUwIj4KICAgIDxwYXRoIGZpbGw9IiNERDAwMzEiIGQ9Ik0xMjUgMzBMMzEuOSA2My4ybDE0LjIgMTIzLjFMMTI1IDIzMGw3OC45LTQzLjcgMTQuMi0xMjMuMXoiIC8+CiAgICA8cGF0aCBmaWxsPSIjQzMwMDJGIiBkPSJNMTI1IDMwdjIyLjItLjFWMjMwbDc4LjktNDMuNyAxNC4yLTEyMy4xTDEyNSAzMHoiIC8+CiAgICA8cGF0aCAgZmlsbD0iI0ZGRkZGRiIgZD0iTTEyNSA1Mi4xTDY2LjggMTgyLjZoMjEuN2wxMS43LTI5LjJoNDkuNGwxMS43IDI5LjJIMTgzTDEyNSA1Mi4xem0xNyA4My4zaC0zNGwxNy00MC45IDE3IDQwLjl6IiAvPgogIDwvc3ZnPg==">
- </div>
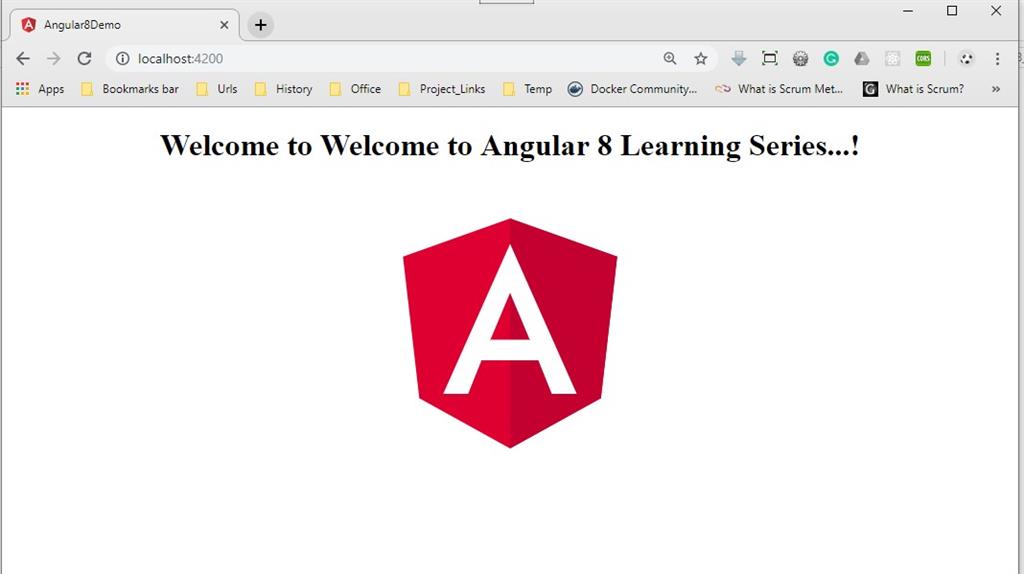
Now, refresh the browser to update the output.

Conclusion
In this article, we discuss how to create an Angular application using Angular CLI along with the basic concept of Angular 8. Also, we discussed the different folders and files that are created automatically by the Angular CLI. Now, in the next article, we will discuss the main building block of Angular framework i.e. components. I hope, this article will help you. Any feedback or query related to this article is most welcome.
Author
Debasis Saha
Tech Writter
67.8k
33.7m
