

Introduction
In this blog, you will learn how to develop AppBarButton, using Universal Windows Application.
Requirements
- Visual Studio 2015 Update 3.
Step 1
Open Visual Studio 2015, open the file and new project, which is using shortcut keys Ctrl+Shift+N.

Step 2
Now, we can choose Visual C# (sharp) and you can select the Universal platform. Afterwards, we can choose Blank app (Universal Window) and you can change the Application name. Click "OK" button.

Step 3
Here, we can select the target minimum, maximum version and click OK button.

Step 4
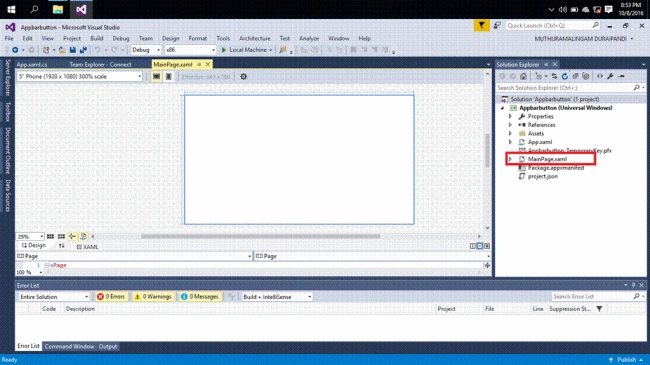
Now, we can go to MainPage.XAML and afterwards, open the design Window.
Step 5
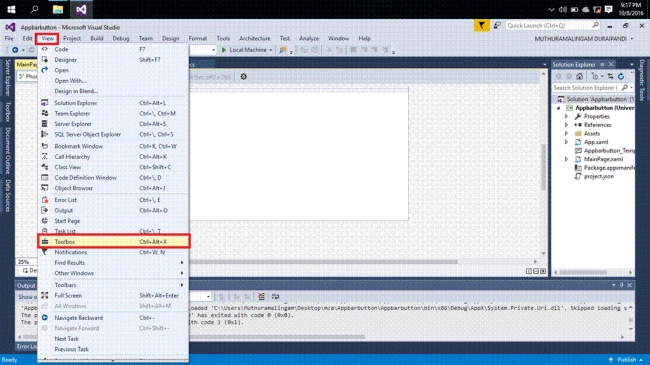
Here, you can go to View, select toolbox and open the toolbox. Afterwards, you can choose AppBarButton and click the button.

Step 6
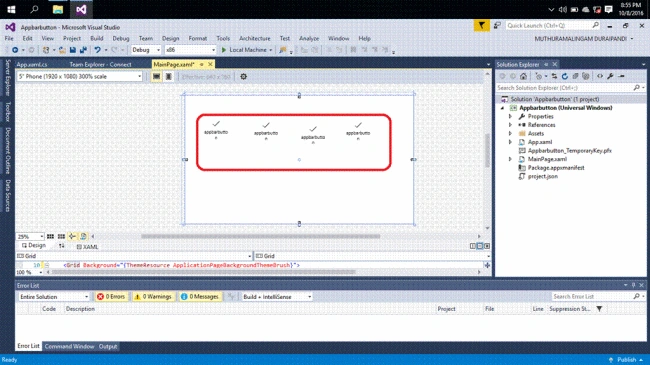
Now, we can go to XAML page, write the code and save the code. Follow the shortcut keys Ctrl+S.
- <Page x:Class="Appbarbutton.MainPage" xmlns="http://schemas.microsoft.com/winfx/2006/xaml/presentation" xmlns:x="http://schemas.microsoft.com/winfx/2006/xaml" xmlns:local="using:Appbarbutton" xmlns:d="http://schemas.microsoft.com/expression/blend/2008" xmlns:mc="http://schemas.openxmlformats.org/markup-compatibility/2006" mc:Ignorable="d">
- <Grid Background="{ThemeResource ApplicationPageBackgroundThemeBrush}">
- <AppBarButton x:Name="contact" HorizontalAlignment="Left" Icon="Contact" Label="contact" Margin="72,254,0,0" VerticalAlignment="Top">
- <AppBarButton.Background>
- <LinearGradientBrush EndPoint="0.5,1" StartPoint="0.5,0">
- <GradientStop Color="Black" Offset="0" />
- <GradientStop Color="#FF00FF6F" Offset="1" />
- </LinearGradientBrush>
- </AppBarButton.Background>
- <AppBarButton x:Name="appBarButton" Height="100" Icon="Accept" Label="appbarbutton" Width="100" />
- </AppBarButton>
- <AppBarButton x:Name="Like" HorizontalAlignment="Left" Icon="Like" Label="Like" Margin="186,254,0,0" VerticalAlignment="Top">
- <AppBarButton.Background>
- <LinearGradientBrush EndPoint="0.5,1" StartPoint="0.5,0">
- <GradientStop Color="Black" Offset="0" />
- <GradientStop Color="#FF00E2FF" Offset="1" />
- </LinearGradientBrush>
- </AppBarButton.Background>
- </AppBarButton>
- <AppBarButton x:Name="Comment" HorizontalAlignment="Left" Icon="Comment" Label="Comment" Margin="324,254,0,0" VerticalAlignment="Top" Background="#FFFFF800" />
- <AppBarButton x:Name="view" HorizontalAlignment="Left" Icon="View" Label="view" Margin="450,254,0,0" VerticalAlignment="Top" RenderTransformOrigin="0.559,1.183">
- <AppBarButton.Background>
- <LinearGradientBrush EndPoint="0.5,1" StartPoint="0.5,0">
- <GradientStop Color="Black" Offset="0" />
- <GradientStop Color="White" Offset="1" />
- </LinearGradientBrush>
- </AppBarButton.Background>
- </AppBarButton>
- </Grid>
- </Page>


Step 7
Here, we can run the machine. It should be like the Local Machine, Remote Machine, device and so on.

Step 8
Now, we can see the output, given below.

Join the conversation! Your thoughts help the community grow.