

In this article, we will discuss the process of posting scheduled messages in Microsoft Teams using Power Automate.
One useful feature of Microsoft Teams is the ability to schedule messages in advance. This can help you stay on top of important deadlines or inform your team members about upcoming events. It effectively allows members to communicate, collaborate, and stay organized.
Step 1. Create a schedule
The First step is to create a schedule for your message. To do this, follow these steps:
- Open Power Automate and click "Myows" in the left-hand navigation menu.
- Click "New flow" and select "Automated-from blank" as the flow type.
- Set the recurrence pattern and interval. For example, if you want to post a message every day at 9:00 AM, set the interval to 1 day and the start time to 9:00 AM.

- I want to send messages every week, so I have selected Interval as 1 and Frequency as Week.
- Select the time zone in which you want to send the message.
- You can even select the Start time, particular days of the week, and the time of day when you want your flow to trigger.
Step 2. Set up a Microsoft Teams connection in Power Automate
Select "Post a message in a chat or chat" as the action and sign in to your Microsoft Teams account if prompted.
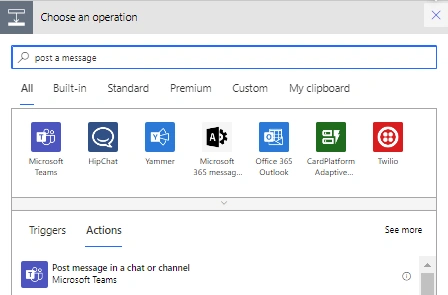
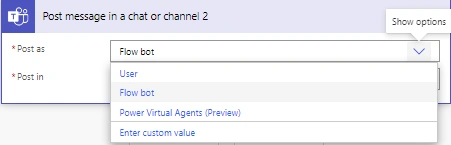
Once you select the action, you will get the post as an option,
- Flow bot: where you can make Power automate to send your message
- User: Where you can use the connection from which account you want to send the message
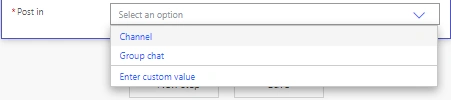
After selecting the Post, you have to select the channel and group in which you want to send the message.
Select the team and select the channel.
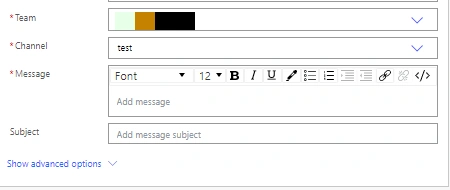
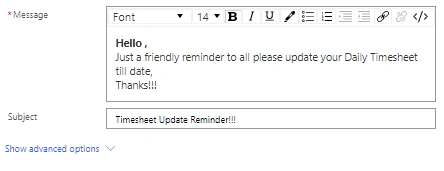
Now write your subject and the message you want to share,
Save your flow and Test. If your flow runs successfully, you will receive the message in your teams.

Conclusion
The recurrence action in Power Automate allows you to schedule messages in Microsoft Teams at specific intervals. This can be useful for sending regular reminders, updates, or announcements. Following the steps outlined in this article post, you can easily automate posting scheduled messages in Microsoft Teams.
Join the conversation! Your thoughts help the community grow.