

In this article, we will learn the step-by-step process of allowing users to log in to an application with Facebook and Gmail using Angular 8. Logging in with Facebook and Google makes it safe and easy for users to use applications. When a user clicks on the Login button with Facebook or Gmail, the user is navigated to Facebook or Google to give the app permission. In response, the user receives a Token key and other personal details. We will use the angular6-social-login Angular library in the demo.
Prerequisites
- Basic knowledge of Angular and Web API
- Visual Studio
- Visual Studio Code
- SQL Server Management Studio
This article covers the following,
- Create Angular 8 Project
- Create a Google App and Get client Id
- Create a Facebook App and Get App Id
- Create a database and table
- Create a Web API Project
- Install Bootstrap and Add Routing
Create Angular 8 Project
Create an Angular 8 project by using the following command.
- ng new socaillogindemo
Open the newly created project in visual studio code and install bootstrap in this project by using the following command
- npm install bootstrap --save
Install SocialLoginModule
Now install angular6-social-login package by using following command
- npm install angular6-social-login
Create a Google App and Get client Id
The first thing we need to create Google Project, is to get Credentials.
Go to Google API Console
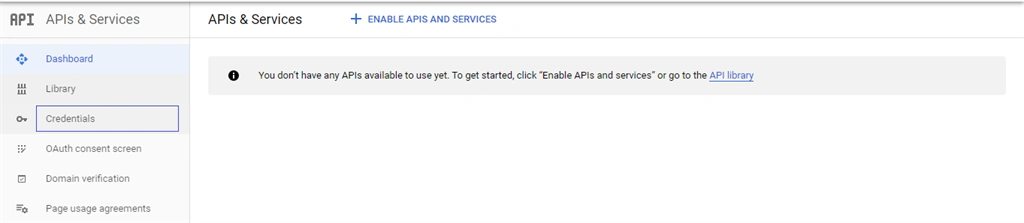
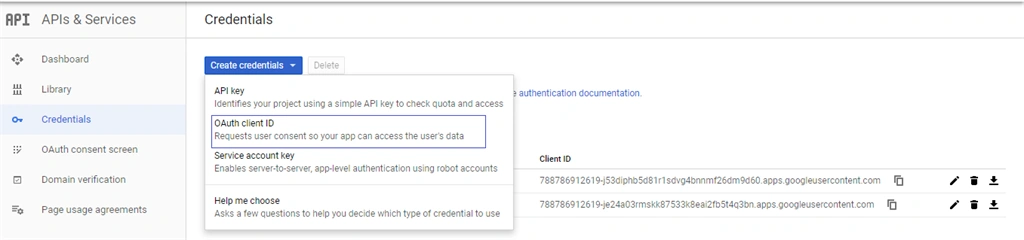
Click on create Credentials and Choose OAuth client ID.
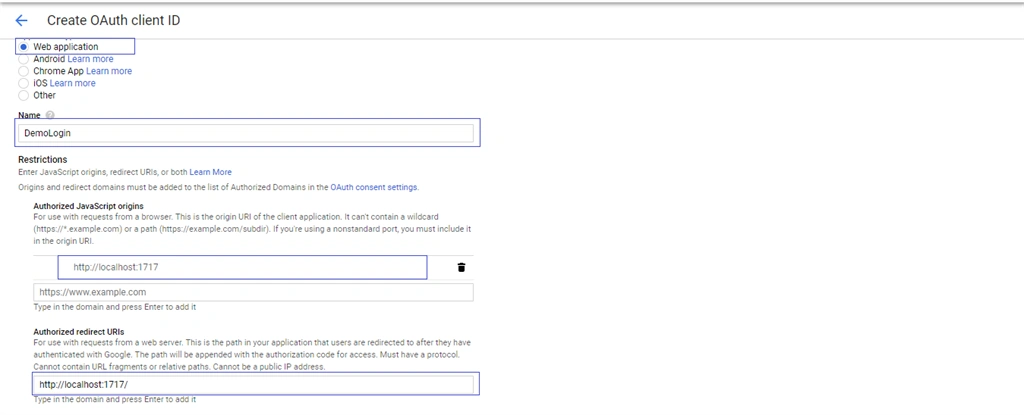
Select web application and enter your project url and click on Create button,
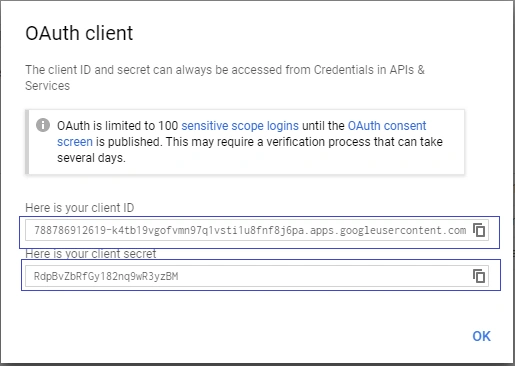
It will create client ID and secret key.
Create a Facebook App and Get App Id
Go to Facebook developer page and create a new App,
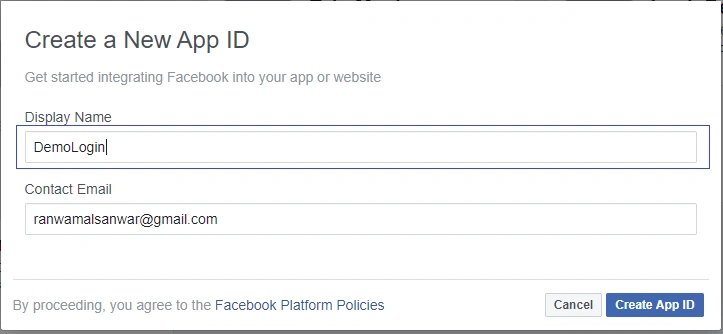
Click on create App ID
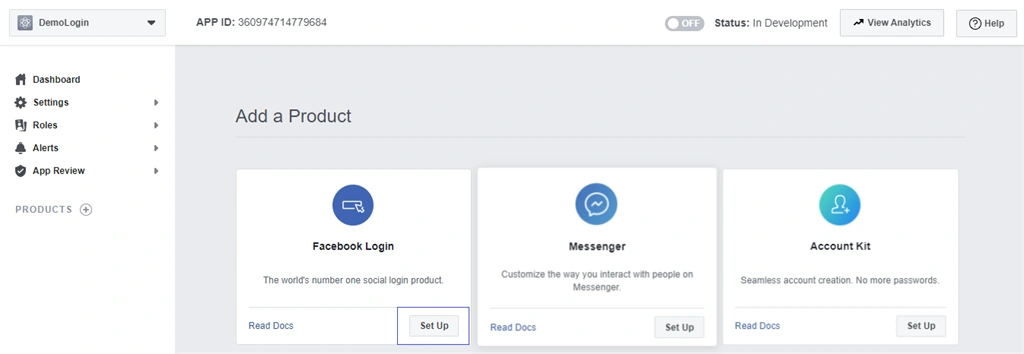
Click on create App ID
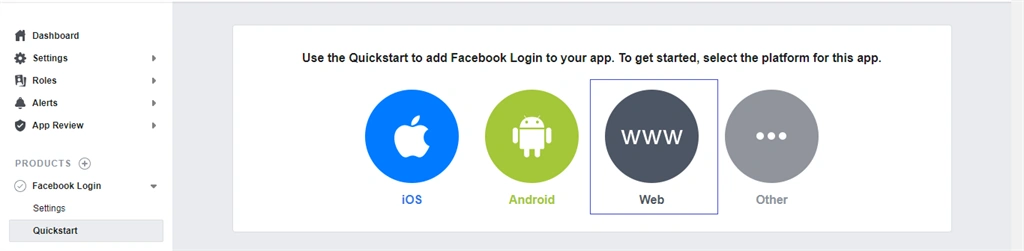
Click on Web
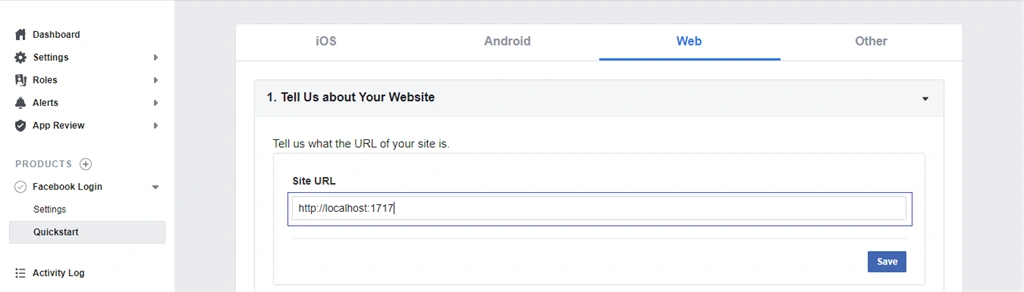
Enter Site url and click on save, now go to setting
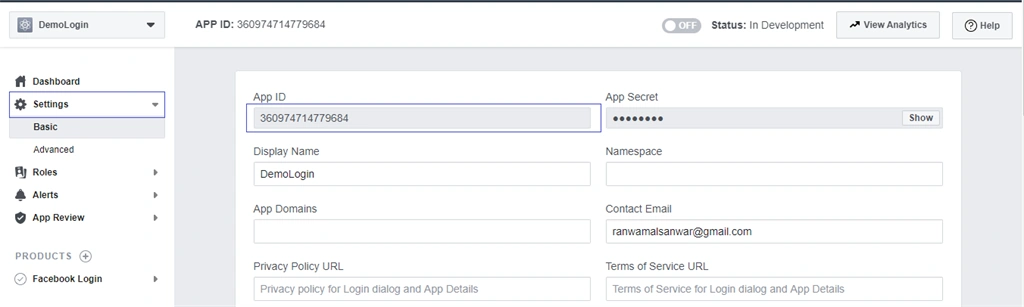
Now open the project in visual studio code and create two components. To create the components, open terminal and use the following commands.
- ng g c Login --spec=false
- ng g c Dashborad--spec=false
Login component
Dashboard component
Create a class named "socialusers" and add Add following properties in the class.
- export class Socialusers {
- provider: string;
- id: string;
- email: string;
- name: string;
- image: string;
- token?: string;
- idToken?: string;
- }
Create a service named "sociallogin" to call the Web API.
Open the sociallogin service and import required packages and classes. Add the following lines of code in the sociallogin.service.ts file.
- import { Injectable } from '@angular/core';
- import { HttpClient } from '@angular/common/http';
- @Injectable({
- providedIn: 'root'
- })
- export class SocialloginService {
- url;
- constructor(private http: HttpClient) { }
- Savesresponse(responce)
- {
- this.url = 'http://localhost:64726/Api/Login/Savesresponse';
- return this.http.post(this.url,responce);
- }
- }
Project Structure
Let's check the project structure of the angular application.
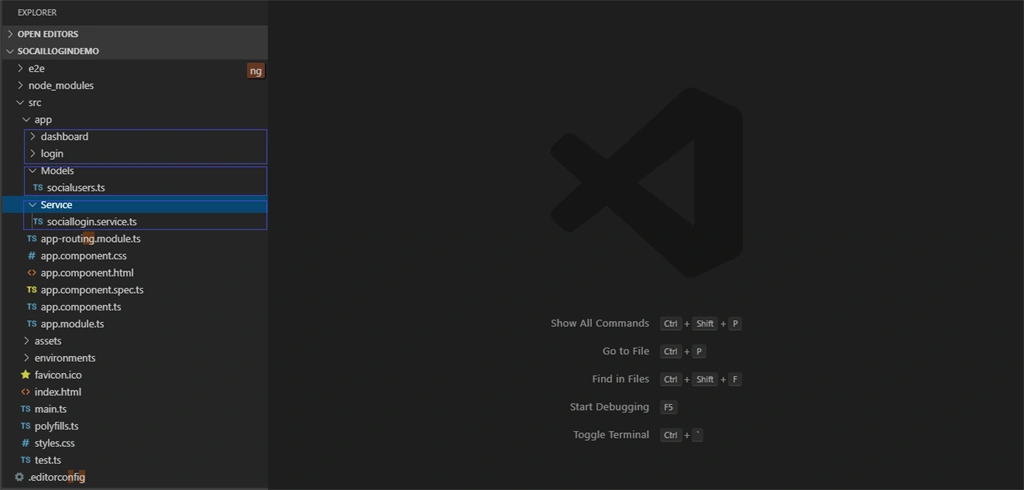
Now open app.module.ts and import Social Login Module and Google and Facebook Login Providers and AuthService. In this file, we add the Facebook and Google client id that we generated when creating the Facebook and Google app. Add the following code in this file.
- import { BrowserModule } from '@angular/platform-browser';
- import { HttpClientModule } from '@angular/common/http';
- import { NgModule } from '@angular/core';
- import { AppComponent } from './app.component';
- import { GoogleLoginProvider, FacebookLoginProvider, AuthService } from 'angular-6-social-login';
- import { SocialLoginModule, AuthServiceConfig } from 'angular-6-social-login';
- import { LoginComponent } from './login/login.component';
- import { DashboardComponent } from './dashboard/dashboard.component';
- import { AppRoutingModule } from '../app/app-routing.module';
- export function socialConfigs() {
- const config = new AuthServiceConfig(
- [
- {
- id: FacebookLoginProvider.PROVIDER_ID,
- provider: new FacebookLoginProvider('app -id')
- },
- {
- id: GoogleLoginProvider.PROVIDER_ID,
- provider: new GoogleLoginProvider('app-id')
- }
- ]
- );
- return config;
- }
- @NgModule({
- declarations: [
- AppComponent,
- LoginComponent,
- DashboardComponent
- ],
- imports: [
- BrowserModule,
- HttpClientModule,
- AppRoutingModule
- ],
- providers: [
- AuthService,
- {
- provide: AuthServiceConfig,
- useFactory: socialConfigs
- }
- ],
- bootstrap: [AppComponent]
- })
- export class AppModule { }
Open login.component.ts file and add the following code
- import { Component, OnInit } from '@angular/core';
- import { GoogleLoginProvider, FacebookLoginProvider, AuthService } from 'angular-6-social-login';
- import { SocialLoginModule, AuthServiceConfig } from 'angular-6-social-login';
- import { Socialusers } from '../Models/socialusers'
- import { SocialloginService } from '../Service/sociallogin.service';
- import { Router, ActivatedRoute, Params } from '@angular/router';
- @Component({
- selector: 'app-login',
- templateUrl: './login.component.html',
- styleUrls: ['./login.component.css']
- })
- export class LoginComponent implements OnInit {
- response;
- socialusers=new Socialusers();
- constructor(
- public OAuth: AuthService,
- private SocialloginService: SocialloginService,
- private router: Router
- ) { }
- ngOnInit() {
- }
- public socialSignIn(socialProvider: string) {
- let socialPlatformProvider;
- if (socialProvider === 'facebook') {
- socialPlatformProvider = FacebookLoginProvider.PROVIDER_ID;
- } else if (socialProvider === 'google') {
- socialPlatformProvider = GoogleLoginProvider.PROVIDER_ID;
- }
- this.OAuth.signIn(socialPlatformProvider).then(socialusers => {
- console.log(socialProvider, socialusers);
- console.log(socialusers);
- this.Savesresponse(socialusers);
- });
- }
- Savesresponse(socialusers: Socialusers) {
- this.SocialloginService.Savesresponse(socialusers).subscribe((res: any) => {
- debugger;
- console.log(res);
- this.socialusers=res;
- this.response = res.userDetail;
- localStorage.setItem('socialusers', JSON.stringify( this.socialusers));
- console.log(localStorage.setItem('socialusers', JSON.stringify(this.socialusers)));
- this.router.navigate([`/Dashboard`]);
- })
- }
- }
Open login.component.html file and add the following lines
- <div class="container" style="padding-top:60px;">
- <div class="row">
- <div class="col-md-6 mx-auto">
- <div class="card-group">
- <div class="card p-4">
- <div class="card-body">
- <form name="form">
- <!-- <button class="btn btn-primary" style="text-align:center">Login</button> -->
- <button type="submit" class="btn btn-block btn-success">Login</button>
- <div style="padding-top: 20px;" class="input-group mb-3">
- <div class="input-group-prepend">
- <span class="input-group-text"><i class="icon-user"></i></span>
- </div>
- <input type="text" name="UserName" class="form-control sty1" placeholder="Email"
- required>
- </div>
- <div class="input-group mb-4">
- <div class="input-group-prepend">
- <span class="input-group-text"><i class="icon-lock"></i></span>
- </div>
- <input type="password" name="Passward" class="form-control" placeholder="Password">
- </div>
- <div>
- <p style="color:#E92626;font-size:20px;font-weight:normal" Class="success" align="left">
- {{errorMessage}}
- </p>
- </div>
- <div class="row">
- <div class="col-6">
- <button type="submit" class="btn btn-primary px-4">Login</button>
- </div>
- <div class="col-6 text-right">
- <button type="button" class="btn btn-link px-0">Forgot password?</button>
- </div>
- </div>
- </form>
- <hr style="border-top: 1px solid #eee;">
- <div class="row">
- <div class="col-6">
- <button (click)="socialSignIn('facebook')" class="loginBtn loginBtn--facebook">
- Login with Facebook
- </button>
- </div>
- <div class="col-6 text-right">
- <button (click)="socialSignIn('google')" class="loginBtn loginBtn--google">
- Login with Google
- </button>
- </div>
- </div>
- </div>
- </div>
- </div>
- </div>
- </div>
- </div>
Open dashboard.component.ts file and add the following lines
- import { Component, OnInit } from '@angular/core';
- import { SocialLoginModule, AuthServiceConfig, AuthService } from 'angular-6-social-login';
- import { Socialusers } from '../Models/socialusers'
- import { SocialloginService } from '../Service/sociallogin.service';
- import { Router } from '@angular/router';
- @Component({
- selector: 'app-dashboard',
- templateUrl: './dashboard.component.html',
- styleUrls: ['./dashboard.component.css']
- })
- export class DashboardComponent implements OnInit {
- socialusers = new Socialusers();
- constructor(public OAuth: AuthService, private router: Router) { }
- ngOnInit() {
- this.socialusers = JSON.parse(localStorage.getItem('socialusers'));
- }
- logout() {
- this.OAuth.signOut().then(data => {
- debugger;
- this.router.navigate([`/Login`]);
- });
- }
- }
Open dashboard.component.html file and add the following lines
- <nav style="background-color: #1e7e34 !important" class="navbar navbar-expand-lg navbar-light bg-light">
- <div class="collapse navbar-collapse" id="navbarSupportedContent">
- <ul class="navbar-nav mr-auto">
- <li class="nav-item active">
- <a class="nav-link" href="#">Home <span class="sr-only"></span></a>
- </li>
- <li class="nav-item">
- <a class="nav-link" href="#">About</a>
- </li>
- </ul>
- <form class="form-inline my-2 my-lg-0">
- <a class="nav-link">{{this.socialusers.name}} <span class="sr-only"></span></a>
- <button (click)="logout()" class="btn btn-outline-success my-2 my-sm-0" >Logout</button>
- </form>
- </div>
- </nav>
Create a Web API Project
Open Visual Studio and create a new project.
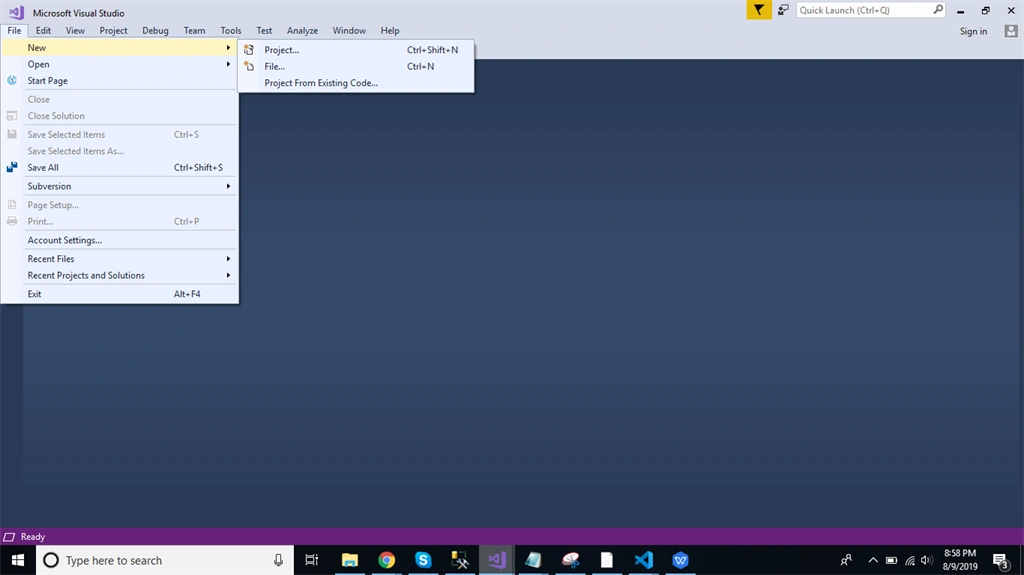
Change the name as SocialmediaLogin and Click ok > Select Web API as its template.
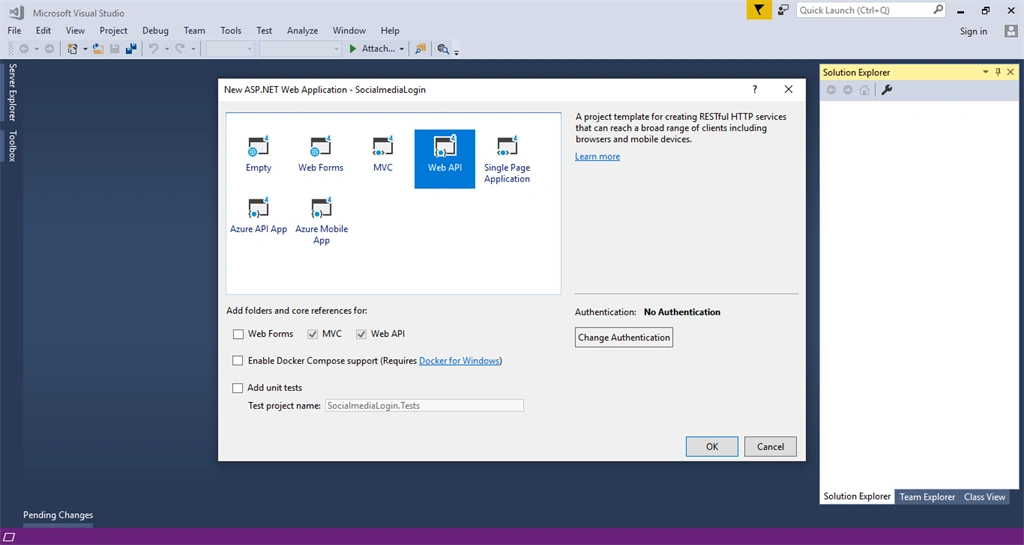
Right-click the Models folder from Solution Explorer and go to Add >> New Item >> data.
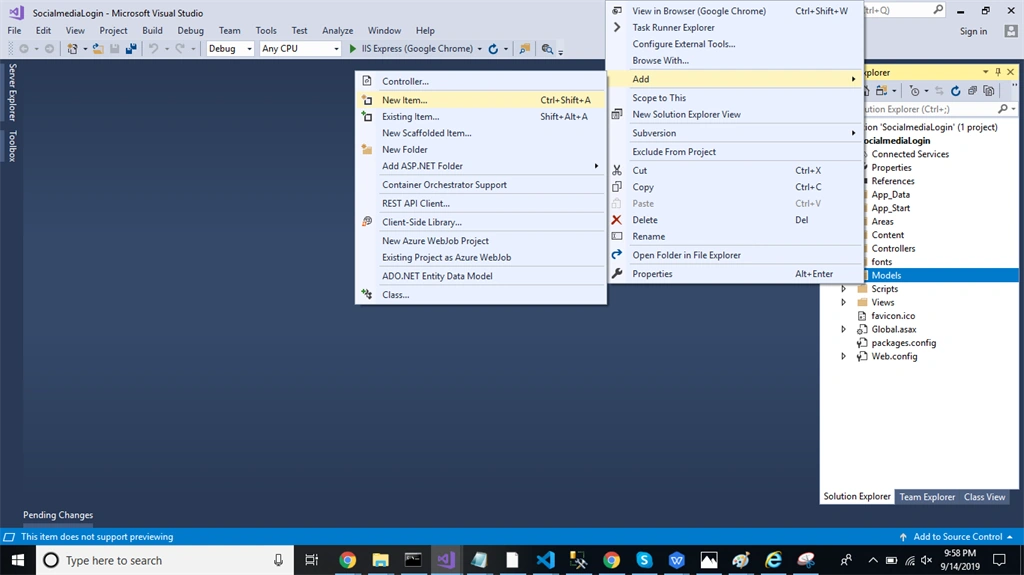
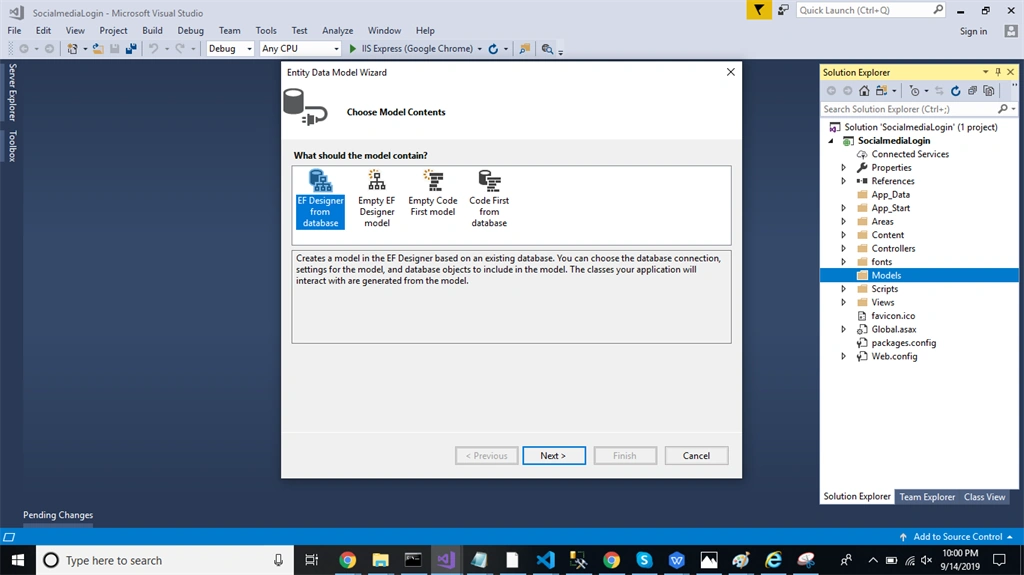
Click on the "ADO.NET Entity Data Model" option and click "Add." Select "EF designer" from the database, and click the "Next" button.
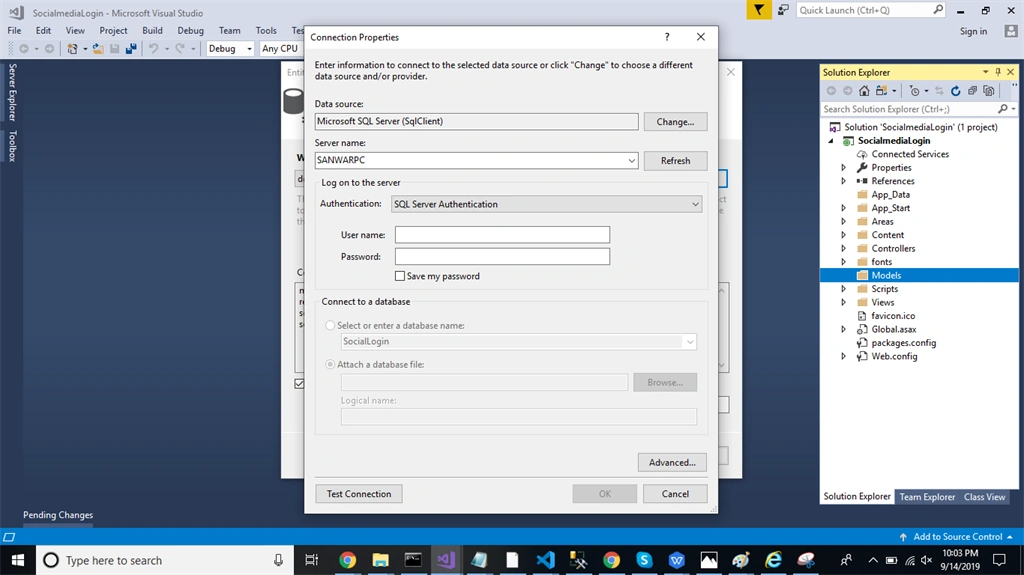
Add the connection properties and select database name on the next page and click OK.
Check the table checkbox. The internal options will be selected by default. Now, click the "Finish" button.
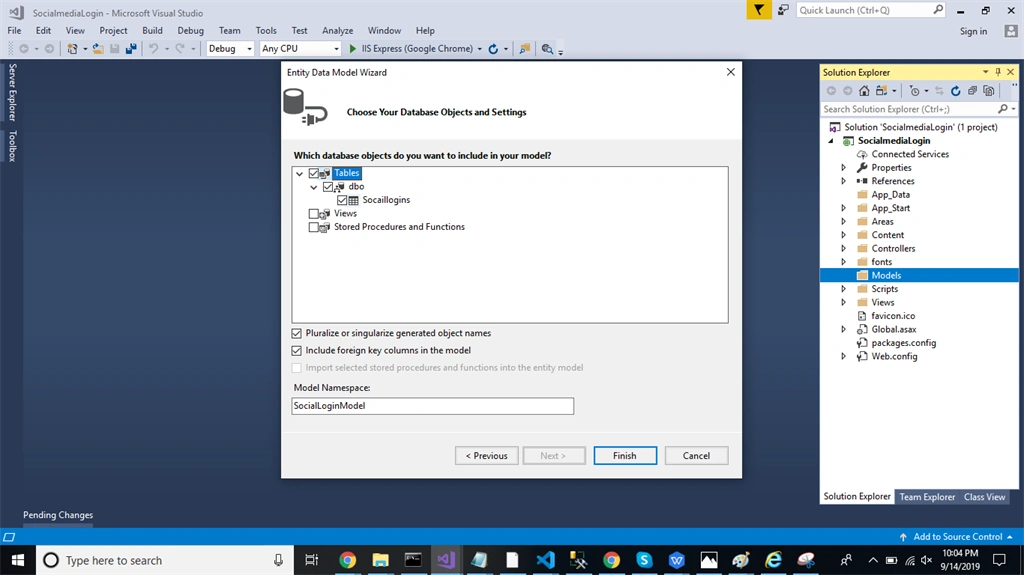
Now, our data model is successfully created.
Now, Right-click on model folder and add two classes -Users and Response. Now, paste the following code in these classes.
Users Class
- public class Users
- {
- public string name { get; set; }
- public string email { get; set; }
- public string provider { get; set; }
- public string provideid { get; set; }
- public string image { get; set; }
- public string token { get; set; }
- public string idToken { get; set; }
- }
Response Class
- public class Response
- {
- public string Status { set; get; }
- public string Message { set; get; }
- }
Right-click on the Controllers folder and add a new controller. Name it as "Login controller" and add the following namespace.
- using SocailMediaLogin.Models;
Create a method in this controller to save data. Add the following code in this controller.
- using System;
- using System.Collections.Generic;
- using System.Linq;
- using System.Net;
- using System.Net.Http;
- using System.Web.Http;
- using SocailMediaLogin.Models;
- namespace SocailMediaLogin.Controllers
- {
- public class LoginController : ApiController
- {
- [Route("Api/Login/Savesresponse")]
- [HttpPost]
- public object Savesresponse(Users user)
- {
- try
- {
- SocialLoginEntities DB = new SocialLoginEntities();
- Socaillogin Social= new Socaillogin();
- if (Social.TId == 0)
- {
- Social.name = user.name;
- Social.email = user.email;
- Social.provideid = user.provideid;
- Social.provider = user.provider;
- Social.image = user.image;
- Social.token = user.token;
- Social.idToken = user.idToken;
- var a= DB.Socaillogins.Add(Social);
- DB.SaveChanges();
- return a;
- }
- }
- catch (Exception)
- {
- throw;
- }
- return new Response
- { Status = "Error", Message = "Invalid Data." };
- }
- }
- }
Now, let's enable Cors. Go to Tools, open NuGet Package Manager, search for Cors, and install the Microsoft.Asp.Net.WebApi.Cors package. Open Webapiconfig.cs, and add the following lines.
- EnableCorsAttribute cors = new EnableCorsAttribute("*", "*", "*");
- config.EnableCors(cors);
Now to go Visual Studio code and run the project
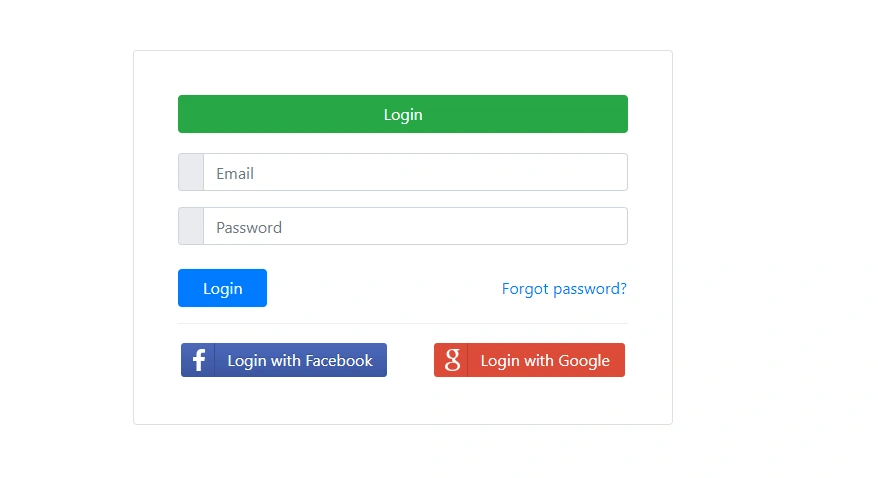
Click on Login with Google button
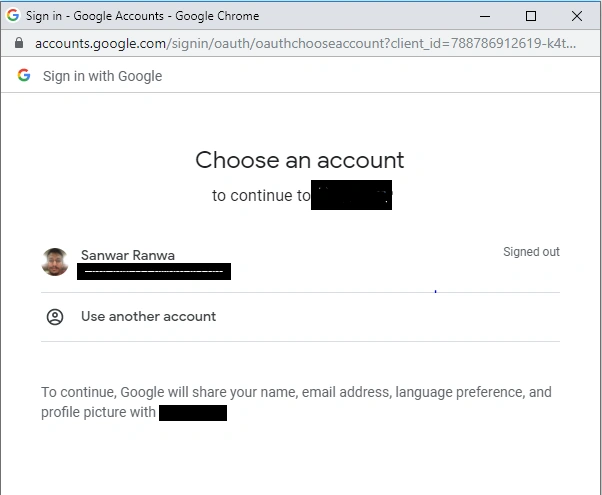
Click on the mail id,
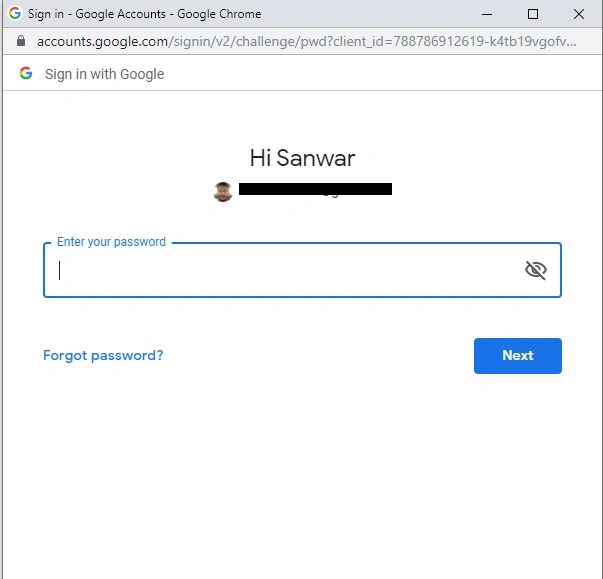
Enter the password and click next button,
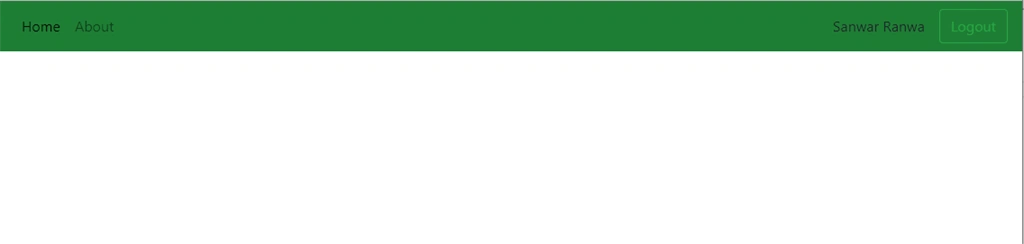
In the same way, click on Login with facebook button and check.
Summary
In this article, we discussed the process of logging in with Facebook and Google using Angular 8 and Web API.
DPosted Aug 5, 2020, 11:52 PM
Can you share the code on github?
waqar mirzaPosted Oct 28, 2019, 2:37 PM
Hi sanwar What we can do if we want to redirect to gmail login to authenticate instead of popup window.
Hari ShankarPosted Oct 2, 2019, 2:07 AM
Hi nice Article. But can't install angular6-social-login packages. As it said the 404 packages not found
Pankajkumar PatelPosted Sep 30, 2019, 12:46 AM
Nice article
Sourav Kumar DasPosted Sep 29, 2019, 11:15 PM
Good Article bro.