

Introduction
Microsoft Forms is an offering from Microsoft that can be used for creating quick and versatile forms for collecting data and quizzes. They are easily configurable and can be integrated with other Microsoft 365 offerings such as Teams, SharePoint and Power Automate, without any hassles.
This is a two-part article. This is the first part of the series and will cover the below articles
-
Designing a form
-
Deployment in Teams
-
Deployment in SharePoint
-
Getting notifications of user responses
-
Viewing results
Designing a form
Step 1
From the app launcher click on “”. It can also be accessed from this URL - https://forms.office.com/Pages/DesignPage.aspx
Step 2
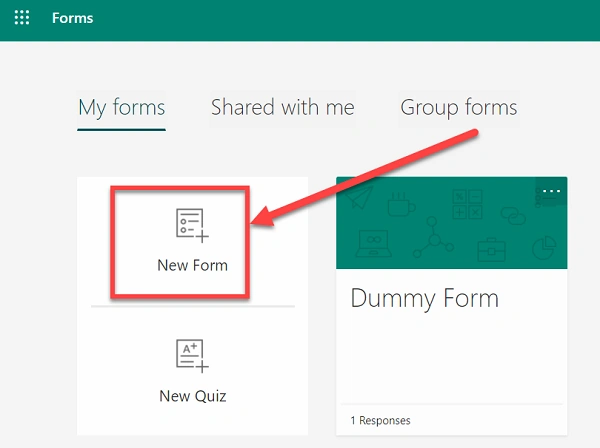
Click on New Form
Step 3
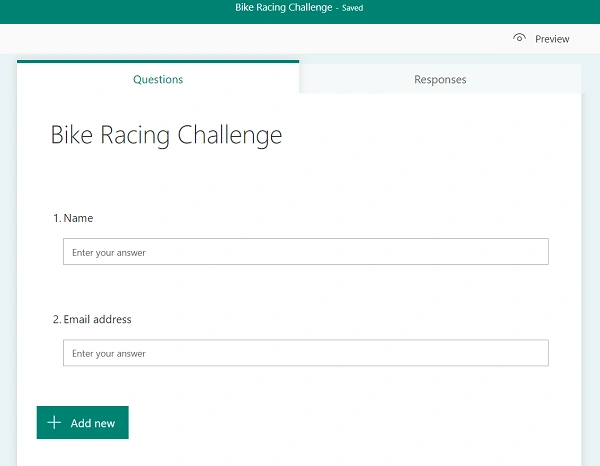
Start building the form. Give it a name. New form questions can be added by clicking on “+ Add New”. Once the questions are saved, click anywhere on the form outside. It has an auto-save feature. We will create a simple form named Bike Racing Challenge with two questions.
Step 4
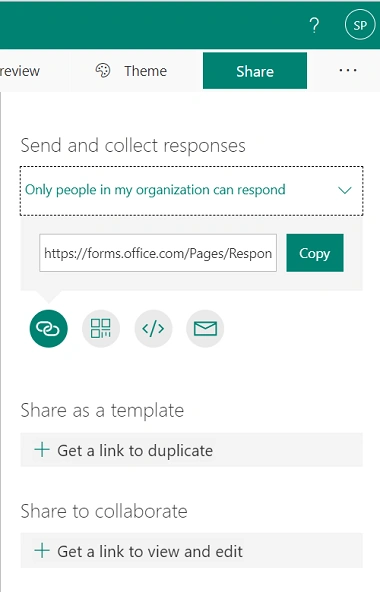
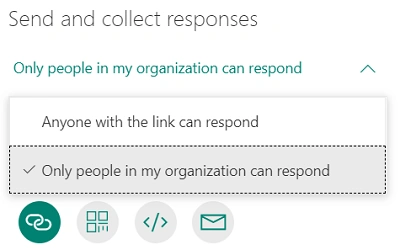
Click on Share button. Then, copy the link under the control Send and Collect Response. This control is also responsible for granting the form with public level or organization level access.
Now at this point, the form development is completed. The next section talks about Deployment in Teams and SharePoint
Deployment in Teams
Step 4
Open Teams. Go to the desired channel where you wish to add the form.
Step 5
Click on Add a tab and select Forms
Step 6
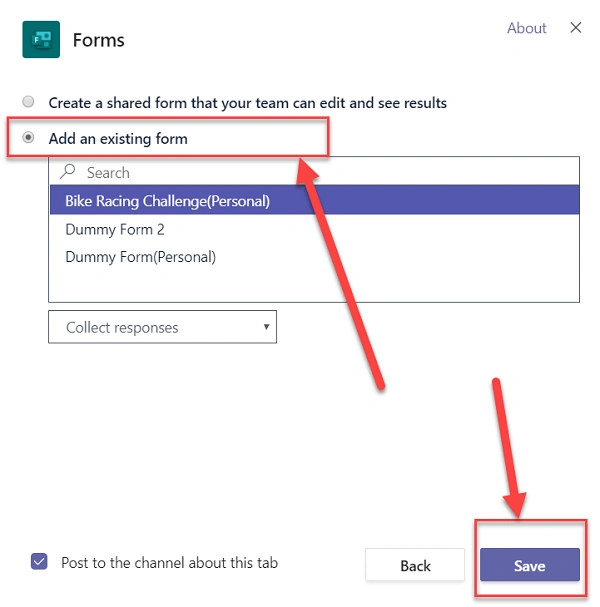
In the next screen, select Add an existing form and select Bike Riding Challenge. Select Collect Response from the dropdown below. Click on Save.
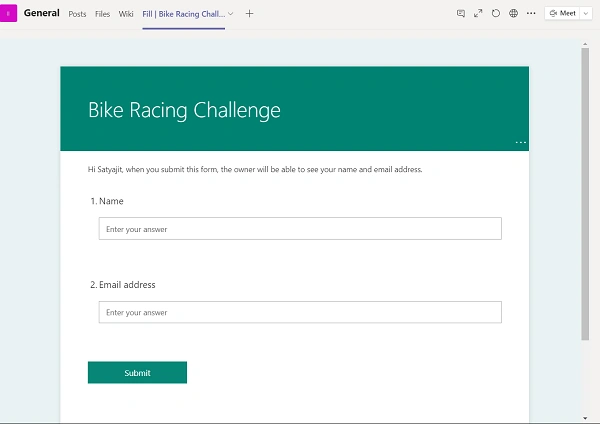
This concludes deployment in Teams. A new tab with the form will be added which can be used to submit responses.
Deployment in SharePoint
Step 7
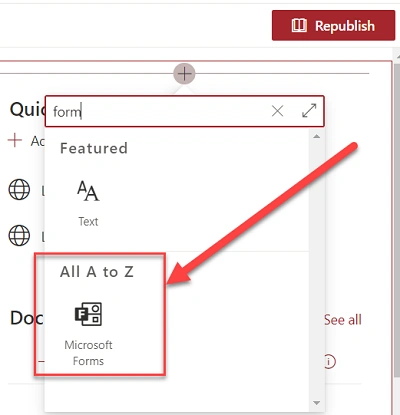
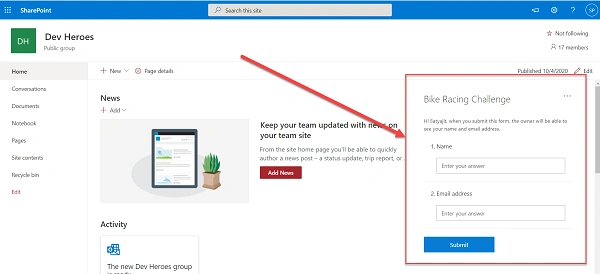
SharePoint has a dedicated webpart for hosting forms, known as Microsoft Forms. Click on Edit page. Add the webpart Microsoft Forms
Step 8
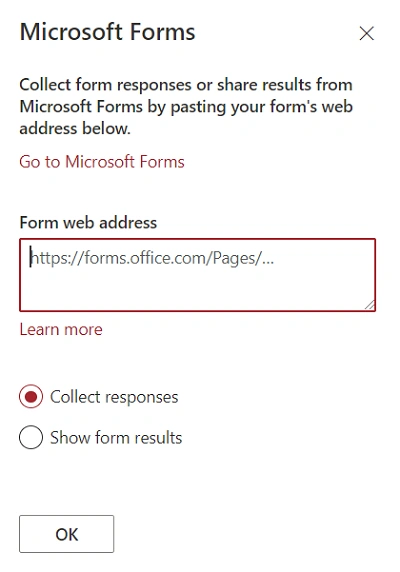
In the next screen, select Add existing form. Paste the URL we copied from Step 4. Select Collect Response and click on Save. Republish the page.
This will add the form in SharePoint page as a webpart.
Getting notifications of user responses
There is an inbuilt setting that lets the owner/creator of the form to receive notification once any user submits the form. Below are the steps to set it up.
Step 9
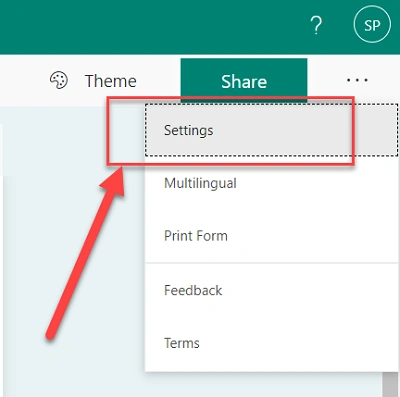
From the form, click on Settings as per this screenshot below
Step 10
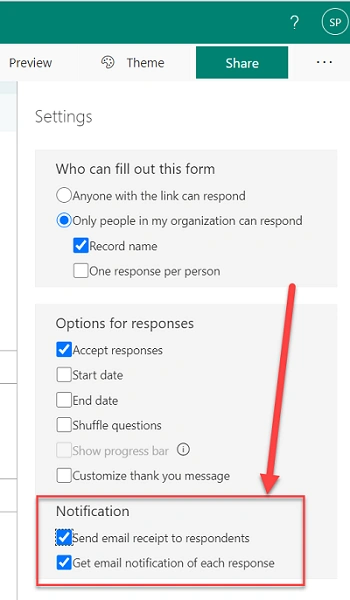
Check the options under Notification section to enable the notifications. This will enable notifications for form submissions.
Viewing results
All the responses for the form can be located easily in the Responses tab of the form.
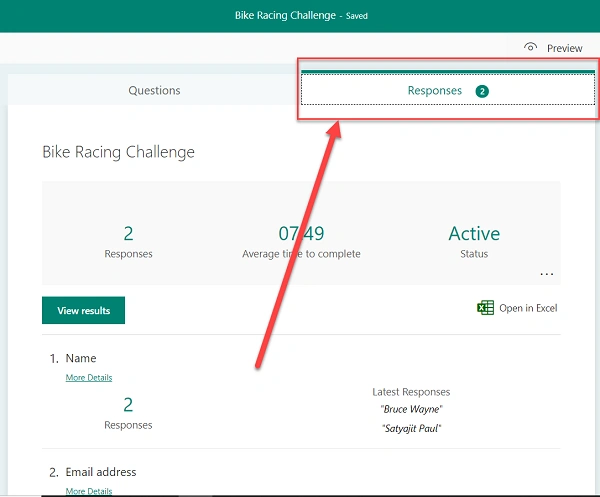
There also exists and Open in Excel button that downloads the responses in an excel. It is handy for easy export of the collected data.

Summary and Conclusion
This concludes the first part of this article, where we discussed the form creation, deployment, notifications and results. In the next and final article, we will have a look at the advanced topics such as group form, ownership transfer of form, etc.
Join the conversation! Your thoughts help the community grow.