

Recently I was working on automating SharePoint site provisioning PnP script. We wanted to schedule this script to auto-trigger on an hourly basis, so we scheduled the script.
As the script was to be scheduled, we started creating SharePoint Apps to manage authentication.
Register SharePoint Add-ins
Go to <site collection url>/_layouts/15/AppRegNew.aspx by using a web browser.
AppRegNew page form
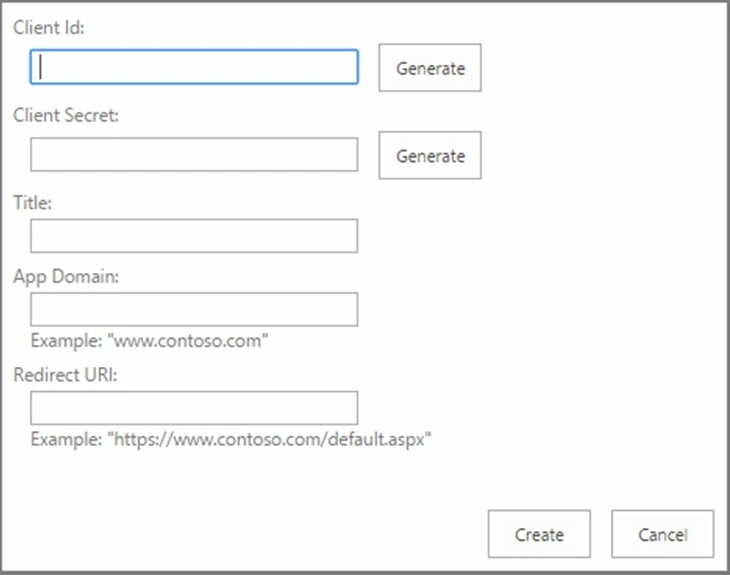
Enter values for the following form fields.
- Add-in ID: Also known as client ID; a GUID that can be generated (when you select Generate) or pasted into AppRegNew.aspx. The value must be unique for each add-in and must be lowercase.
- Add-in Secret: Also known as the client secret, an opaque string. It is generated on the AppRegNew.aspx page by using the Generate button.
- Title: A user-friendly title: for example, Contoso photo printing add-in. Users are prompted to grant or deny the add-in permissions that the add-in is requesting. This title appears as the name of the add-in on the consent prompt.
- Add-in Domain: The hostname of the remote component of the SharePoint Add-in. If the remote application isn't using port 443, the add-in domain must also include the port number. The add-in domain must match the URL bindings you use for your web application.
- Redirect URI: The endpoint in your remote application or service to which ACS sends an authentication code. Strictly speaking, SharePoint Add-ins don't use this value. The redirect URI is required for web applications that are launched outside of SharePoint and that use the Authentication Code flow to get authorized access to SharePoint data.
Select Create on the form. The page reloads and shows a confirmation of the values that you entered. Make a record of these values in a form that is easy to copy and paste.
Setting up an app-only principal with tenant permissions
The next step is granting permissions to the newly created principal. Since we're granting tenant-scoped permissions, this granting can only be done via the appinv.aspx page on the tenant administration site. You can reach this site via https://contoso-admin.sharepoint.com/layouts/15/appinv.aspx. Once the page is loaded, add your client ID and look up the created principal.
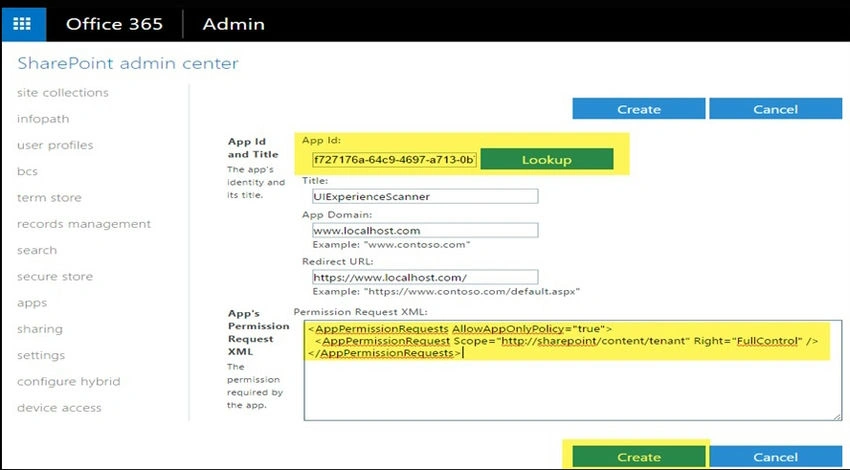
To grant permissions, you'll need to provide the permission XML that describes the needed permissions. Since this application needs to be able to access all sites + also uses search with app-only it needs below permissions.
<AppPermissionRequests AllowAppOnlyPolicy="true">

  <AppPermissionRequest Scope="http://sharepoint/content/tenant" Right="FullControl" />

</AppPermissionRequests>
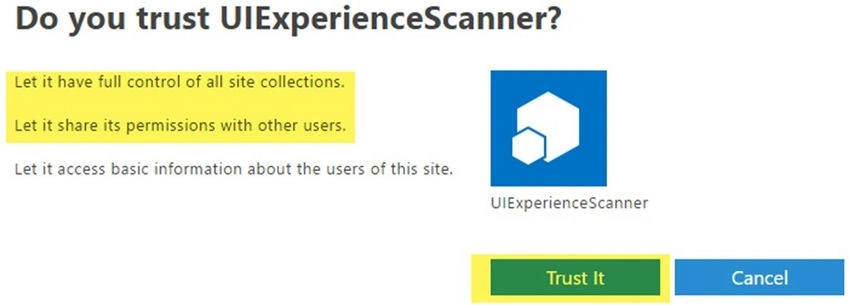
When you click on Create, you'll be presented with a permission consent dialog. Press Trust It to grant the permissions.
With the preparation work done, let's continue to the next chapter showing how you can use the created app principal via its client ID and secret combination.
While we try to connect using.
Connect-PnPOnline -Url <URL> -ClientId <ClientID> -ClientSecret <ClientSecret>
Happy development.
Join the conversation! Your thoughts help the community grow.