

In my previous article, I explained how to implement Slowly Changing Dimension (SCD) Type 4 in Azure SQL Database. In this article, we will explore how to automate this process by creating an Azure SQL Database and executing the stored procedure using Azure Data Factory (ADF).
Creating an Azure SQL Database
- Navigate to Azure Portal: Go to portal.azure.com and open the marketplace.
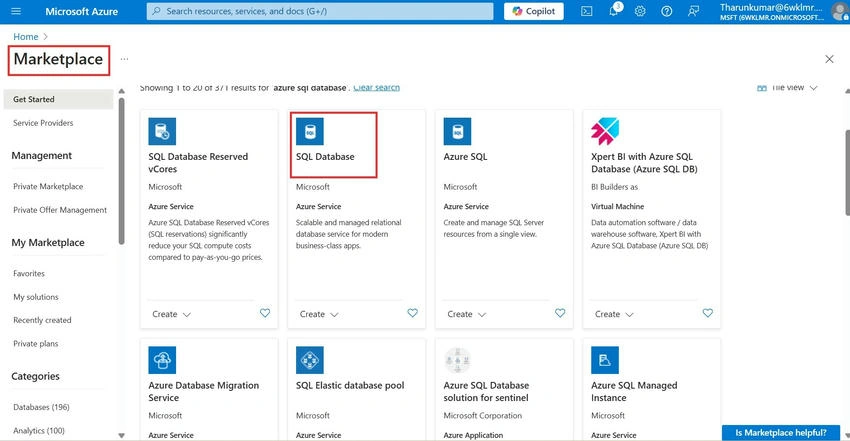
- Search for Azure SQL Database and click Create.
- Provide Required Details.
- Select the appropriate Subscription and Resource Group (create a new one if needed).
- Provide a Database Name.
- If no existing server is available, create a new one.
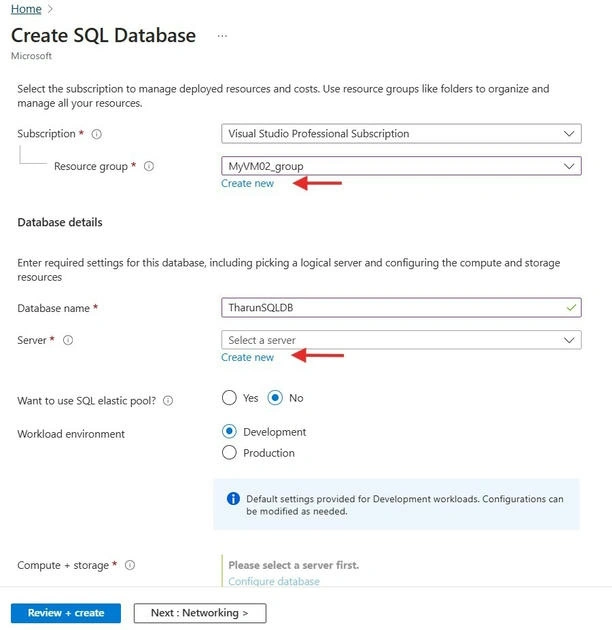
Creating a New SQL Server
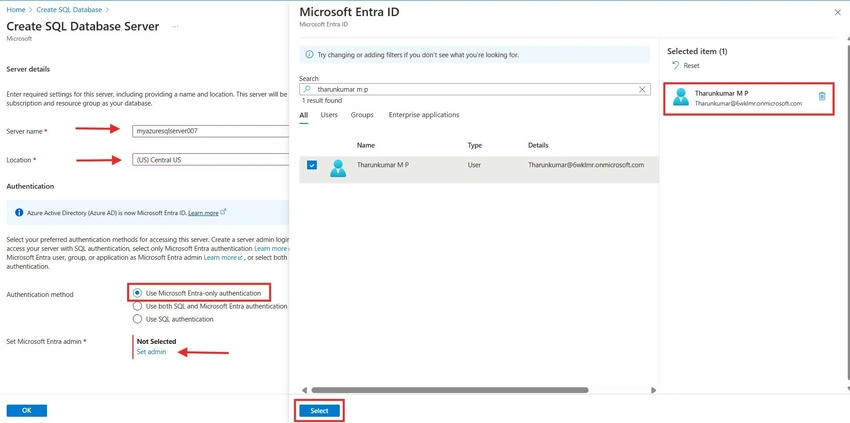
- Provide a Server Name and choose the Server Hosting Location.
- For authentication, select Microsoft Entra-only Authentication, as this is a best practice.
- Why not SQL Server Authentication? SQL Server Authentication relies on username/password combinations, which pose security risks such as credential leaks and brute-force attacks. Entra authentication enhances security through multi-factor authentication (MFA) and centralized identity management.
- Select the Entra Admin and click Create.
- When prompted for Elastic Pool, select No.
- What is an Elastic Pool? Elastic pools provide a cost-effective way to manage multiple databases with varying usage patterns by sharing resources among them.
- Leave the remaining settings as default and click Review & Create.
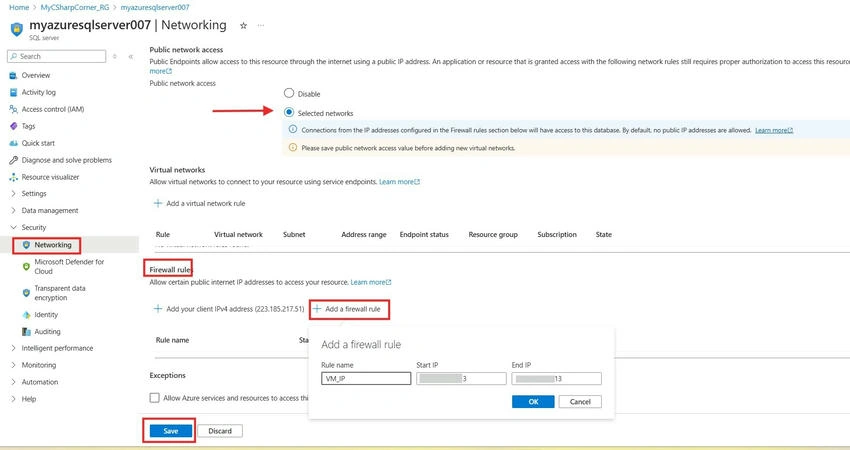
Configuring Firewall Rules for SQL Server
- Navigate to: SQL Server > Security > Networking > Public Network Access.
- Select Selected Networks.
- Add your Client IPv4 Address and configure Virtual Network Rules if necessary.
- Enable "Allow Azure Services & Resources".
- Why enable this? This setting allows services like Azure Data Factory to communicate with the database without requiring additional firewall configurations.
- Why enable this? This setting allows services like Azure Data Factory to communicate with the database without requiring additional firewall configurations.
Testing SQL Server Connectivity
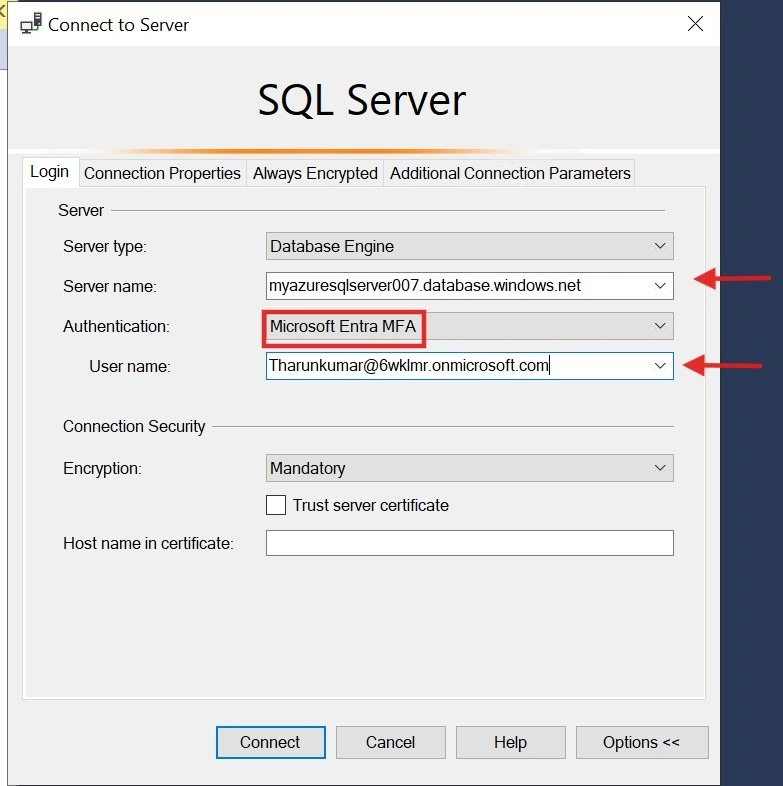
- Open SQL Server Management Studio (SSMS).
- Click Connect > Database Engine.
- Enter the following details:
- Server Name: <server name>
- Authentication: Microsoft Entra MFA
- Username: <Entra Admin Username>
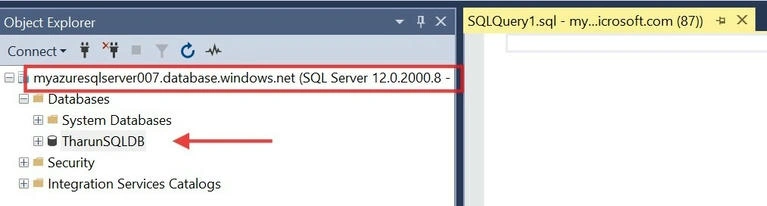
- Click Connect. Complete MFA authentication if prompted.
- The connection should be successful.
Enabling System Assigned Managed Identity for Data Factory
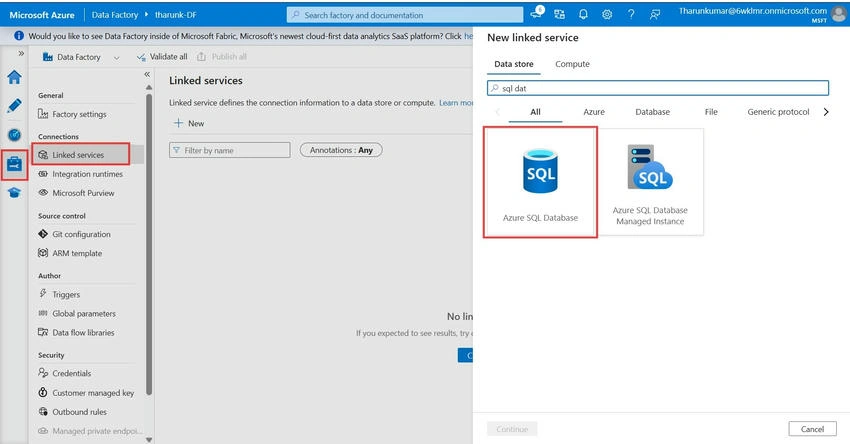
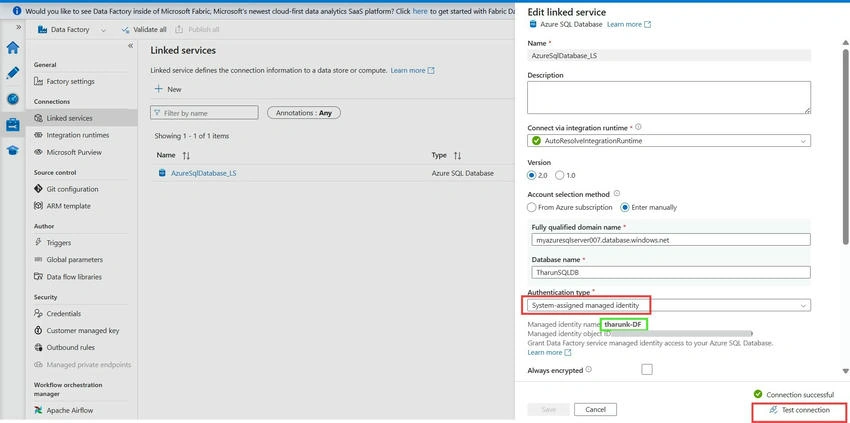
To allow ADF to interact with the SQL Server securely, we will use System Assigned Managed Identity.
Step 1. Grant Data Factory Access to SQL Server.
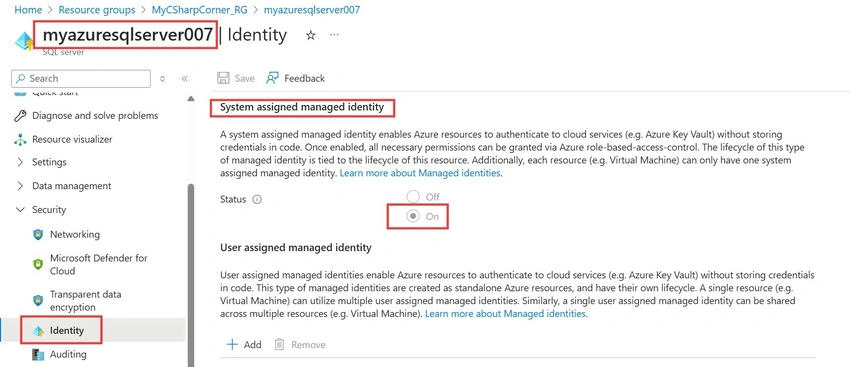
- Ensure System Assigned Managed Identity is enabled for SQL Server under Security > Identity.
Step 2. Assign Access to Data Factory.
- Navigate to Access Control (IAM).
- Select Role Assignments > Add Role Assignment.
- Under Assign Access To, choose Managed Identity.
- Search for ADF’s Managed Identity (using Identity ID/Name).
- Click Review & Assign.

Step 3. Configure Database Permissions.
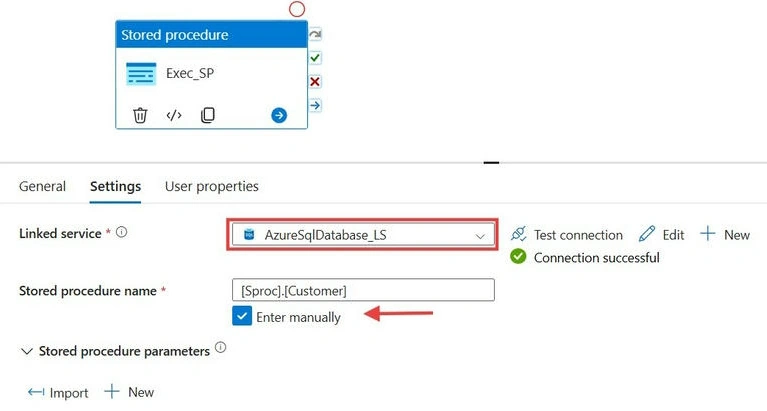
While we have granted access to ADF at the server level, additional permissions are required for operations such as executing stored procedures, creating and dropping tables, and modifying database objects. To achieve this, we execute the following SQL commands.





Join the conversation! Your thoughts help the community grow.