


Implementing Alerts in Android using Kotlin is similar to Java implementation and so, it is very easy to understand. Here, we will learn the following alerts.
- Alert with two options
- Alert with list
Coding Part
I have split this article into 3 steps as follows:
Step 1 - Creating a new Android Project with Kotlin in Android Studio.
Step 2 - Adding User Interface in your layout file.
Step 3 - Implementing the alerts in Android Application.
Step 1 - Creating a new Android Project with Kotlin in Android Studio
By default, Android Studio 3.0 has the checkbox for Kotlin Support for your Android Application. Create a new project in Android studio, check the Kotlin support, and start as usual with Android Studio 3.0.
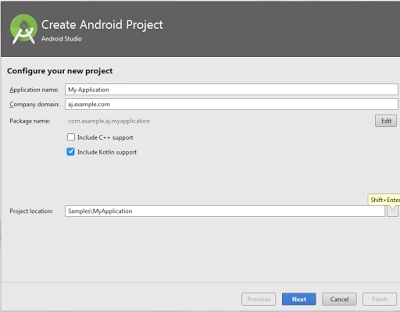
For migrating Java Android Project to Kotlin Android Project, you can do the following processes.
Configuring Kotlin
Kotlin support can be configured by selecting Tools - Kotlin - Configure Kotlin. Then, click “Sync Now”. This step is applicable to the Android Studio versions prior to 3.0, so it's best to update your Android Studio.
In Android Studio 3.0, by default, you have Kotlin Activity. For Android Studio with versions lower than 3.0, you can convert Java activity into Kotlin Activity.
Open Quick Search or Click Ctrl + Shift + A for Windows Users and Search and Select “Convert Java to Kotlin” or simply Select Ctrl + Shift + Alt + K.
Step 2 - Adding User Interface in your Layout file
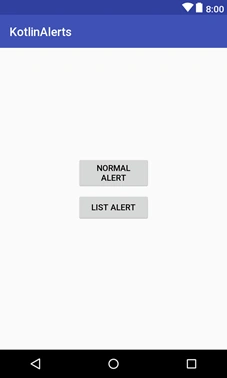
In this step, we will add buttons for triggering normal alerts and list alerts. Open your activity_main.xml file and paste the following.
- <?xml version="1.0" encoding="utf-8"?>
- <android.support.constraint.ConstraintLayout xmlns:android="http://schemas.android.com/apk/res/android"
- xmlns:app="http://schemas.android.com/apk/res-auto"
- xmlns:tools="http://schemas.android.com/tools"
- android:layout_width="match_parent"
- android:layout_height="match_parent"
- tools:context="com.ajts.androidmads.kotlinalerts.MainActivity"
- tools:layout_editor_absoluteY="81dp">
- <Button
- android:id="@+id/optionAlert"
- android:layout_width="0dp"
- android:layout_height="wrap_content"
- android:layout_marginTop="184dp"
- android:text="Normal Alert"
- app:layout_constraintEnd_toEndOf="@+id/listAlert"
- app:layout_constraintStart_toStartOf="@+id/listAlert"
- app:layout_constraintTop_toTopOf="parent"
- android:onClick="showNormalAlert"/>
- <Button
- android:id="@+id/listAlert"
- android:layout_width="123dp"
- android:layout_height="wrap_content"
- android:layout_marginTop="7dp"
- android:text="List Alert"
- app:layout_constraintEnd_toEndOf="parent"
- app:layout_constraintStart_toStartOf="parent"
- app:layout_constraintTop_toBottomOf="@+id/optionAlert"
- android:onClick="showListAlert" />
- </android.support.constraint.ConstraintLayout>
Sagar Pandurang KapPosted Mar 11, 2018, 11:59 PM
Nicely Explained.......