

Prerequisites
- Active Microsoft Azure Account
Introduction
In this article, we’ll see how to connect a Virtual Machine in Azure and install Active Directory inside that Virtual Machine.
Azure Active Directory is a fully managed multi-tenant service from Microsoft that offers identity and access capabilities for applications running in Microsoft Azure and for applications running in an on-premises environment.
Virtual Machine Creation
Click here.
Process 1 (Going inside VM)
Step 1
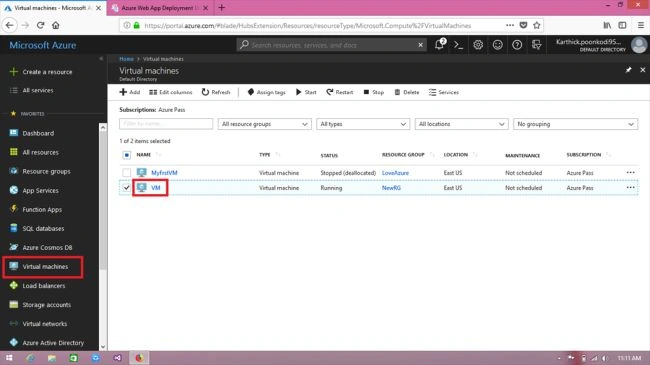
Go to the Virtual Machine section located on the left panel.
Select the “Virtual Machines”, which you want to connect to.
Step 2
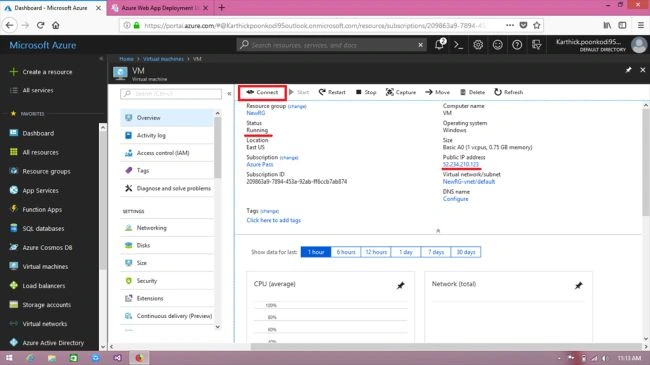
Here, the Virtual Machine is already started and the status is “Running”.
Click “Connect”.
(This connection will initiate “Remote Desktop Session”. The protocol used behind the connection is Remote Desktop Protocol. Every Virtual machine in Azure is given with a “Public IP Address”. This IP address will be given automatically to the Virtual machine by Azure)
Step 3
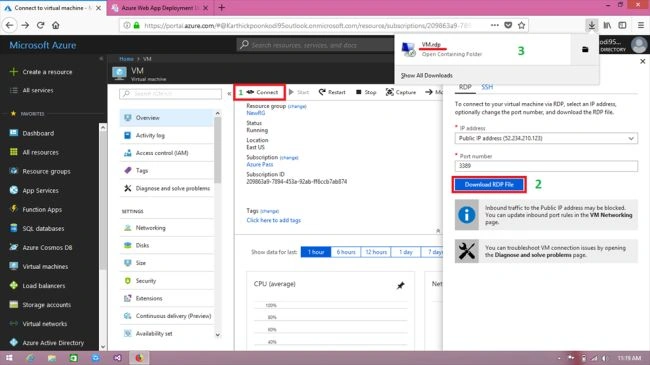
Connect >> Download RDF File >> Click the downloaded file (VM.rdp).
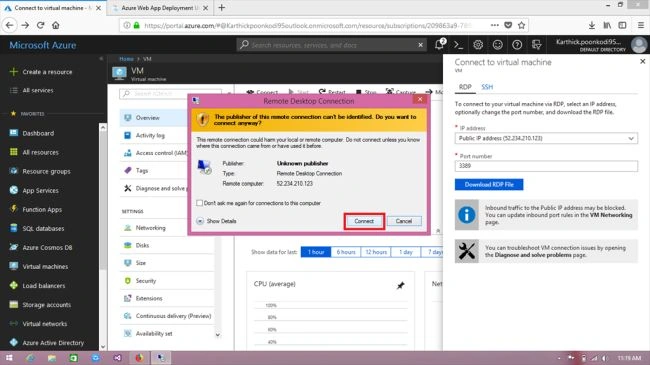
Click the “Connect” to connect.
Give your Virtual machine’s Username and Password here.
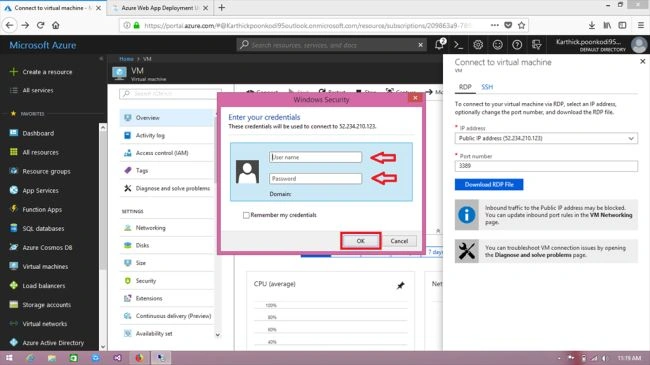
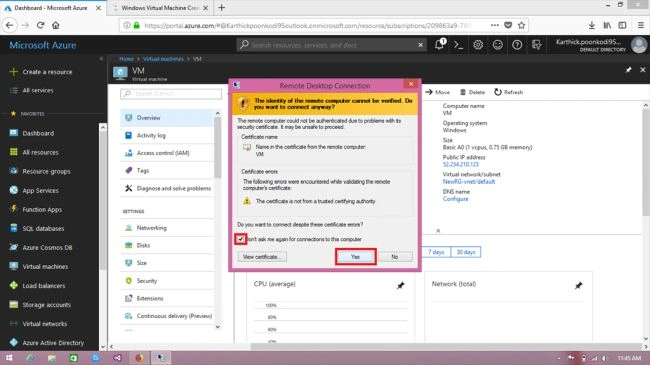
Now, we have opened the Virtual Machine.
Once my Virtual Machine is created, I can use that Virtual Machine in the same way as I use any on-premise Virtual Machine.
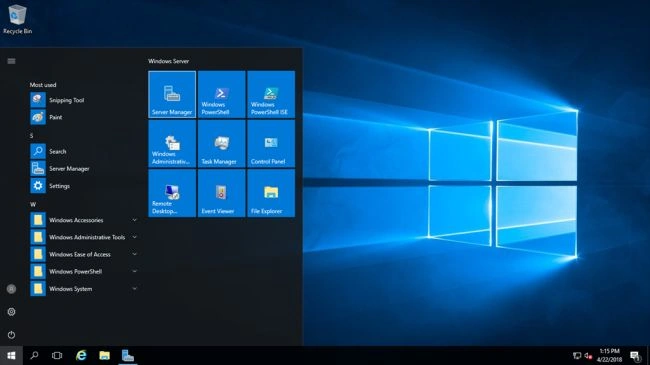
Process 2 - (Remote Desktop Connection in Server Manager on the VM)
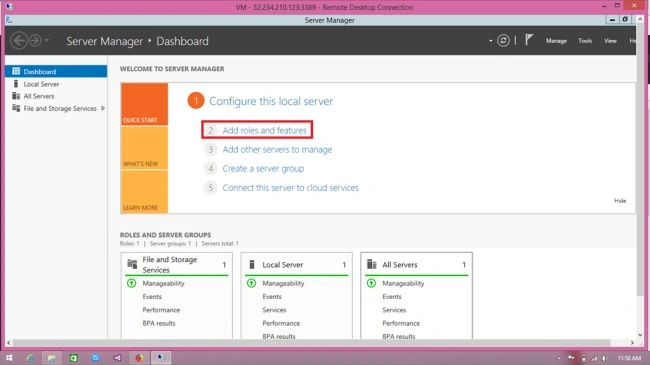
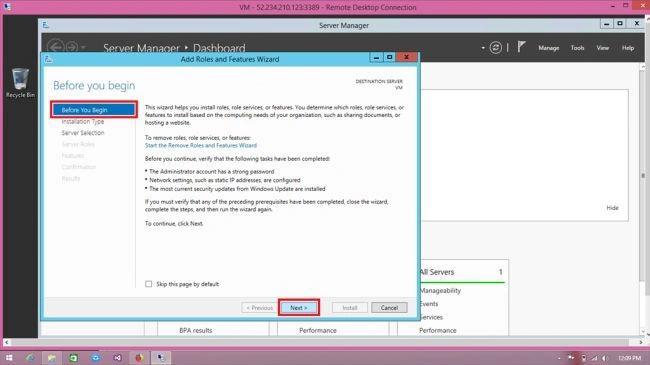
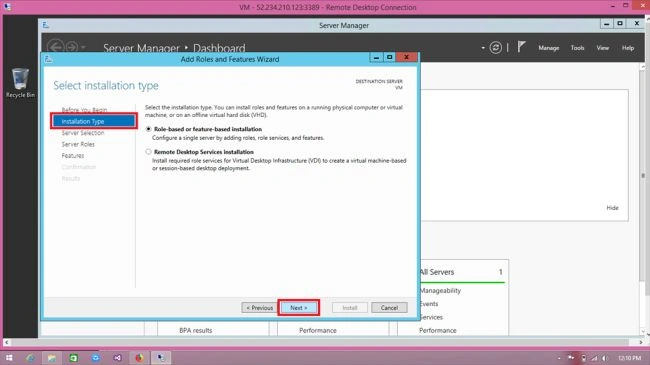
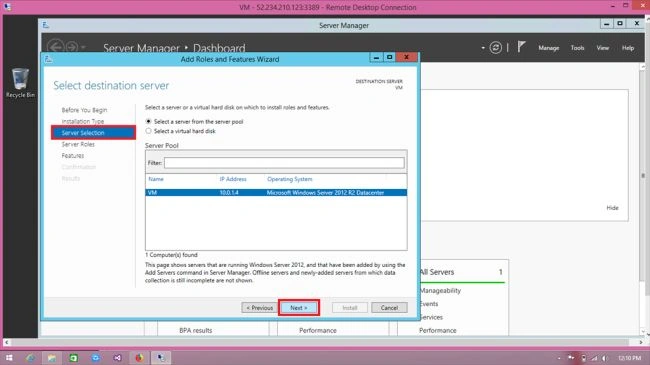
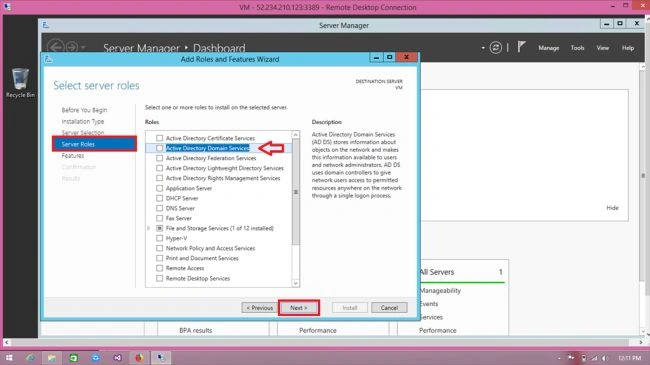
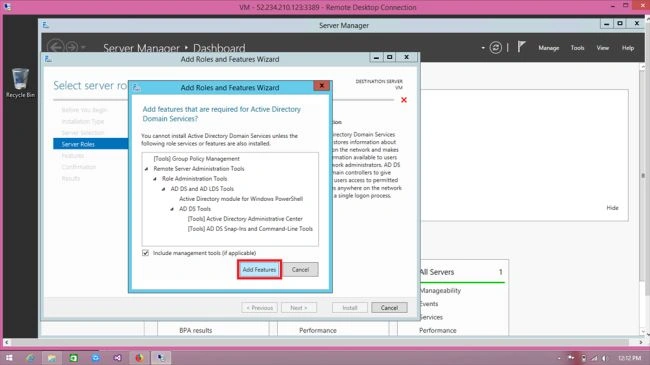
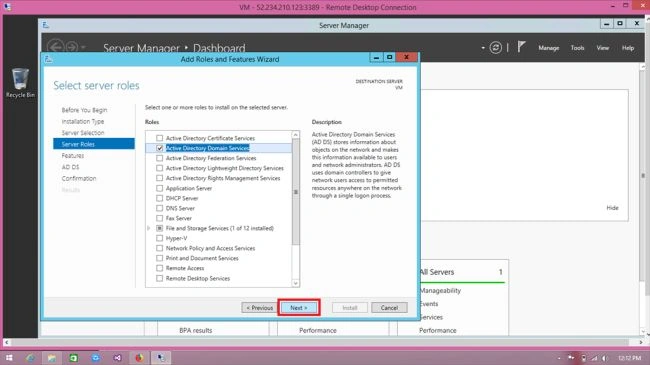
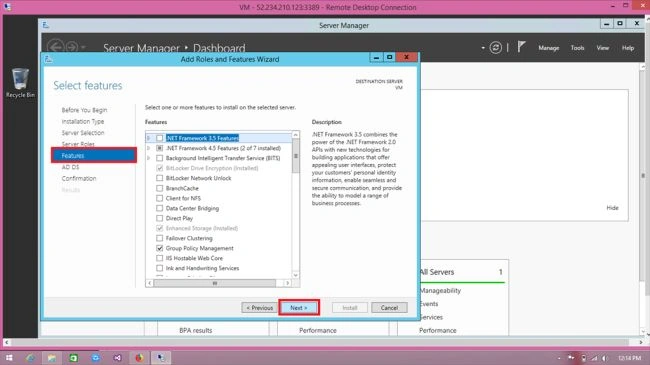
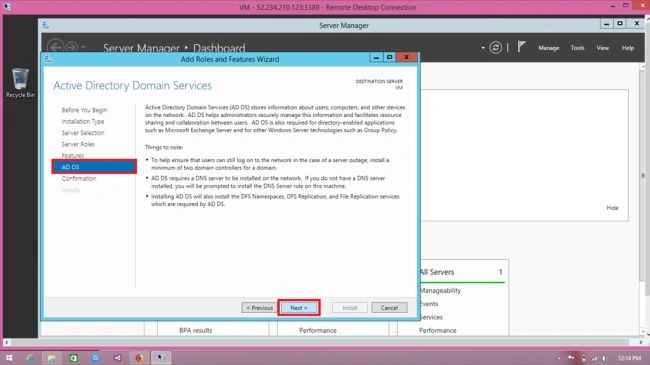
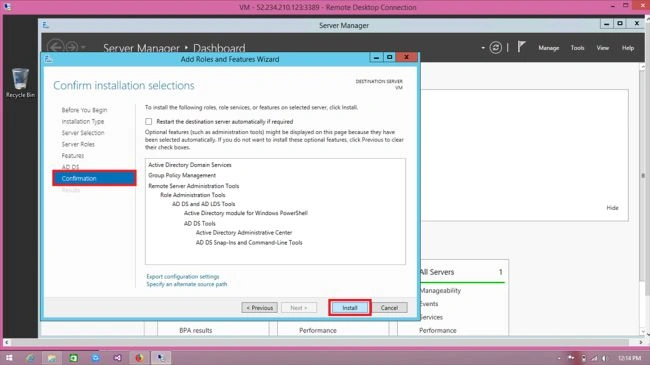
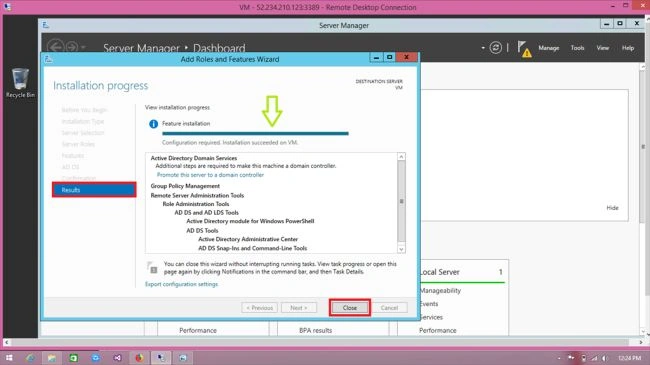
Adding Roles and Features
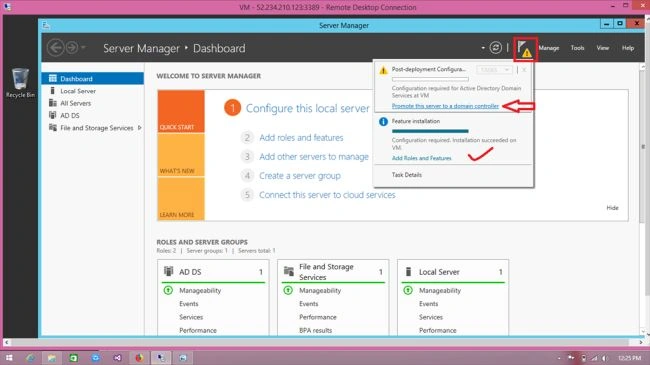
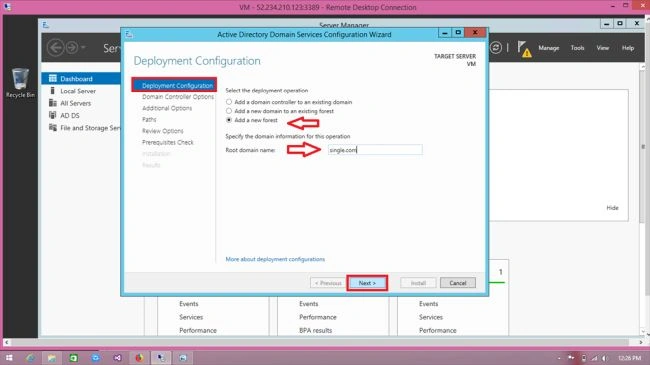
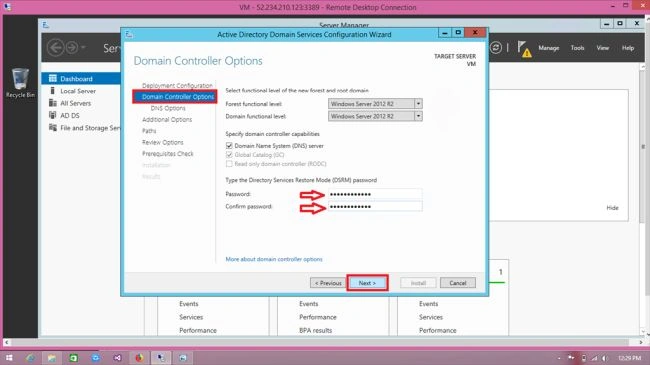
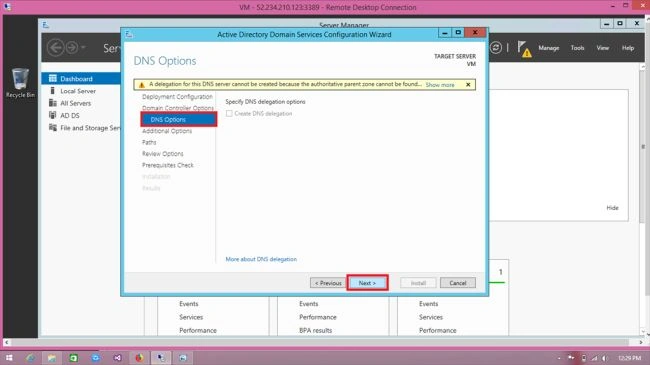
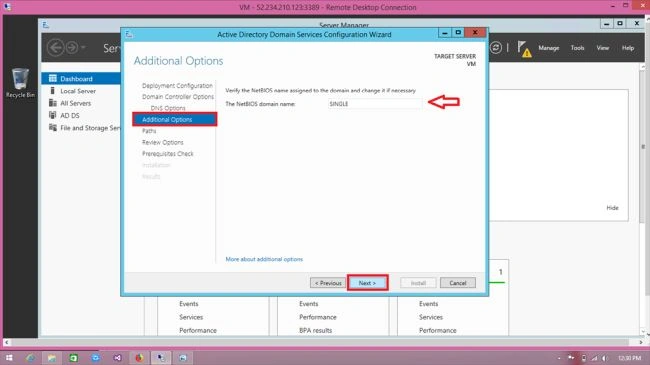
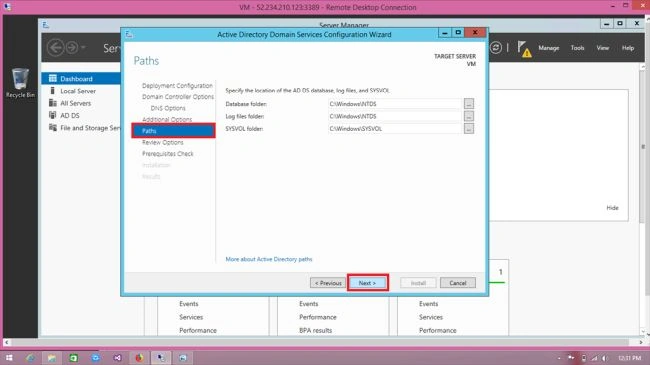
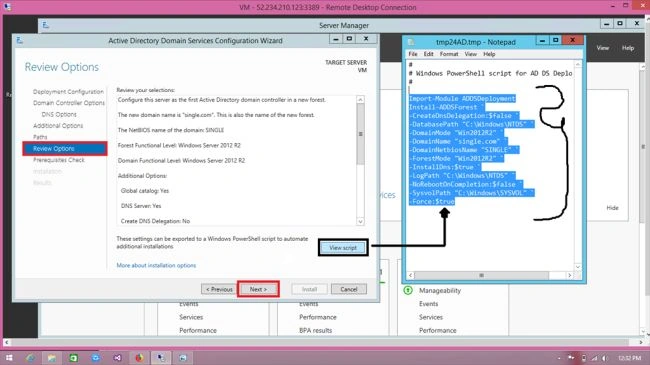
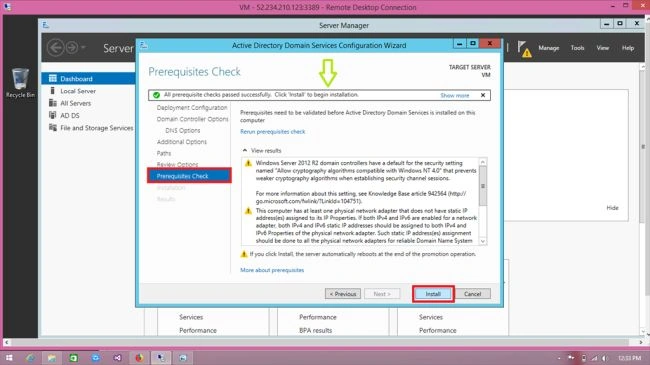
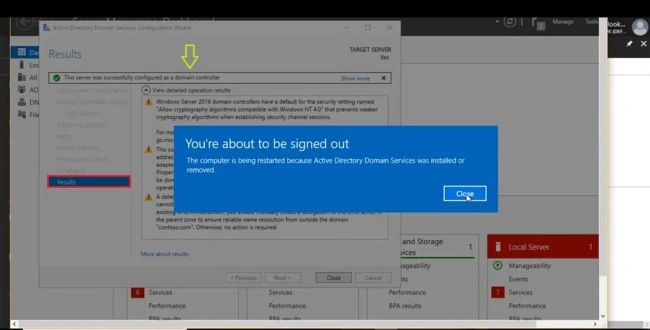
All the upcoming steps are simple. So, keep doing it what I have shown in the images.
Open the second one on the Dashboard.
tharak nadhPosted May 8, 2019, 5:08 AM
Thank you so much for sharing with screen shots also
Hadshana KamalanathanPosted Jul 14, 2018, 11:38 PM
Thank you for sharing...
Reena LakraPosted Jun 29, 2018, 3:56 AM
Nice article sir
Mahesh VermaPosted Jun 28, 2018, 10:00 AM
Nice article.....