Creating Table in SQL
Server Database
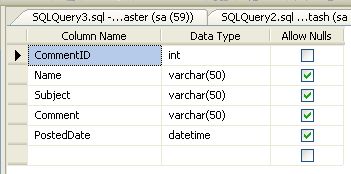
Now create a table named Commenttable
with columns CommentID, Name, Subject and Comment. Set
identity property=true for
CommentID.
Table looks like the below.
Step 1: Create
a simple application in Visual Studio.
After completion of table
creation open Visual Studio and create a new website. After that drag and drop
three TextBoxes and one Button control onto the form from the ToolBox and write the
following code in your aspx page.
<%@
Page Language="C#"
AutoEventWireup="true"
CodeFile="Default2.aspx.cs"
Inherits="Default2"
%>
<!DOCTYPE
html PUBLIC
"-//W3C//DTD XHTML 1.0 Transitional//EN"
"http://www.w3.org/TR/xhtml1/DTD/xhtml1-transitional.dtd">
<html
xmlns="http://www.w3.org/1999/xhtml">
<head
runat="server">
<title></title>
</head>
<body>
<form
id="form1"
runat="server">
<div>
<table>
<tr>
<td> Name:
</td>
<td><asp:TextBox
ID="txtName" runat="server"/></td>
</tr>
<tr>
<td>Subject:
</td>
<td><asp:TextBox
ID="txtSubject" runat="server"/></td>
</tr>
<tr>
<td
valign="top">Comments:</td>
<td><asp:TextBox
ID="txtComment" runat="server"
Rows="5"
Columns="20"
TextMode="MultiLine"/></td>
</tr>
<tr>
<td></td>
<td><asp:Button
ID="btnSubmit" runat="server"
Text="Submit"
onclick="btnSubmit_Click"
/></td>
</tr>
</table>
</div>
<div>
</div>
</form>
</body>
</html>
Step 2: Now drag and drop a Repeater control onto the form to show the
inserted comments. Write the following code
in your aspx page.
<asp:Repeater
ID="RepDetails" runat="server">
<HeaderTemplate>
<table
style="
border:1px solid
#df5015; width:500px"
cellpadding="0">
<tr
style="background-color:Green;
color:White">
<td
colspan="2">
<b>Comments</b>
</td>
</tr>
</HeaderTemplate>
<ItemTemplate>
<tr
style="background-color:#EBEFF0">
<td>
<table
style="background-color:#EBEFF0;border-top:1px
dotted #df5015; width:500px"
>
<tr>
<td>
Subject:
<asp:Label
ID="lblSubject" runat="server"
Text='<%#Eval("Subject")
%>'
Font-Bold="true"/>
</td>
</tr>
</table>
</td>
</tr>
<tr>
<td>
<asp:Label
ID="lblComment" runat="server"
Text='<%#Eval("Comment")
%>'/>
</td>
</tr>
<tr>
<td>
<table
style="background-color:#EBEFF0;border-top:1px
dotted #df5015;border-bottom:1px
solid #df5015; width:500px"
>
<tr>
<td>Post
By: <asp:Label
ID="lblUser"
runat="server"
Font-Bold="true"
Text='<%#Eval("Name")
%>'/></td>
<td>Created
Date:<asp:Label
ID="lblDate"
runat="server"
Font-Bold="true"
Text='<%#Eval("PostedDate")
%>'/></td>
</tr>
</table>
</td>
</tr>
<tr>
<td
colspan="2"> </td>
</tr>
</ItemTemplate>
<FooterTemplate>
</table>
</FooterTemplate>
</asp:Repeater>
Step 3: Now add the following
namespace.
using
System.Data.SqlClient;
using
System.Data;
Step 4: Now write the connection string to connect to the database.
string
strConnection = "Data Source=.; uid=sa; pwd=wintellect;database=Rohatash;";
Step 5: Now Insert the comment detail into the database table. Write the following
code for the Button click event for inserting the comment details.
protected
void btnSubmit_Click(object
sender, EventArgs e)
{
SqlConnection con = new
SqlConnection(strConnection);
con.Open();
SqlCommand com = new
SqlCommand("insert
into Commenttable(Name,Subject,Comment,PostedDate) values('" +
txtName.Text + "', '" + txtSubject.Text +
"', '" + txtComment.Text +
"', '"+DateTime.Now+"'
)", con);
com.ExecuteNonQuery();
con.Close();
}
Step 6: Now bind the data to the repeater control. We create a function with the
following code.
protected
void BindData()
{
SqlConnection con = new
SqlConnection(strConnection);
con.Open();
SqlCommand cmd = new
SqlCommand("select
* from Commenttable Order By PostedDate desc", con);
DataSet
ds = new DataSet();
SqlDataAdapter da = new
SqlDataAdapter(cmd);
da.Fill(ds);
RepDetails.DataSource = ds;
RepDetails.DataBind();
con.Close();
}
Now the Default2.aspx.cs file looks like the following code.
using
System;
using
System.Collections.Generic;
using
System.Linq;
using
System.Web;
using
System.Web.UI;
using
System.Web.UI.WebControls;
using
System.Data.SqlClient;
using
System.Data;
public
partial class
Default2 : System.Web.UI.Page
{
string
strConnection = "Data Source=.; uid=sa; pwd=wintellect;database=Rohatash;";
protected
void Page_Load(object
sender, EventArgs e)
{
BindData();
}
protected
void btnSubmit_Click(object
sender, EventArgs e)
{
SqlConnection con = new
SqlConnection(strConnection);
con.Open();
SqlCommand com = new
SqlCommand("insert
into Commenttable(Name,Subject,Comment,PostedDate) values('" +
txtName.Text + "', '" + txtSubject.Text +
"', '" + txtComment.Text +
"', '"+DateTime.Now+"'
)", con);
com.ExecuteNonQuery();
con.Close();
}
protected
void BindData()
{
SqlConnection con = new
SqlConnection(strConnection);
con.Open();
SqlCommand cmd = new
SqlCommand("select
* from Commenttable Order By PostedDate desc", con);
DataSet
ds = new DataSet();
SqlDataAdapter da = new
SqlDataAdapter(cmd);
da.Fill(ds);
RepDetails.DataSource = ds;
RepDetails.DataBind();
con.Close();
}
}
Step 7: Now run the application and test it.
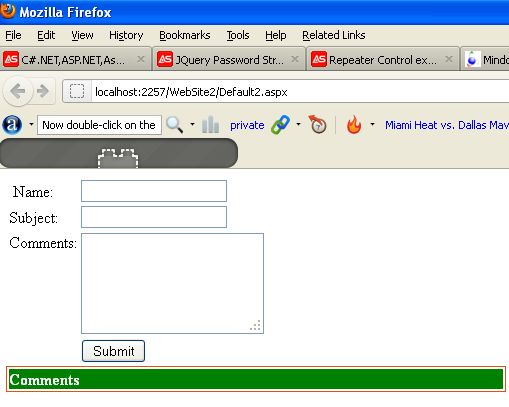
Now insert the comment detail.
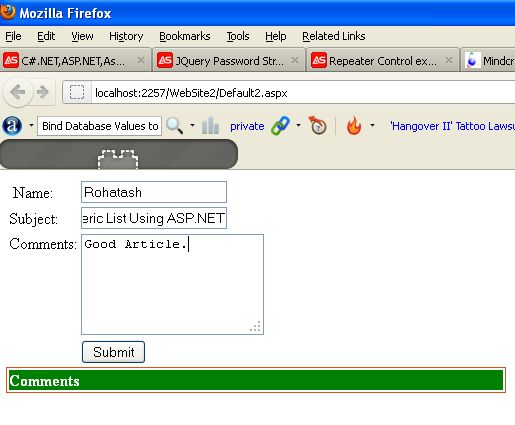
Now click on the Submit button control. The comment looks like the following figure.
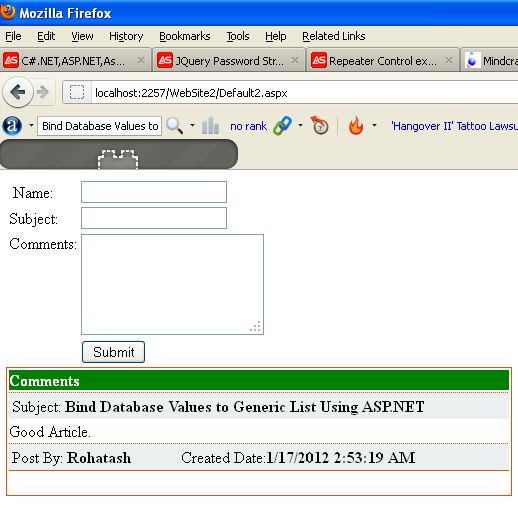
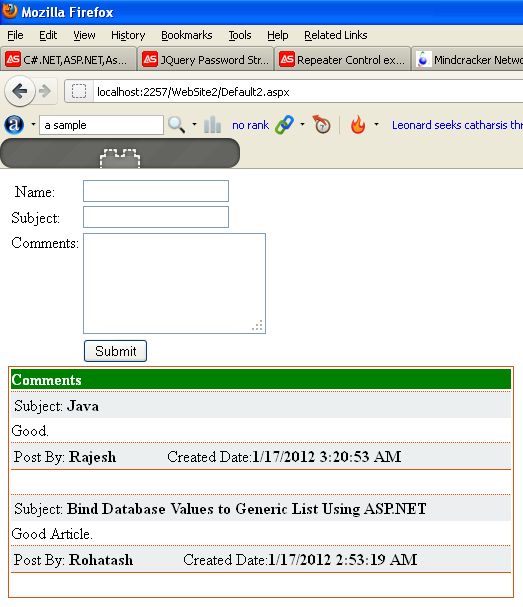
Now add more comments.
