
Introduction
We develop applications with help of entity framework to create database first and use scaffolding MVC features .
Database First Approach
Entity Framework built-in features to automatically generate a data model with classes and properties of existing database tables and columns. Entity Framework provide graphical interface for displaying and editing .edmx file.
Set Up SQL Server Database
Step 1: Create database.
Figure 1.1: How to Create New Database.
Right click on Databases folder and then click New Database:

Figure 1.1
Step 2: Database name
A new window will open, enter Database Name like CRM, DR, RR. After that enter Database name and click OK button. Here's figure 1.2:
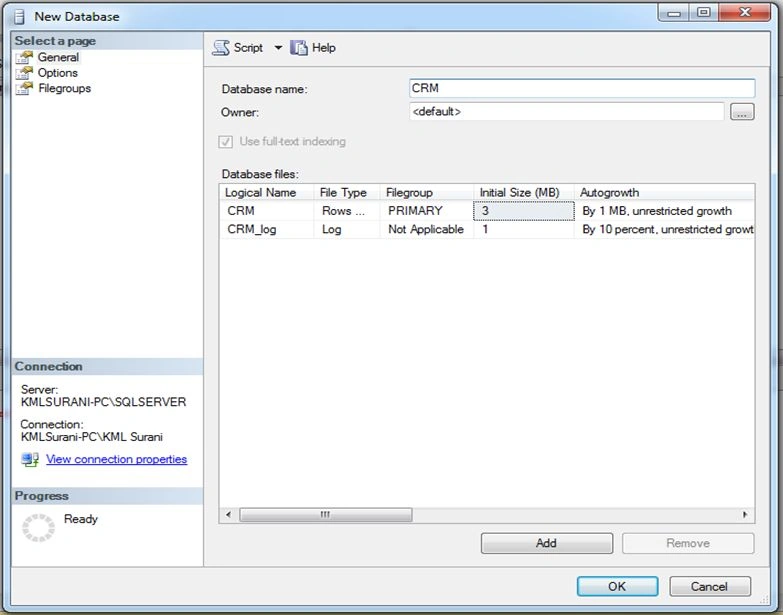
Figure 1.2
Step 3: Create table and see the database.
Figure 1.1
Step 2: Database name
A new window will open, enter Database Name like CRM, DR, RR. After that enter Database name and click OK button. Here's figure 1.2:
Figure 1.2
Step 3: Create table and see the database.
- Create Table to use below script
- Create Table EmpMst (EmpId Int Identity(1,1) Primary Key,
- EmpName Varchar(100),
- EmpAddress Varchar(200),
- PhoneNo Varchar(18),
- Email varchar(50))

Figure 1.3
Adding Database in MVC Application
For adding database entities right click Models Folder. See context menu and Add New Items. Every table create individual classes. You can add .edmx project in any folder.
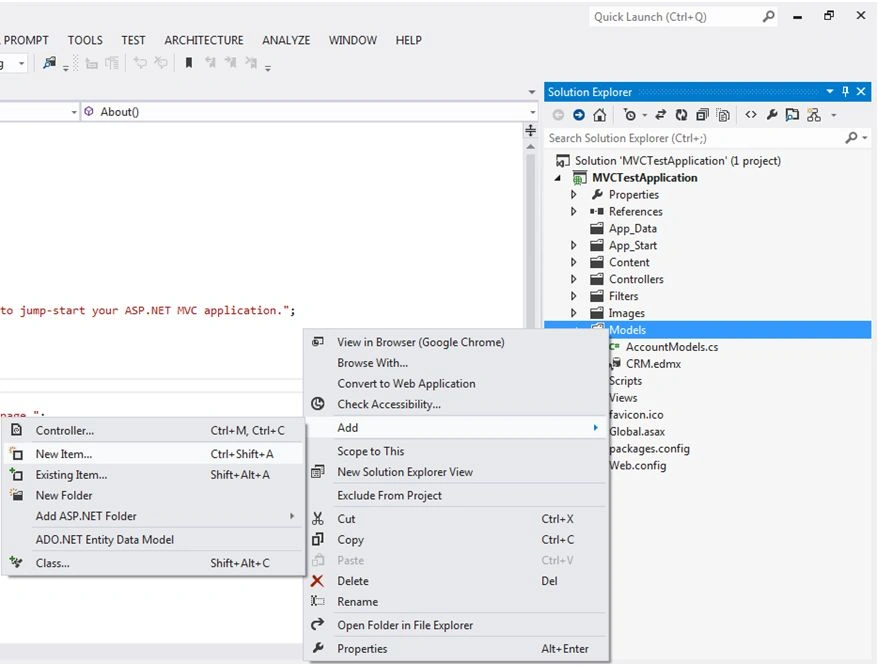
Figure 1.4
Add New Item window will open. You can select ADO.Net Entity Data Model and enter name. Please enter name CRMX,edmx and click Add button
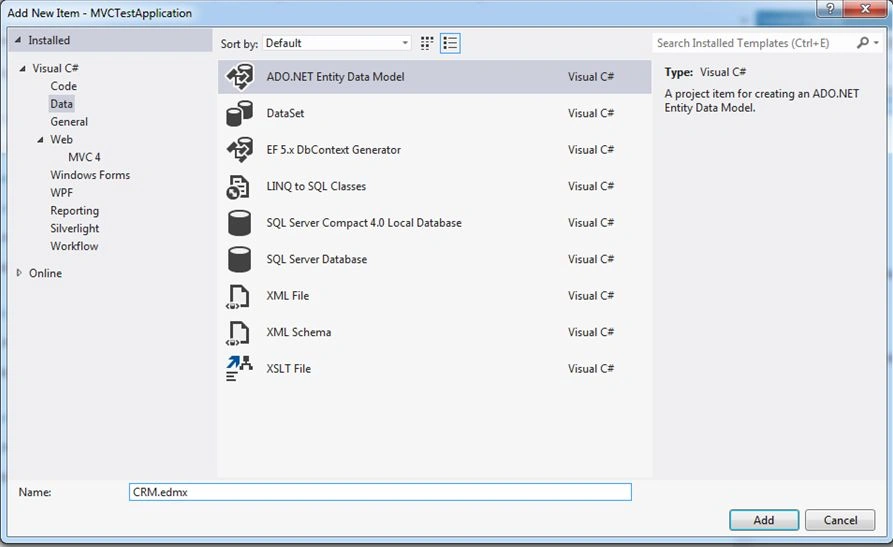
Figure 1.5
After clicking add button open Entity Data Model Wizard window. You can select Generate from database and click Next button as in the following figure 1.6:
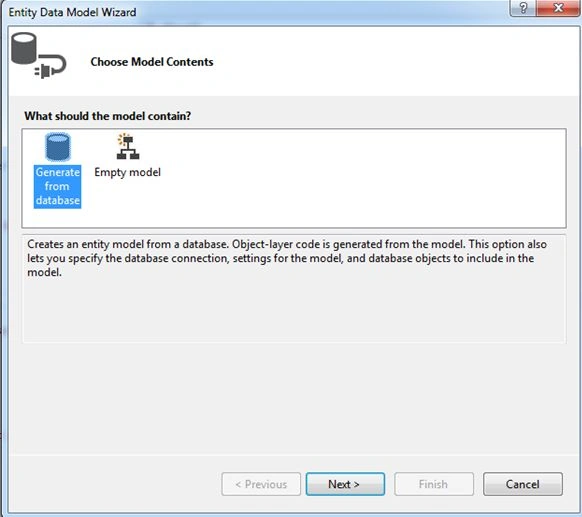
Figure 1.6
After clicking Next open a new winodw to select connection. Click New Connection as in the following figure 1.7 or already available connection and then select dropdown list.
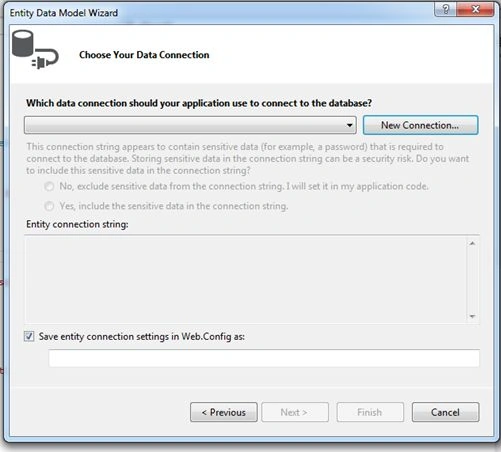
Figure 1.7
After clicking New Connection open windows Connection Properties and you can add Data Source and Server Name. Select Authentication Type Windows or SQL Server. Select database name already created in SQL Server. Here's figure 1.8:
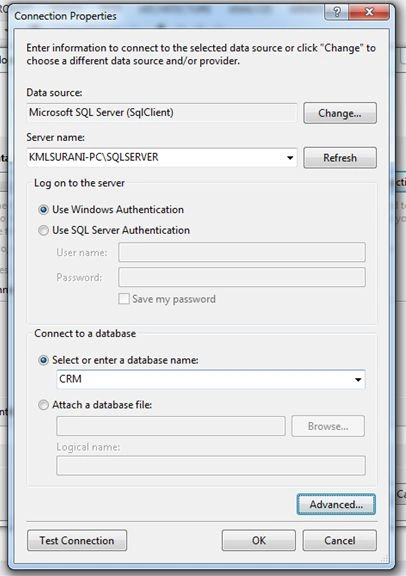
Figure 1.8
Check connection as in the following figure 1.9. If connection is successful then alert message is successful, else failed. Click OK button.
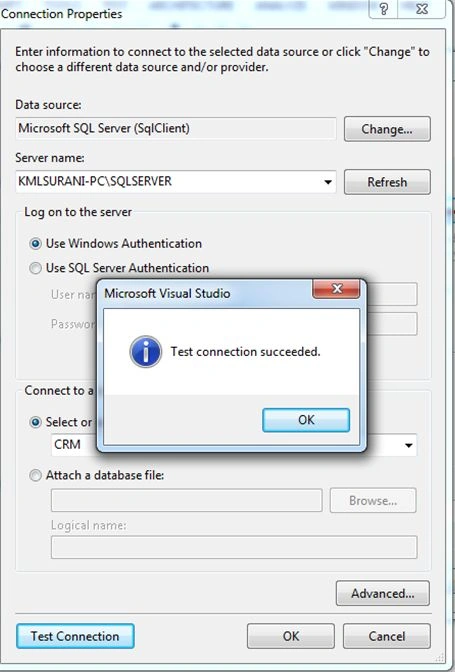
Figure 1.9
After clicking OK button connection name and connection string display in window. Also, you can enter entities name. Click Next as in the following figure 1.10.
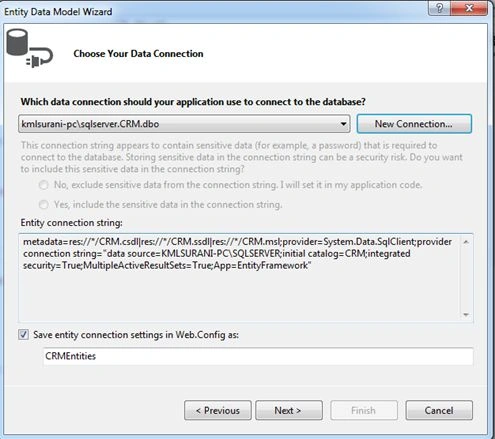
Figure 1.10
You can add the following object: Tables, Views, Stored Procedures and Functions. You need to select object and click Finish as in the following figure 1.11.
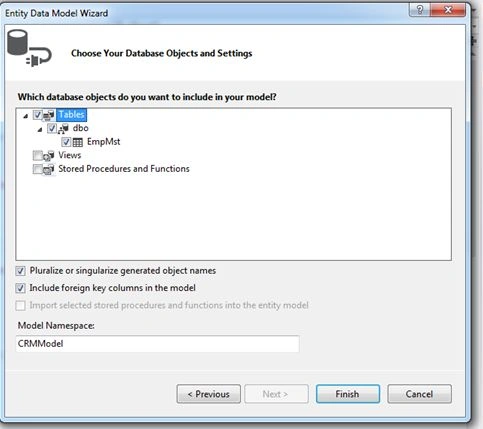
Figure 1.11
You can see design view in database available in tables.
Figure 1.12 showing Design View is .edmx file and you can see Solution Explore .edmx file.
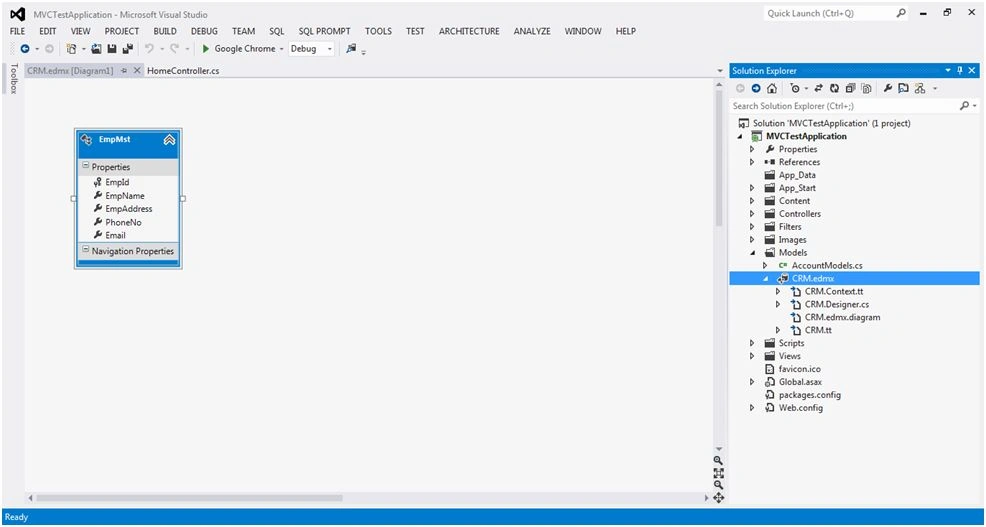
Figure 1.12
Former memberPosted Jan 11, 2016, 9:49 AM
Thanks
Arul RPosted Jan 11, 2016, 8:22 AM
Nice share
Rupali ShindePosted Jan 11, 2016, 6:45 AM
useful artical for mvc new comers ..
Anu VPosted Jan 11, 2016, 4:11 AM
Nice share..
Former memberPosted Jan 11, 2016, 4:08 AM
Thanks
Mohammed IbrahimPosted Jan 11, 2016, 2:59 AM
nice
Ankit BansalPosted Jan 11, 2016, 1:42 AM
Nice...keep sharing..
Raja TPosted Jan 10, 2016, 11:10 PM
Nice, Thanks for sharing
sreenivasa kPosted Jan 10, 2016, 1:37 PM
nice