

Introduction
This article shows how to select courses from a list. When we select the set of the courses from a list the current price of the courses is calculated.
We know that backbone.js is a JavaScript library. It gives a structure to the web application with the models, Views and collections. All of these are connected to the application with backbone through RESTful JSON interface. Backbone is for client-side applications so it stores everything on the client side.
Now we create an application for selecting courses and the current cost of the courses are shown depending on the number of courses selected..
- First we will create an application using the following:
- Start Visual Studio 2013.
- From the Start window select "New Project".
- Select "Installed" -> "Visual C#" -> "Web" -> "Visual Studio 2012" and select "ASP.NET Empty Web Application".
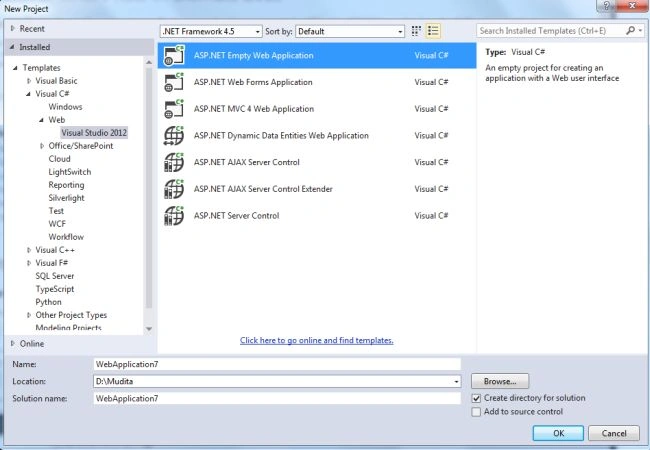
- Click on the "OK" button.
- Now add an HTML page to the project using the following:
- In the Solution Explorer.
- Right-click on the project select "Add" -> "HTML Page".
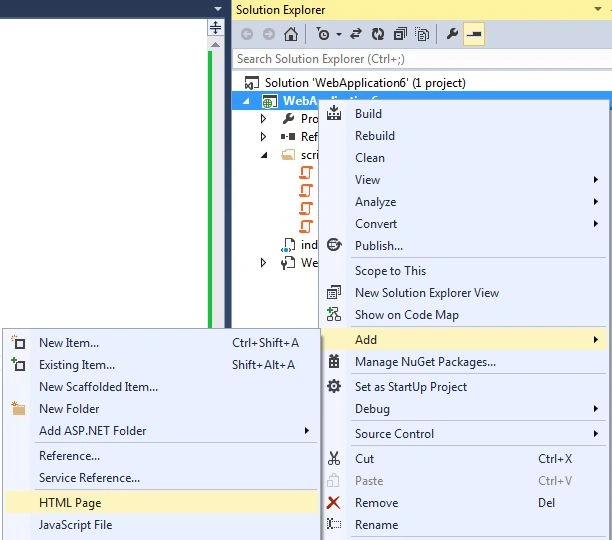
- Change the name of the page.
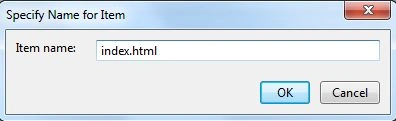
- Click on the "OK" button.
Add the following code:
<!DOCTYPE html>
<html>
<head>
<meta charset="utf-8" />
<title>Your first Backbone.js App | Tutorialzine </title>
</head>
<body>
<form ><!--id="main" method="post">-->
<h1>My Courses</h1>
<ul id="courses">
<!-- The sCervices will be inserted here -->
</ul>
<p id="total">total: <span>$0</span></p>
</form>
<!-- JavaScript Includes -->
<script src="https://ajax.googleapis.com/ajax/libs/jquery/1.9.1/jquery.min.js"></script>
<script src="//cdnjs.cloudflare.com/ajax/libs/underscore.js/1.4.4/underscore-min.js"></script>
<script src="//cdnjs.cloudflare.com/ajax/libs/backbone.js/1.0.0/backbone-min.js"></script>
<script src="scripts/Hello.js"></script>
</body>
</html>
- Now add a scripting file to the project.
- In the Solution Explorer.
- Right-click on the project then select "Add" -> "New Folder" then name it "scripts".
- Add the Script file in this folder.
- Right-click on the scripts folder and then select "Add" -> "New Item" -> "JavaScript".
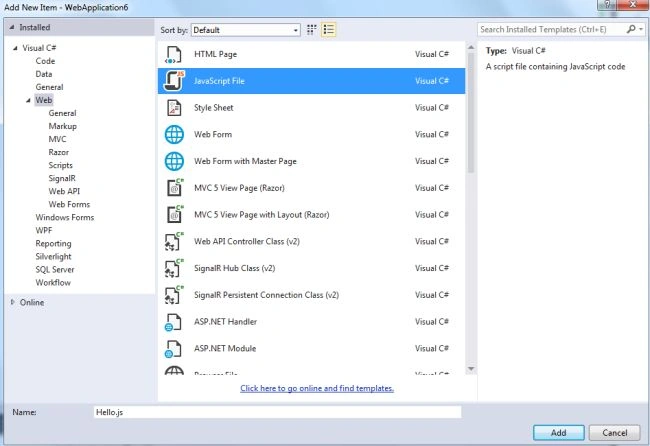
- Click on the "Add" button.
Add the following code:
$(function () {
// Create a model for the courses
var Course = Backbone.Model.extend({
// These contain three attributes.
// Here their default values
defaults: {
title: 'My Courses',
price: 100,
checked: false
},
toggle: function () {
this.set('checked', !this.get('checked'));
}
});
// Collection of Courses
var CourseList = Backbone.Collection.extend({
// Will hold objects of the Course model
model:Course,
getChecked: function () {
return this.where({ checked: true });
}
});
var courses = new CourseList([
new Course({ title: '.NET Developer', price: 200 }),
new Course({ title: 'web designing', price: 250 }),
new Course({ title: 'Software Testing', price: 100 }),
new Course({ title: 'Java developer', price: 10 })
]);
var CourseView = Backbone.View.extend({
tagName: 'li',
events: {
'click': 'toggleCourse'
},
initialize: function () {
this.listenTo(this.model, 'change', this.render);
},
render: function () {
this.$el.html('<input type="checkbox" value="1" name="' + this.model.get('title') + '" /> ' + this.model.get('title') + '<span>$' + this.model.get('price') + '</span>');
this.$('input').prop('checked', this.model.get('checked'));
return this;
},
toggleCourse: function () {
this.model.toggle();
}
});
var App = Backbone.View.extend({
el: $('#main'),
initialize: function () {
this.total = $('#total span');
this.list = $('#courses');
this.listenTo(courses, 'change', this.render);
courses.each(function (course) {
var view = new CourseView({ model: course });
this.list.append(view.render().el);
}, this);
},
render: function () {
var total = 0;
_.each(courses.getChecked(), function (elem) {
total += elem.get('price');
});
this.total.text('$' + total);
return this;
}
});
new App();
});
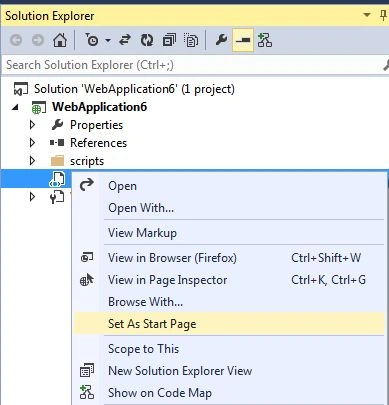
- Now set the HTML Page as "Execute First" by setting the property to "Set as Start Page".
- Right-click on the "index.html".
- Then select the "Set as Start Page".
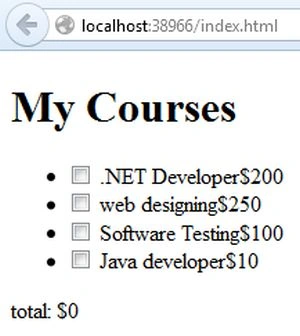
- Execute the application.
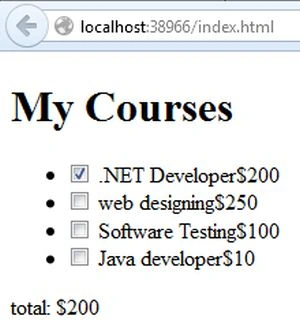
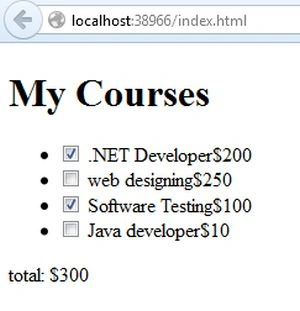
- Select the Course in set then we can see that the cost is updated.
Join the conversation! Your thoughts help the community grow.