

We know how to upload an image but in this example, we will supply the width and height values (in pixels) while uploading the image.
Step 1 - Index.aspx page
This is a form with the File Upload control, textboxes for width and height, validation controls, and a button control to handle the events to upload an image.
- <fieldset>
- <legend>Image Resize and Save</legend>
- <table>
- <tr>
- <td><label>Upload Image:</label></td>
- <td><asp:FileUpload runat="server" ID="fupImage" /></td>
- <td><asp:RequiredFieldValidator ID="RequiredFieldValidator1" ControlToValidate="fupImage" Display="Dynamic" ForeColor="Red" Font-Size="Small" runat="server" ErrorMessage="Required"></asp:RequiredFieldValidator>
- <asp:RegularExpressionValidator ID="RegularExpressionValidator1" ValidationExpression="([a-zA-Z0-9\s_\\.\-:])+(.jpg|.jpeg|.gif|.png)$" ControlToValidate="fupImage" runat="server" ForeColor="Red" ErrorMessage="Only jpg, png and gif formats allowed." Display="Dynamic" />
- </td>
- </tr>
- <tr>
- <td><label>Image Width:</label></td>
- <td><asp:TextBox ID="txtWidth" runat="server" placeholder="Enter width" onkeypress='return event.charCode >= 48 && event.charCode <= 57'></asp:TextBox>
- </td>
- <td>
- <asp:RequiredFieldValidator ID="RequiredFieldValidator2" ControlToValidate="txtWidth" Display="Dynamic" ForeColor="Red" Font-Size="Small" runat="server" ErrorMessage="Required"></asp:RequiredFieldValidator>
- </td>
- </tr>
- <tr>
- <td>
- <label>Image Height:</label></td>
- <td>
- <asp:TextBox ID="txtHeight" runat="server" placeholder="Enter Height" onkeypress='return event.charCode >= 48 && event.charCode <= 57'></asp:TextBox>
- </td>
- <td>
- <asp:RequiredFieldValidator ID="RequiredFieldValidator3" runat="server" ControlToValidate="txtHeight" Display="Dynamic" ForeColor="Red" Font-Size="Small" ErrorMessage="Required"></asp:RequiredFieldValidator>
- </td>
- </tr>
- <tr>
- <td></td>
- <td>
- <asp:Button runat="server" ID="btnUpload" Text="Resize & Upload" OnClick="btnUpload_Click" />
- </td>
- </tr>
- <tr>
- <td colspan="3">
- <asp:Label runat="server" ID="lblResult" ForeColor="Red" Font-Size="Small" Font-Bold="true"></asp:Label></td>
- </tr>
- </table>
- </fieldset>
Step 2 - Index.aspx.cs file
Here is the C# code snippet for image resizing with dynamic width and height values on a button-click event.
- protected void btnUpload_Click(object sender, EventArgs e)
- {
- string newFile = string.Empty;
- if (fupImage.HasFile)
- {
- int width = Convert.ToInt32(txtWidth.Text);
- int height = Convert.ToInt32(txtHeight.Text);
- Stream inp_Stream = fupImage.PostedFile.InputStream;
- using (var image = System.Drawing.Image.FromStream(inp_Stream))
- {
- Bitmap myImg = new Bitmap(width, height);
- Graphics myImgGraph = Graphics.FromImage(myImg);
- myImgGraph.CompositingQuality = CompositingQuality.HighQuality;
- myImgGraph.SmoothingMode = SmoothingMode.HighQuality;
- myImgGraph.InterpolationMode = InterpolationMode.HighQualityBicubic;
- var imgRectangle = new Rectangle(0, 0, width, height);
- myImgGraph.DrawImage(image, imgRectangle);
- string ext = string.Empty;
- ext = System.IO.Path.GetExtension(fupImage.FileName.ToString()).ToLower();
- newFile = DateTime.Now.ToString("ddMMyyyyhhmmsstt") + "_" + width + "X" + height + ext;
- // Save the file
- var path = Path.Combine(Server.MapPath("~/ResizedImages"), newFile);
- myImg.Save(path, image.RawFormat);
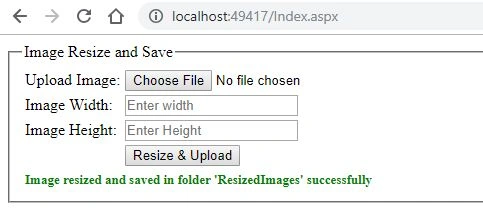
- lblResult.Text = "Image resized and saved in folder 'ResizedImages' successfully";
- lblResult.ForeColor = Color.Green;
- txtWidth.Text = txtHeight.Text = "";
- }
- }
- else
- {
- lblResult.Text = "please upload image";
- }
- }
Here is the VB code snippet for image resize with given width and height values on the button-click event.
Index.aspx.vb file
- Protected Sub btnUpload_Click(sender As Object, e As EventArgs) Handles btnUpload.Click
- Dim newFile As String = String.Empty
- If (fupImage.HasFile) Then
- Dim width As Integer = txtWidth.Text
- Dim height As Integer = txtHeight.Text
- Dim inp_Stream As Stream = fupImage.PostedFile.InputStream
- Using image = System.Drawing.Image.FromStream(inp_Stream)
- Dim myImg As Bitmap = New Bitmap(width, height)
- Dim myImgGraph As Graphics = Graphics.FromImage(myImg)
- myImgGraph.CompositingQuality = CompositingQuality.HighQuality
- myImgGraph.SmoothingMode = SmoothingMode.HighQuality
- myImgGraph.InterpolationMode = InterpolationMode.HighQualityBicubic
- Dim imgRectangle = New Rectangle(0, 0, width, height)
- myImgGraph.DrawImage(image, imgRectangle)
- Dim ext As String = String.Empty
- ext = System.IO.Path.GetExtension(fupImage.FileName.ToString()).ToLower()
- newFile = DateTime.Now.ToString("ddMMyyyyhhmmsstt") & "_" & width & "X" & height & ext
- Dim path = System.IO.Path.Combine(Server.MapPath("~/ResizedImages"), newFile)
- myImg.Save(path, image.RawFormat)
- lblResult.Text = "Image resized and saved in folder 'ResizedImages' successfully"
- lblResult.ForeColor = Color.Green
- txtWidth.Text = String.Empty
- txtHeight.Text = String.Empty
- End Using
- Else
- lblResult.Text = "Please upload image"
- End If
- End Sub
Run the page in the browser to see results.
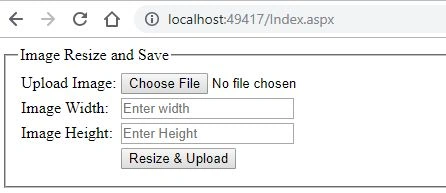
Upload an image and pass the desired width, height values. Hit the "Resize and Upload" button to see the results. Open the ‘ResizedImages’ folder in your project.
Summary
In this article, I discussed how to resize the image using the Stream class. It can be useful if we need different dimensions for images to be uploaded on our website. Here, we passed dynamic values for width and height. If we want the image to be of a particular dimension, we can make it statically from the code behind.
Dean ParkerPosted Jul 17, 2019, 1:41 PM
Great article and your Resizer is incredibly fast, In fact, so fast I thought it was not saving anything. When I checked the directory there were 10 perfectly resized images waiting. One item I found, I needed to add the following to the web.config file and added jquery to the page to get this to work. <configuration> <appSettings> <add key="ValidationSettings:UnobtrusiveValidationMode" value="None" /> </appSettings> </configuration>