

Introduction
In this article, I shall show you how to create gestures using Gesture Overlay View in Xamarin Android. A "gesture" occurs when a user places one or more fingers on the touchscreen and your application interprets that pattern of touches as a particular gesture.
Step 1
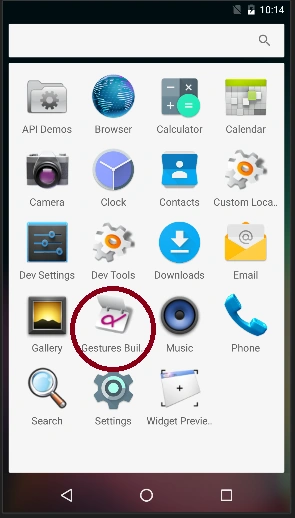
Open Visual Studio emulator for Android and open "Gestures Builder" from emulator apps.
Step 2
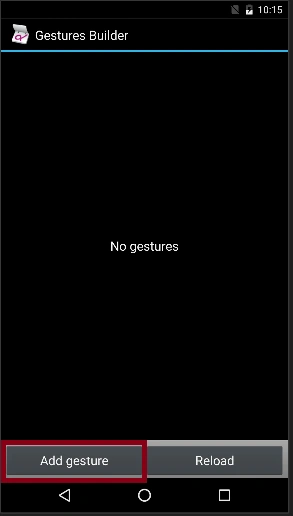
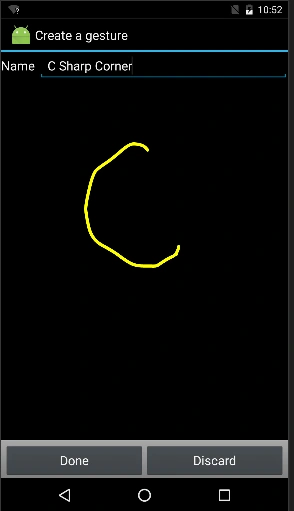
Next, click on "Add Gesture" button and draw a gesture, give it a name as shown in the screenshot, and click on "Done" button.
Step 3
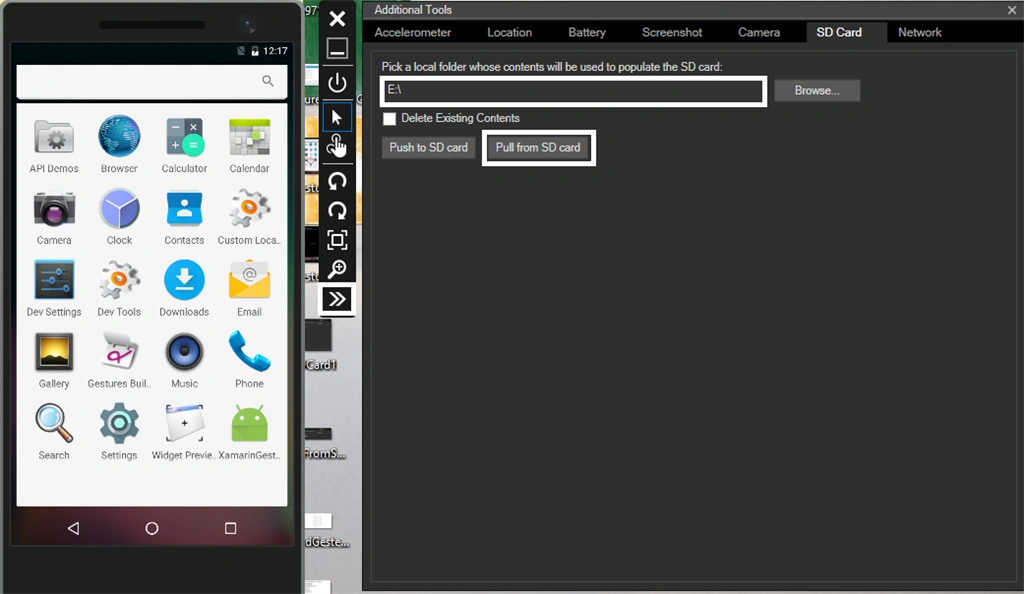
After creating some gestures in Gesture Builder, click on emulator double arrow and go to Emulator Tools -> Additional Tools -> SD card. Pick a local folder whose content will be used to populate the SD card and give it a new location.
In this article, I shall show you how to create gestures using Gesture Overlay View in Xamarin Android. A "gesture" occurs when a user places one or more fingers on the touchscreen and your application interprets that pattern of touches as a particular gesture.
Step 1
Open Visual Studio emulator for Android and open "Gestures Builder" from emulator apps.
Step 2
Next, click on "Add Gesture" button and draw a gesture, give it a name as shown in the screenshot, and click on "Done" button.
Step 3
After creating some gestures in Gesture Builder, click on emulator double arrow and go to Emulator Tools -> Additional Tools -> SD card. Pick a local folder whose content will be used to populate the SD card and give it a new location.
Next, click on "Pull from SD card". The emulator will pull all the emulator data to your local folder.
Step 4
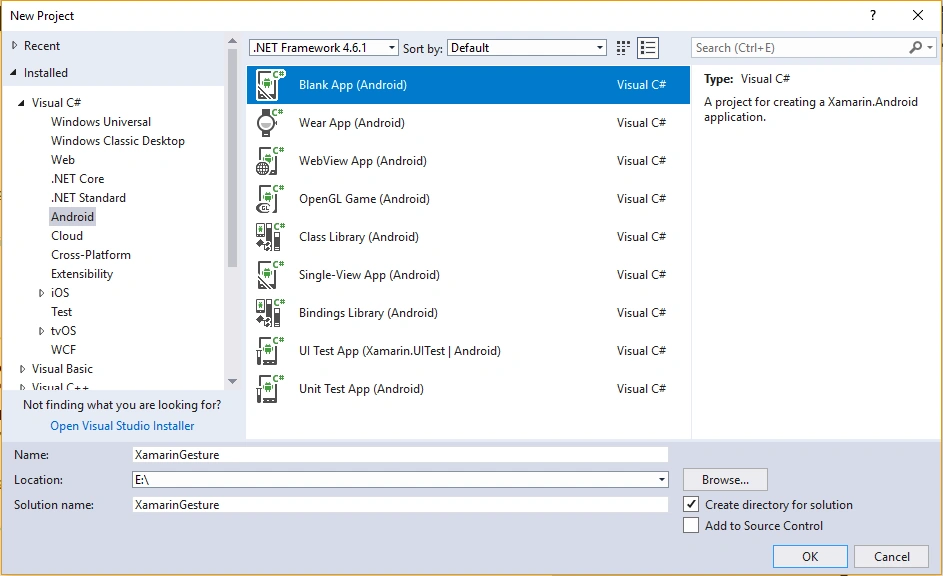
Open Visual Studio and go to New Project-> Templates-> Visual C#-> Android-> Blank app. Give it a name like XamarinGesture.
Step 5
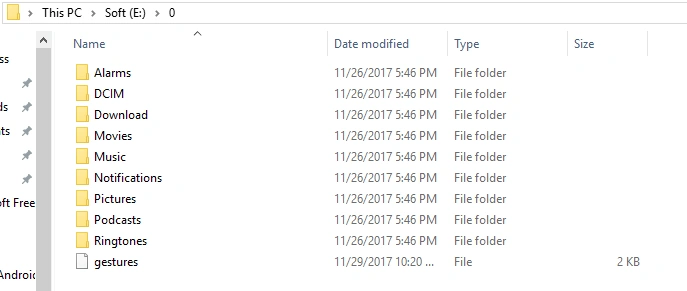
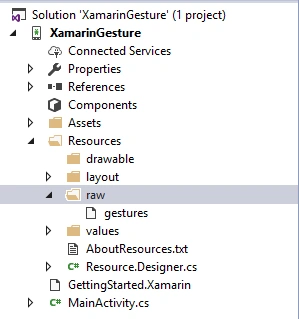
Now, copy the gestures file from your local folder with the name "0" and go to Solution Explorer-> Project Name-> Resources. Right-click to create a new folder, give it a name like Raw, and paste the gesture file in it, as shown in below screenshot.
Step 6
Go to Solution Explorer-> Project Name-> Resources-> Layout-> Main.axml. Open main.axml file and add the following code. The layout will have a TextView in order to display the preview of the gesture name.
Step 4
Open Visual Studio and go to New Project-> Templates-> Visual C#-> Android-> Blank app. Give it a name like XamarinGesture.
Step 5
Now, copy the gestures file from your local folder with the name "0" and go to Solution Explorer-> Project Name-> Resources. Right-click to create a new folder, give it a name like Raw, and paste the gesture file in it, as shown in below screenshot.
Step 6
Go to Solution Explorer-> Project Name-> Resources-> Layout-> Main.axml. Open main.axml file and add the following code. The layout will have a TextView in order to display the preview of the gesture name.
(FileName: Main.axml)
XAML Code
- <?xml version="1.0" encoding="utf-8"?>
- <android.gesture.GestureOverlayView xmlns:android="http://schemas.android.com/apk/res/android"
- android:orientation="vertical"
- android:id="@+id/gesture"
- android:layout_width="match_parent"
- android:layout_height="match_parent">
- <TextView
- android:layout_width="wrap_content"
- android:layout_height="wrap_content"
- android:layout_gravity="center"
- android:id="@+id/txtResult"
- android:textSize="30sp"
- android:text="Gesture" />
- </android.gesture.GestureOverlayView>
Step7
Next, go to Solution Explorer-> Project Name-> MainActivity and add the following code to it using appropriate namespaces.
(FileName: MainActivity)
C# Code
- using Android.App;
- using Android.Widget;
- using Android.OS;
- using Android.Gestures;
- using static Android.Gestures.GestureOverlayView;
- using System.Collections.Generic;
- using System.Linq;
- namespace XamarinGesture
- {
- [Activity(Label = "XamarinGesture", MainLauncher = true)]
- public class MainActivity : Activity, IOnGesturePerformedListener
- {
- GestureLibrary lib;
- TextView txtResult;
- public void OnGesturePerformed(GestureOverlayView overlay, Gesture gesture)
- {
- List<Prediction> predictions = lib.Recognize(gesture).ToList();
- foreach(var item in predictions)
- {
- if (item.Score > 1.0)
- txtResult.Text = item.Name;
- }
- }
- protected override void OnCreate(Bundle savedInstanceState)
- {
- base.OnCreate(savedInstanceState);
- // Set our view from the "main" layout resource
- SetContentView(Resource.Layout.Main);
- txtResult = FindViewById<TextView>(Resource.Id.txtResult);
- lib = GestureLibraries.FromRawResource(this, Resource.Raw.gestures);
- if (!lib.Load())
- Finish();
- GestureOverlayView gesture = FindViewById<GestureOverlayView>(Resource.Id.gesture);
- gesture.AddOnGesturePerformedListener(this);
- }
- }
- }

We have finished our gesture builder app. Just rebuild and run the project. You will have the result like below.
Output
Join the conversation! Your thoughts help the community grow.