
Introduction
This article will help you to work on Azure Storage by adding CDN (Content Delivery Network) to access data with high availability.
Note
Please look at the previous article to understand about Content Delivery Network in detail.
Here are a few links that you should go through before adding CDN for Azure storage:
- Click here for Azure Storage - Creating A Container Using Visual Studio.
- Click here for Part One - Azure Storage components – Blob.
- Click here for Part Two - Azure Blob Storage Service – Uploading a Blob and Set Container propertied with metadata.
- Click here for Part Three – Blob Security on Azure Storage.
- Click here for Part Four – Blob Operations on Azure Storage.
Follow the steps below now.
Step 1: Creating a Container with Blob access level.
Login to the Azure portal with your Azure account credentials on which the storage account with containers and blobs was created before.
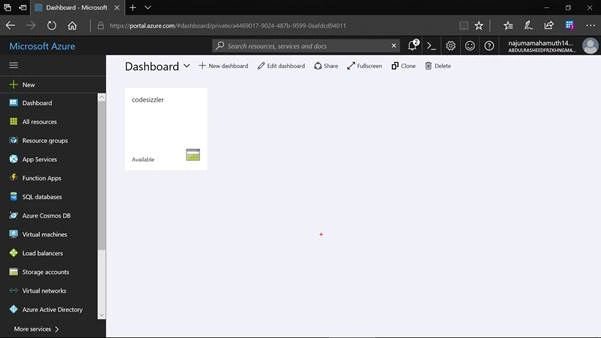
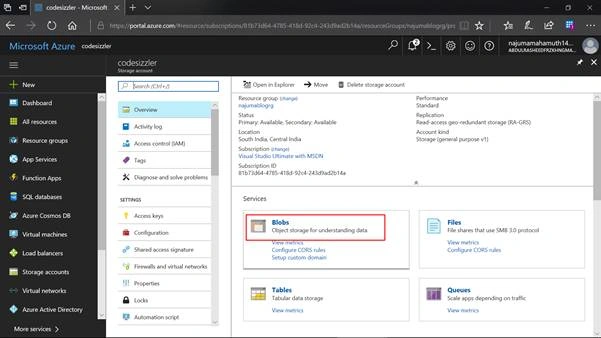
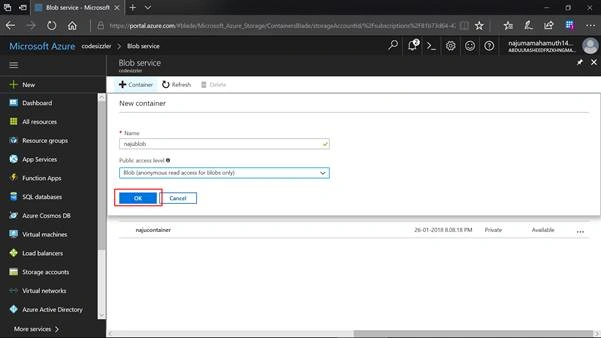
Create a new portal on the Azure storage account which was created before and create a new container with public blob access. On your Azure storage account click on “Blobs” followed up by the “+ Container” button to create the container.
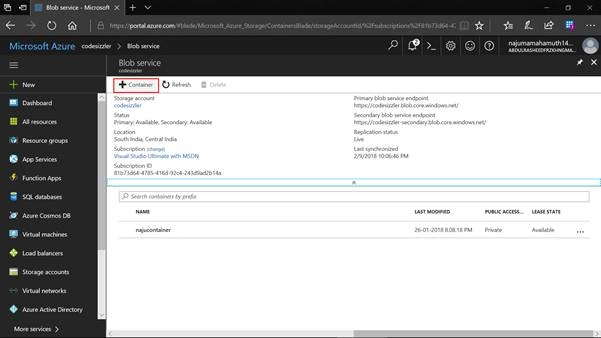
Name the blob with some meaningful name and select the public access level as “Blob” so that any anonymous person can have read access for blobs alone.
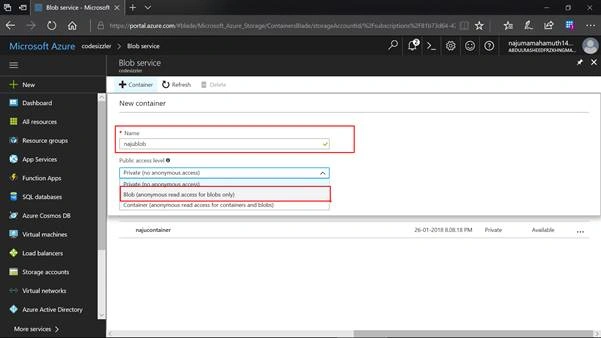
Click on “Ok” to create the Container.
Step 2: Uploading a file to the new container.
In the new container, upload a file that needs to be put in front of a CDN. Select the Container and click on upload to add the files.
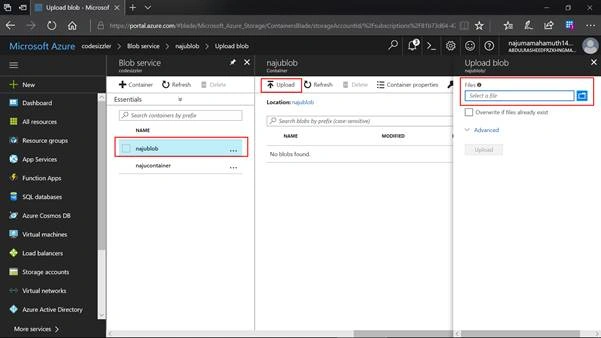
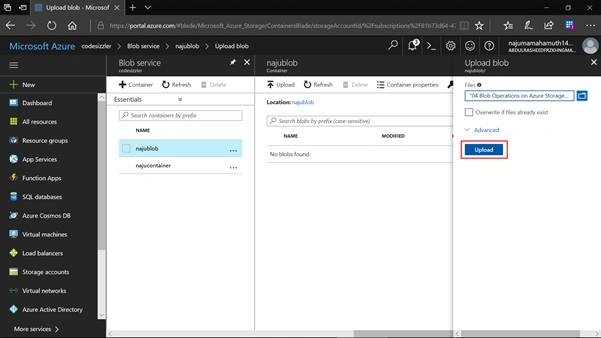
Select any file from your hard disk and click on “upload” to upload the file.
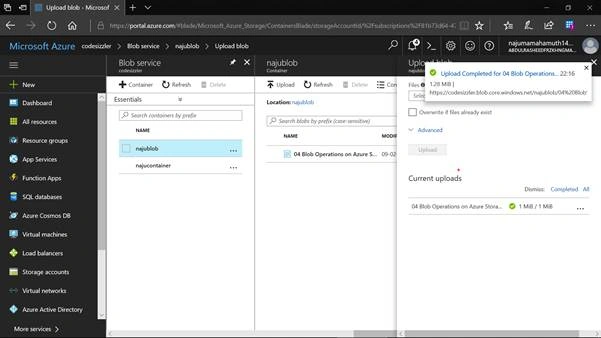
The file has been uploaded towards the container.
Step 3: Creating an Azure CDN
On the Azure portal under all resources, find for CDN and select the same. Click on create to fill in the details.
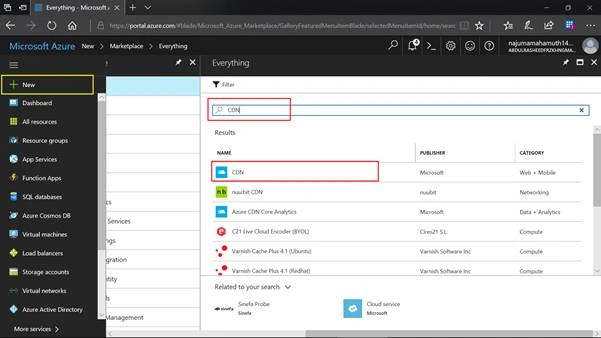
Click on “Create” to create the CDN.
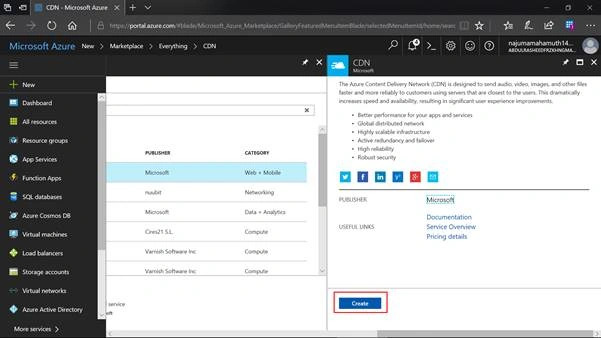
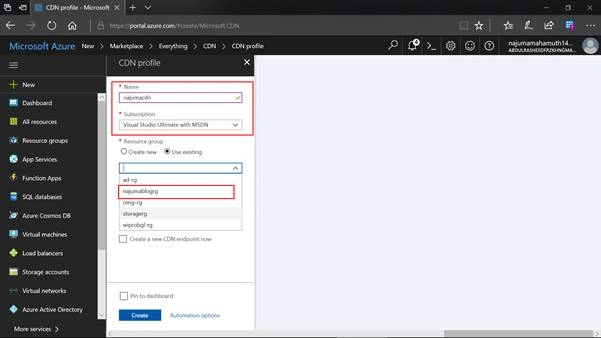
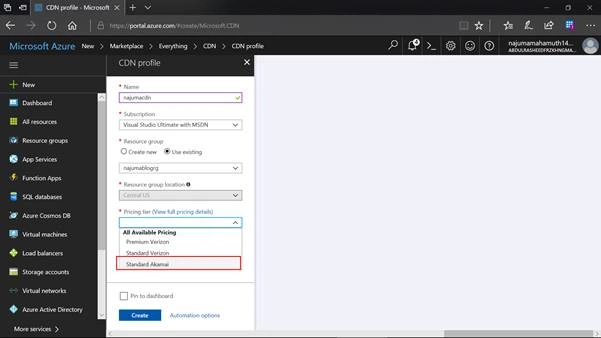
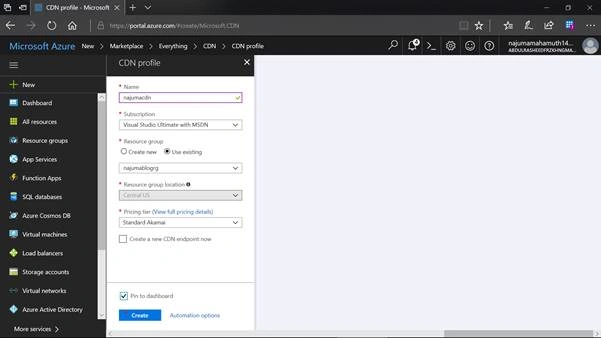
And now the CDN on the Azure portal has been deployed.
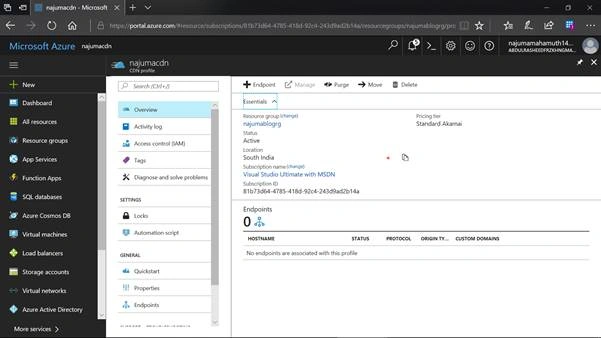
Step 4: Adding an Endpoint to the Azure CDN
Once the CDN is created, you need to add an endpoint to it as shown, remember Endpoint is the new URL for your content.
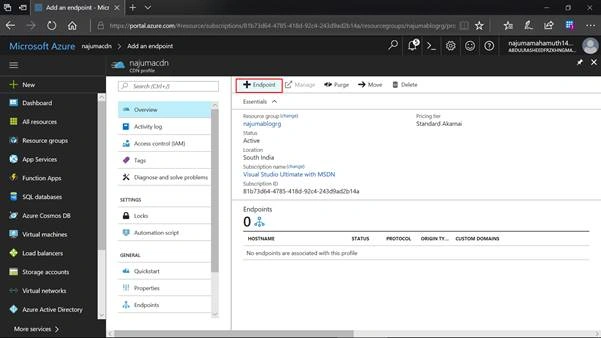
Endpoint name should be a unique one and enter the origin type as “Storage”.
Select the origin host name
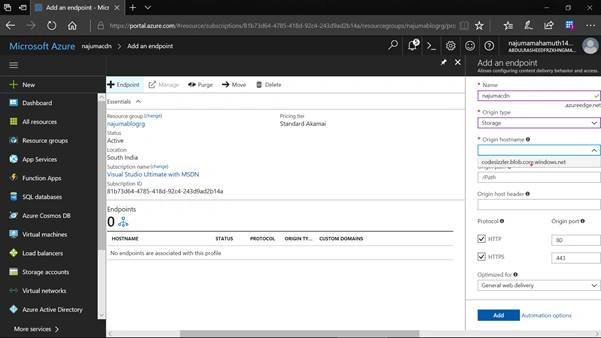
- Origin type
Storage could be any sort of storage type like blob, Cloud Service is any CloudApp on Azure, WebApp is any webapp on azure, custom origin is any custom resource path, if any. - Origin hostname
Select any storage which you have created. - Origin path
If you want CDN to use a specific directory path when it retrieves content from the origin, add it here. - Origin host header
The host header value is sent to the origin with each request, if you leave this blank the request hostname determines the value. Azure CDN origins, such as WebApps, Blob Storage and Cloud Services require this host header value to match the origin hostname by default. - Protocol
The protocol used from the client to the origin, the same protocol (HTTP or HTTPS) is used from the client to the CDN and from the CDN to the origin. By default both are checked so both protocols are allowed. HTTP uses port 80 and HTTPS uses port 443, you can even add a custom port over here. - Optimised for
Azure CDN enhances content delivery for your delivery scenarios like general web delivery, general media streaming, video on demand media streaming, large file download.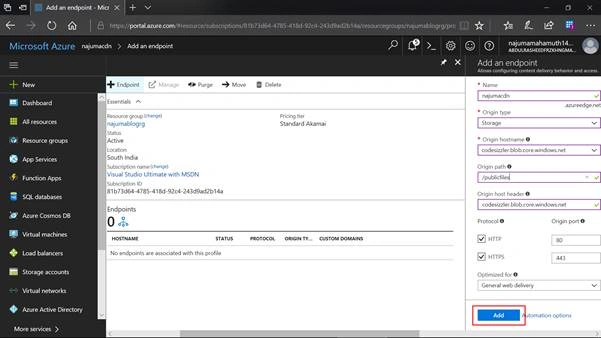
Accessing the blob file through the standard URL
After creating an endpoint you can access the file through both the standard URL and the endpoint URL; here you can access through standard URL to check.
Accessing the blob file through the CDN endpoint URL
You can now access the blob file through the new endpoint URL of the CDN, which you have put in front of the storage account.
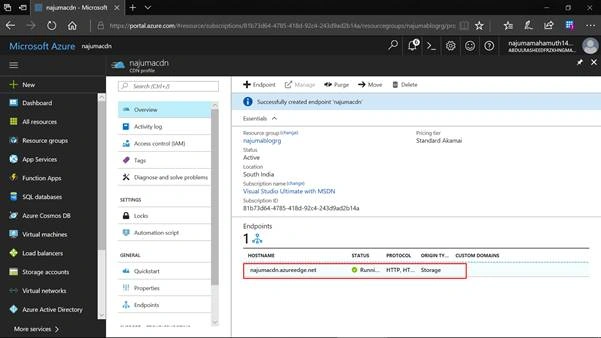
Here is the endpoint which has been created, and you can use the endpoint address for accessing the azure storage.
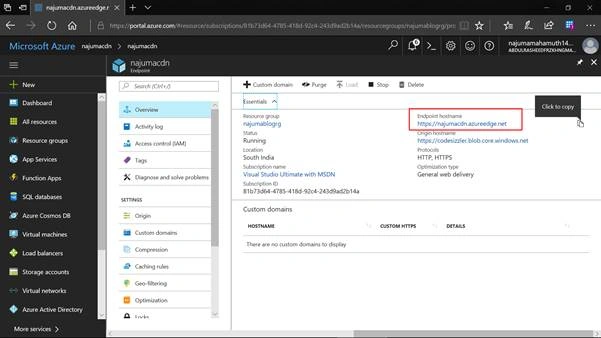
You can copy the storage account name as shown below,
Summary
Here we come to the end of the discussion of Azure storage, by which we have implemented a CDN on an Azure storage account.
Join the conversation! Your thoughts help the community grow.